Available for: All users
In this article, you will learn how to manage Address Books in my.anydesk II.
An Address Book lets you save and organize the devices you frequently connect to, like a contacts list on your phone. You can also add tags to quickly find entries.
Your Address Books sync across devices, whether you're using the AnyDesk client or my.anydesk II.
🦉 For more details on how to manage Address Books in the AnyDesk client, see this article.
Personal Address Book
When you create an AnyDesk account, you automatically get a Personal Address Book that only you can access. You can add, edit, and manage entries. The personal Address Book cannot be deleted.
Access your personal Address Book
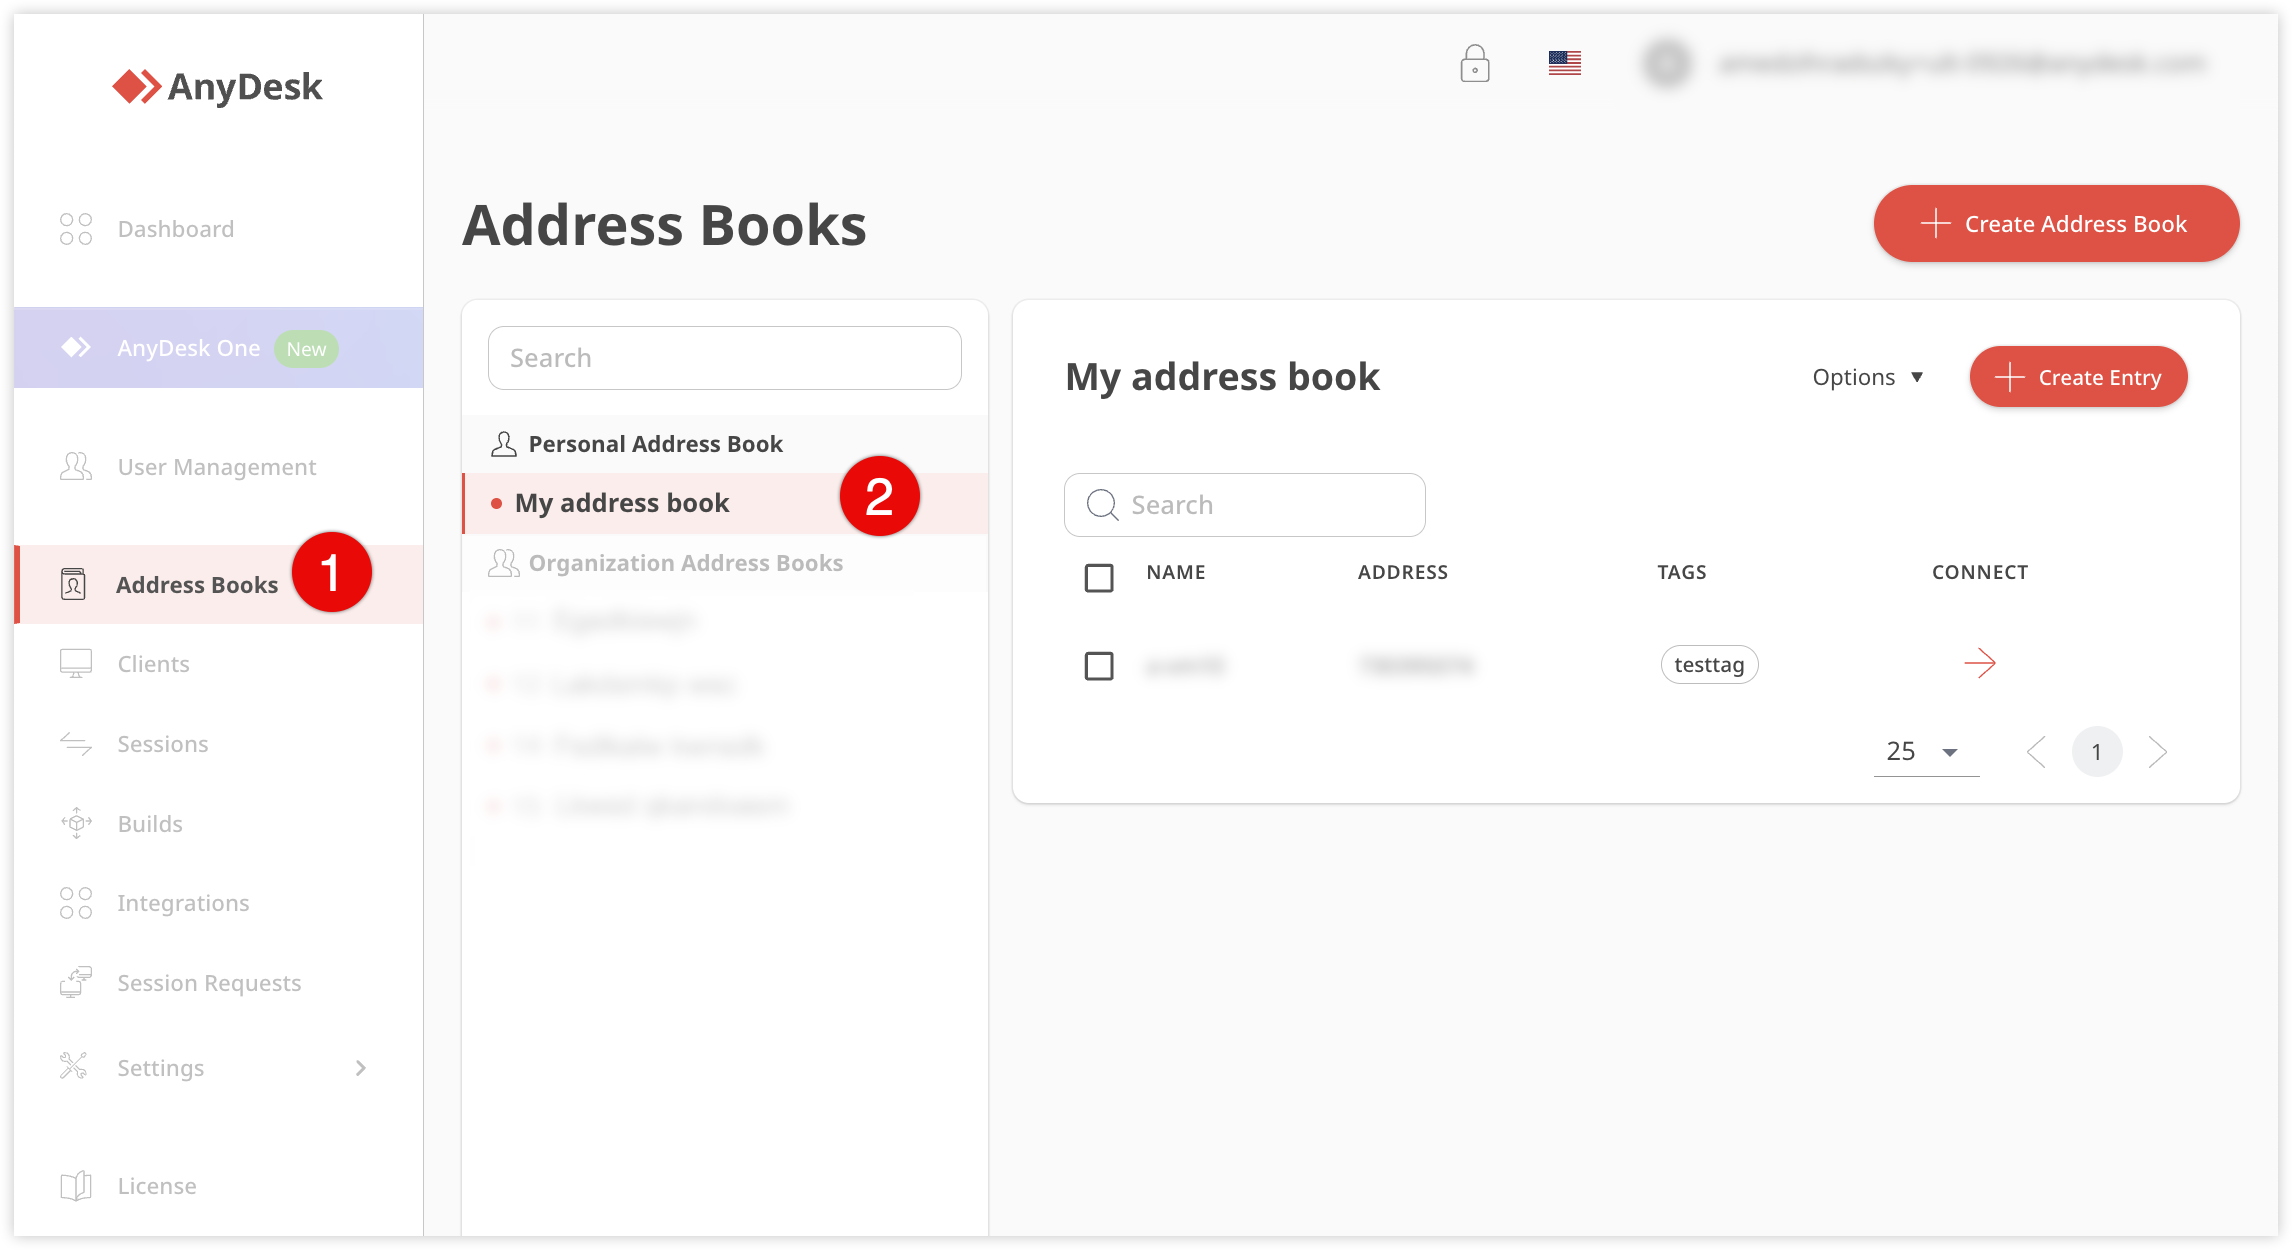
To access your personal Address Book in my.anydesk:
Sign in to my.anydesk II and go to Address Books.
In the Personal Address Book section, open My address book.
Edit your personal Address Book
To edit a personal Address Book:
Go to Address Books, open My address book, and then click Options > Modify Address Book.
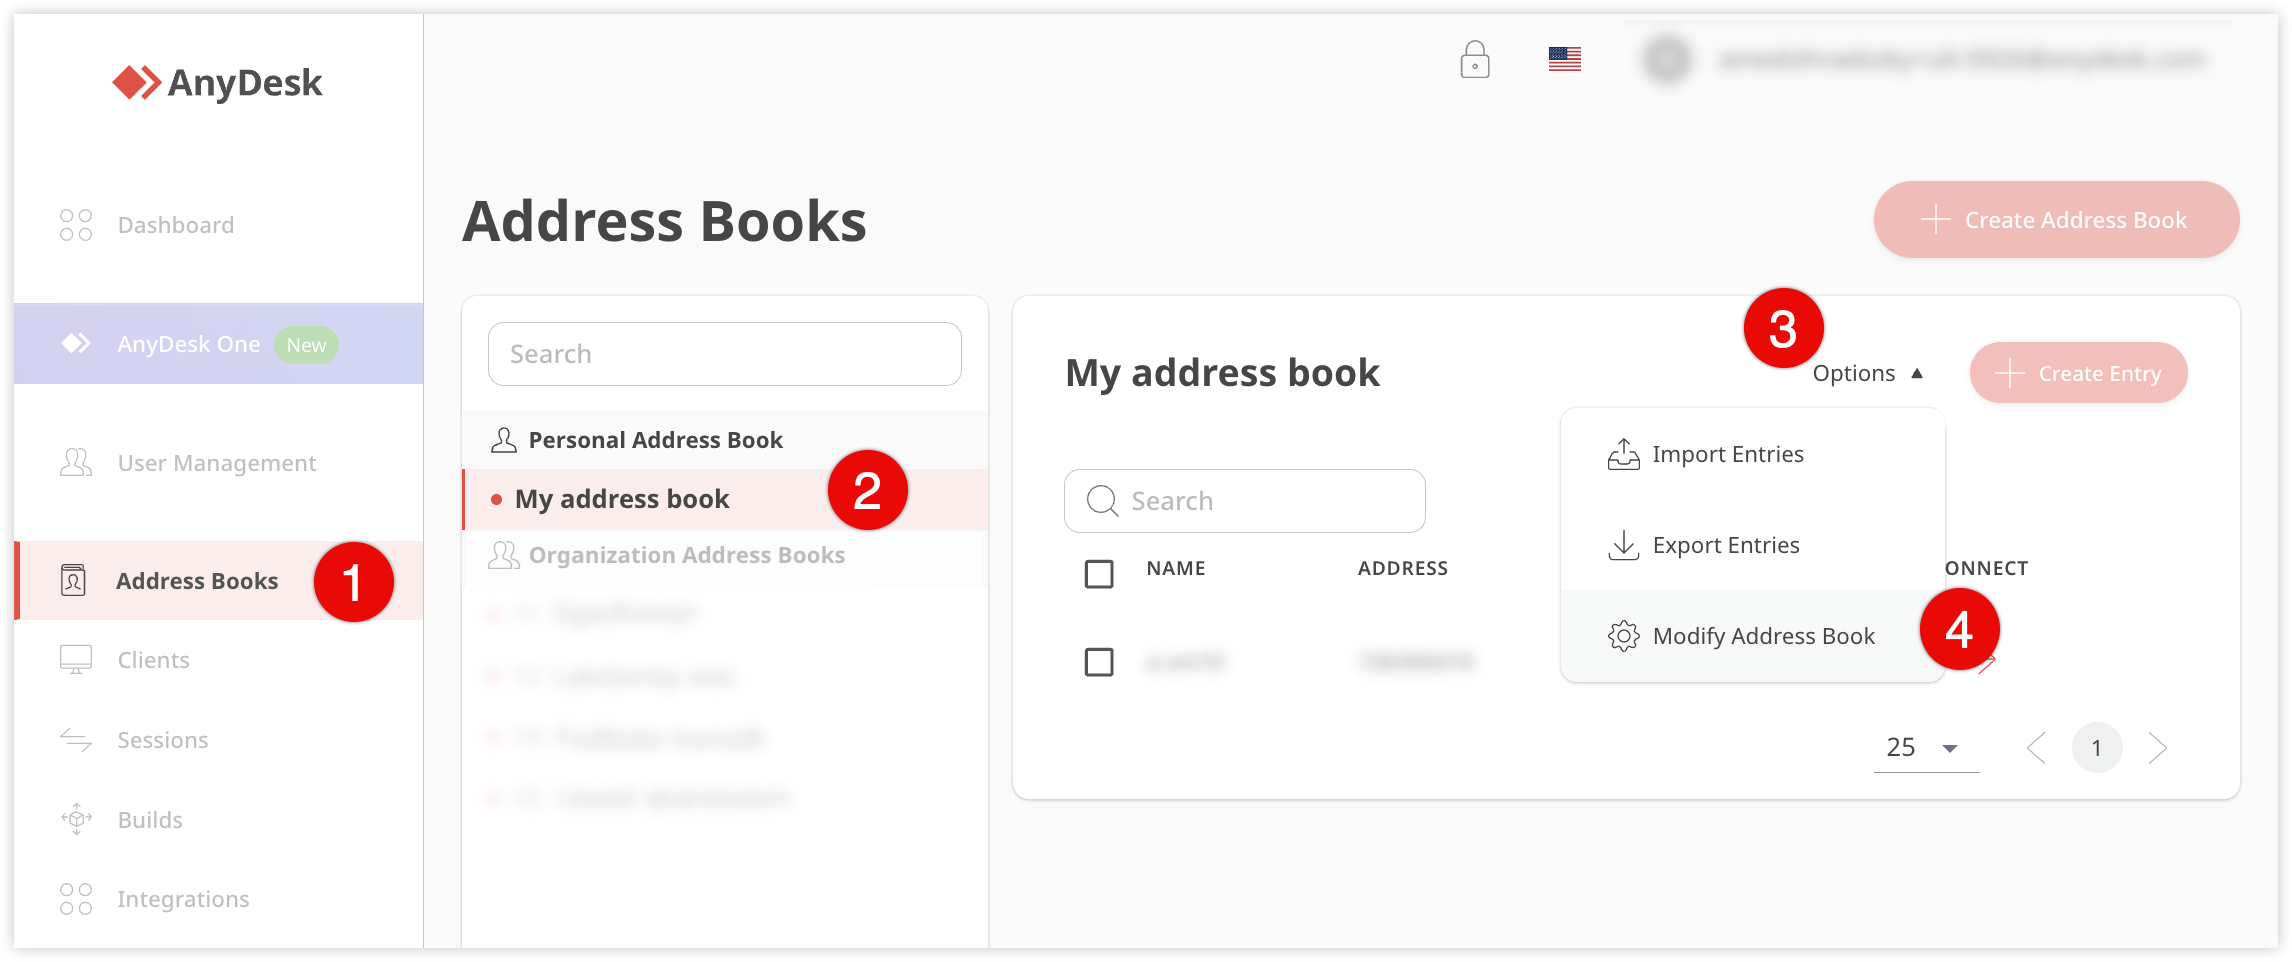
On the opened page, you can change the Name, add Tags and Entries (AnyDesk clients).
.png)
Organization Address Book
Members of a team or organization can access a shared Address Book if they have the required permissions. Access must be granted by an administrator or license owner.
With the right permissions, you can:
Create a new organization Address Book
Add and manage client entries
Import and export client entries
Create an organization Address Book
To create an organization Address Book:
Sign in to my.anydesk II, go to Address Books and click Create Address Book.
In the pop-up window, enter the name for the address book.
Click Create.
Limit access to the Address Book
License: Ultimate-Cloud
Available for: Admin
You can restrict which roles in your organization can access an Address Book to improve security and usability.
To set Address Book access limits:
On the Address Books page, find the the address book you wish to manage access for.
Click Access Management.
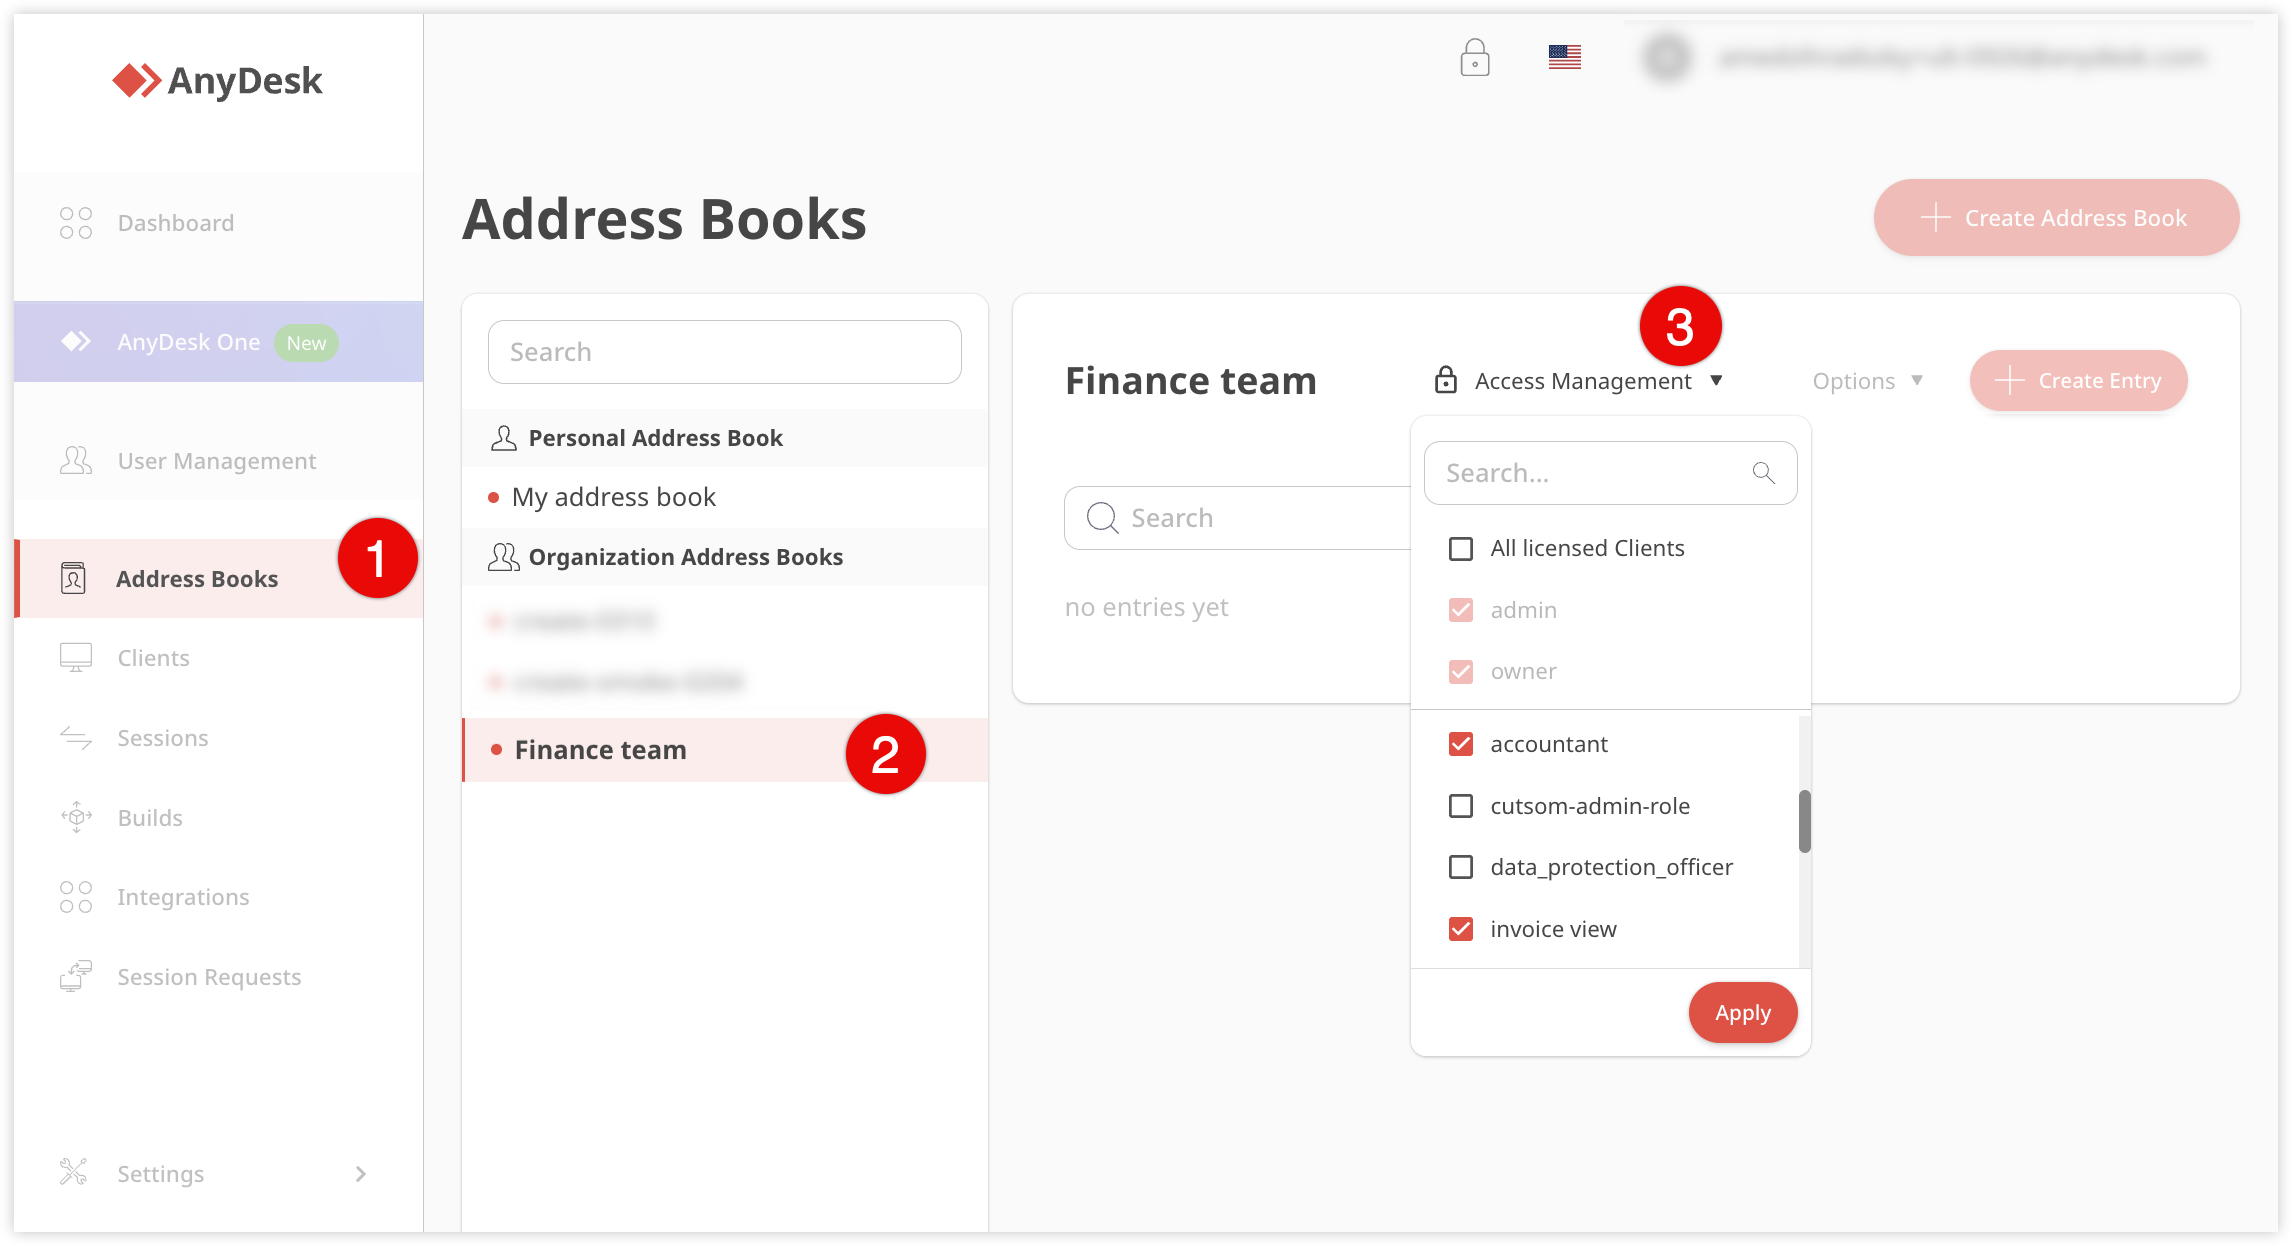
Select the roles that should have access to the Address Book.
Click Apply.
💡 NOTE
If you select All licensed clients, the address book will be available to all AnyDesk clients linked to your license, either by account or license key, if they have access to the Address Book feature.
Add entries (AnyDesk clients)
To add entries to an organization Address Book:
Sign in to my.anydesk II and open Address Books.
In the Organization Address Books tab, select the address book you wish to add clients to and click Create Entry.
.png)
In the pop-up window, provide the following details:
Name - enter the name for the contact.
or Alias - provide AnyDesk ID or Alias of the contact.
Comment - enter a description for the contact you are adding.
Tags - add a tag for further contact filtering.
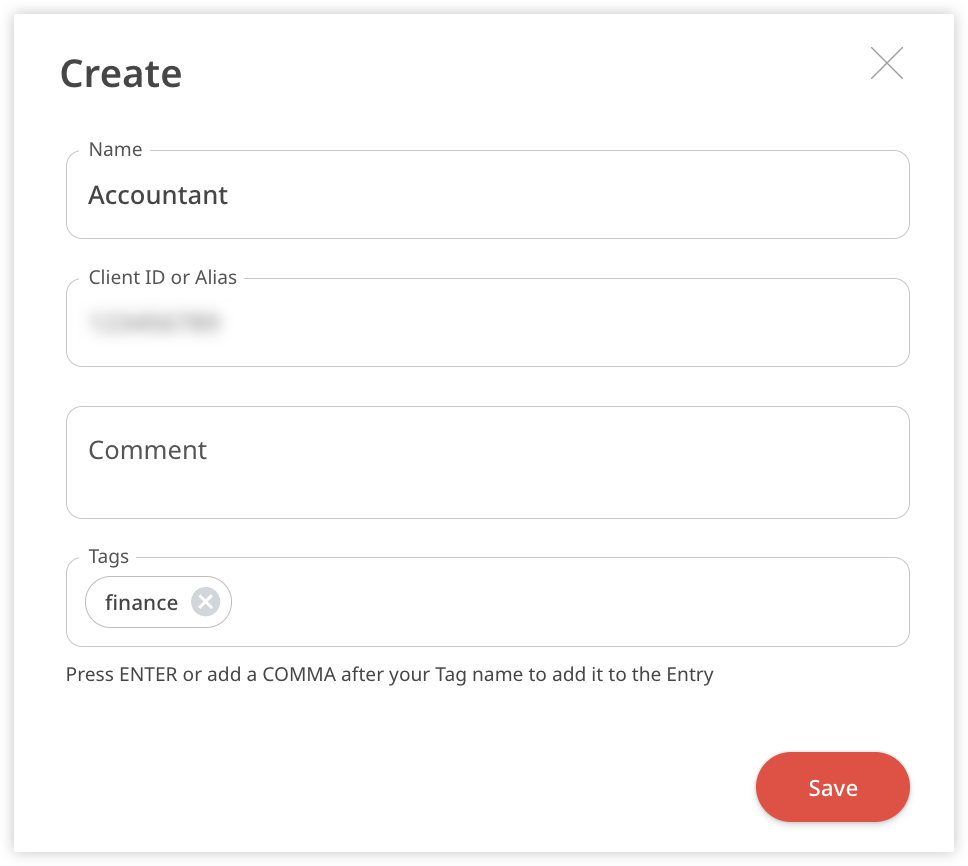
Click Save.