The AnyDesk remote desktop application for macOS offers seamless connectivity and a straightforward setup process. With support for custom clients, you can tailor the application to meet specific operational needs.
System requirements
Supported versions: macOS 11 and newer
💡 NOTE
If you're experiencing connection issues on macOS 15 Sequoia, ensure your firewall applications are compatible with the OS and can interact properly with the built-in macOS firewall.
Installation and uninstallation
Installation
🦉 For installation instructions, see this article.
Uninstallation
To remove the portable version of AnyDesk:
In the menu bar, right-click the AnyDesk icon, then select Quit.
Move the AnyDesk application from the Applications folder to Trash.
Delete the following folders:
~/.anydesk//etc/anydesk/(for standard clients)~/.anydesk-ad_<prefix>//etc/anydesk-ad_<prefix>/(for custom clients)
To uninstall the installed version:
Go to Menu > About AnyDesk.
Hold the Option/Alt key.
Click Uninstall at the top-right corner.
Delete the following folders:
~/.anydesk//etc/anydesk/(for standard clients)~/.anydesk-ad_<prefix>//etc/anydesk-ad_<prefix>/(for custom clients)
🚨 IMPORTANTDeleting these folders will permanently remove the AnyDesk ID and Alias from the device. These cannot be restored unless previously backed up. For details, see Back up AnyDesk ID and Settings.
Granting security permissions
To receive incoming connections, you must configure the correct permissions. See Grant security permissions on macOS.
Notarization
Custom clients are not signed by Apple by default. This may trigger a security prompt when starting the application. To bypass the prompt:
Option 1: Right-click the AnyDesk app and select Run.
Option 2: Enable Notarize Client in the custom client configurator to have Apple notarize your custom client.
🚨 IMPORTANTNotarization can take from 15 minutes to 6 hours, depending on Apple’s server load. If it takes longer, copy the configuration and submit it again. Any configuration changes or updates to the macOS AnyDesk version will restart the notarization process.
Accept window
The Accept Window appears when a connection request is received, It is always displayed during an active session.
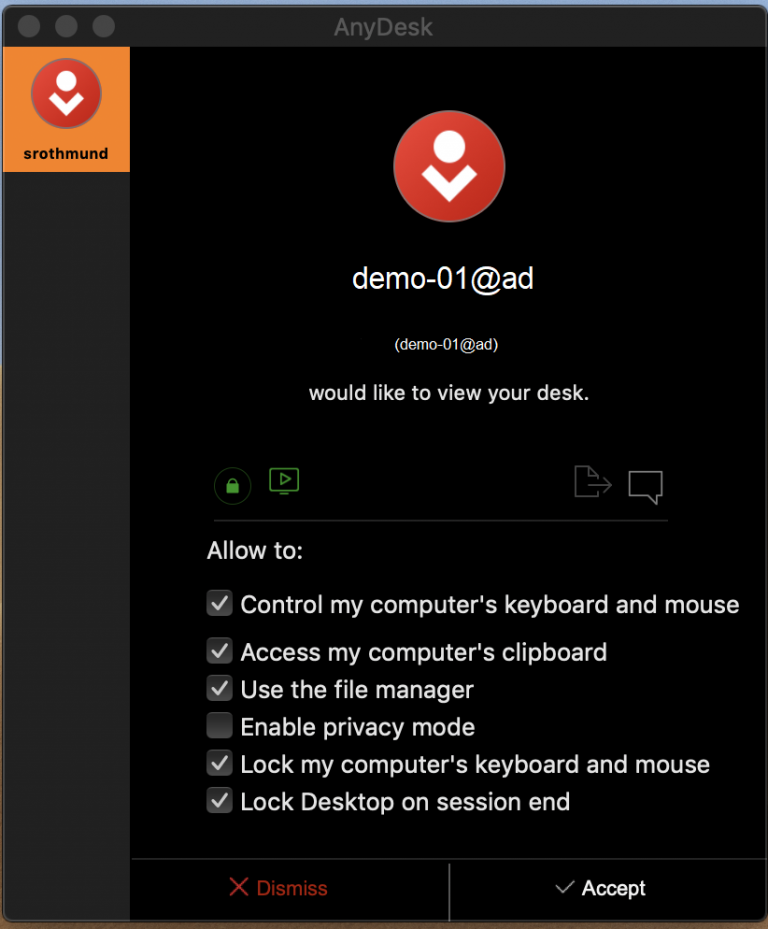
From this window, you can:
Accept, reject, or disconnect a session.
View the ID or Alias of the connecting user.
See encryption and connection type.
Access files copied via the clipboard (if enabled).
Open the chat window.
Configure permissions for the connecting user.
💡 NOTE
If all permissions are disabled, the session becomes view-only.
File Manager
To start a File Manager-only session:
Enter the AnyDesk ID or Alias of the remote device.
Click Browse files.
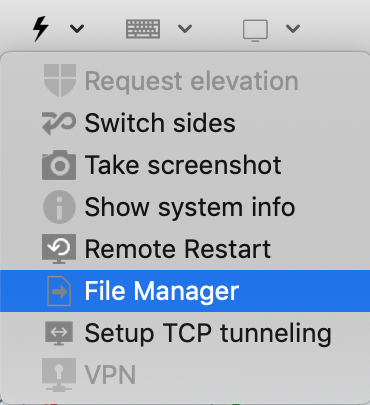
You can also access the File Manager during a session using the Files icon in the session toolbar.
Cross-platform shortcuts
Due to platform differences, keyboard shortcuts do not map 1:1 between macOS, Windows, and Linux. Use the shortcut keys of the device you're controlling.
macOS Key | Windows/Linux equivalent |
command (CMD) | WIN / SUP |
option | ALT |
control | CTRL |
Examples:
macOS to Windows/Linux:
Copy with
CMD+C, paste withCTRL+V
Windows/Linux to macOS:
Copy with
CTRL+C, paste withCMD+V
Access Spotlight (from Windows/Linux):
Use
WIN/SUP + Space
macOS-specific settings
In addition to standard AnyDesk settings, macOS clients offer the following under the General tab:
Transmit keyboard shortcuts - sends macOS keyboard shortcuts to the remote device.
Accept all remote keyboard shortcuts - enables extended shortcuts defined under macOS System Preferences > Keyboard > Shortcuts. Additional permissions are required.
Use Right Command as a Host Key - allows local use of the right Command key while the left Command key is sent to the remote session.
Audio support
Audio transmission is supported on:
macOS devices running macOS 13 Ventura or newer
AnyDesk version 7.2.0 or newer for macOS