エイリアスは、 AnyDesk IDに対して、より説明的でわかりやすいラベルを提供します。エイリアスは、デバイスを迅速に認識し、個人環境とビジネス環境の両方での使いやすさを向上させるのに特に役立ちます。

既存のエイリアスを変更する必要がある場合は、この文章では、 Namespace とライセンスの種類に応じて、利用可能なオプションと更新方法について説明します。
必要条件
エイリアスは、 <name>@<namespace> の形式に従う必要があります。
使用できる文字: a-z、0-9、ハイフン (
-)、ピリオド (.)、アンダースコア (_)最大長: 25 文字
エイリアスは、パブリック名前空間またはカスタム名前空間で割り当てることができます。
パブリック名前空間は @ad
フォーマット:
john@ad有料ライセンスユーザーのみが利用可能
各AnyDesk IDには、パブリック名前空間で最大3つの エイリアス を割り当てることができます。
これらのエイリアスは、作成されると元の ID に 永続的にリンク され、 削除または再割り当てすることはできません。
カスタム名前空間は、@yourcompanynameたとえば、
形式:
john@yourcompanynameStandard、Advanced、またはUltimateライセンスが必要です
カスタム名前空間のエイリアスは、制限なくいつでも作成、変更、または再割り当てできます。
エイリアスの設定または変更
AnyDeskクライアントにエイリアスがまだない場合は、以下の手順に従って割り当てることができます。
AnyDeskクライアントでエイリアスを設定するには、クライアントがインストールされ、有効な ライセンスキーに登録されていることを確認してください。設定が完了したら、アプリケーションで直接エイリアスを割り当てることができます。
AnyDeskを開きます。
右上隅にある [
.png) ] をクリックし、[ 設定] を選択します。
] をクリックし、[ 設定] を選択します。 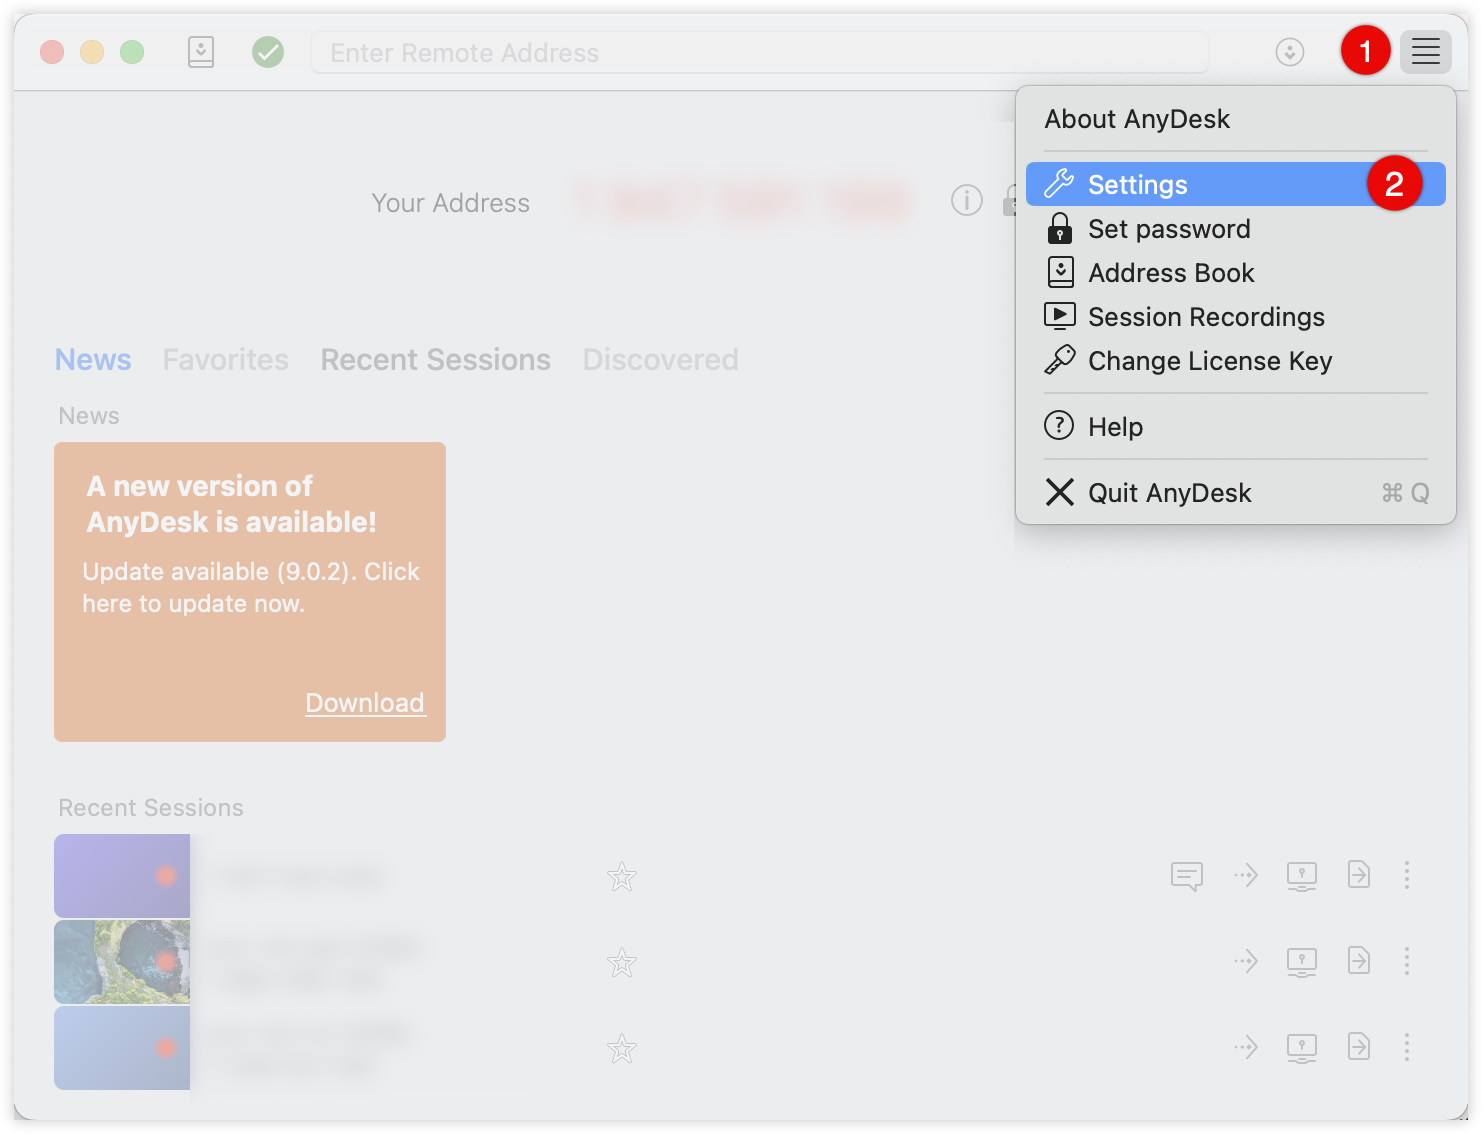
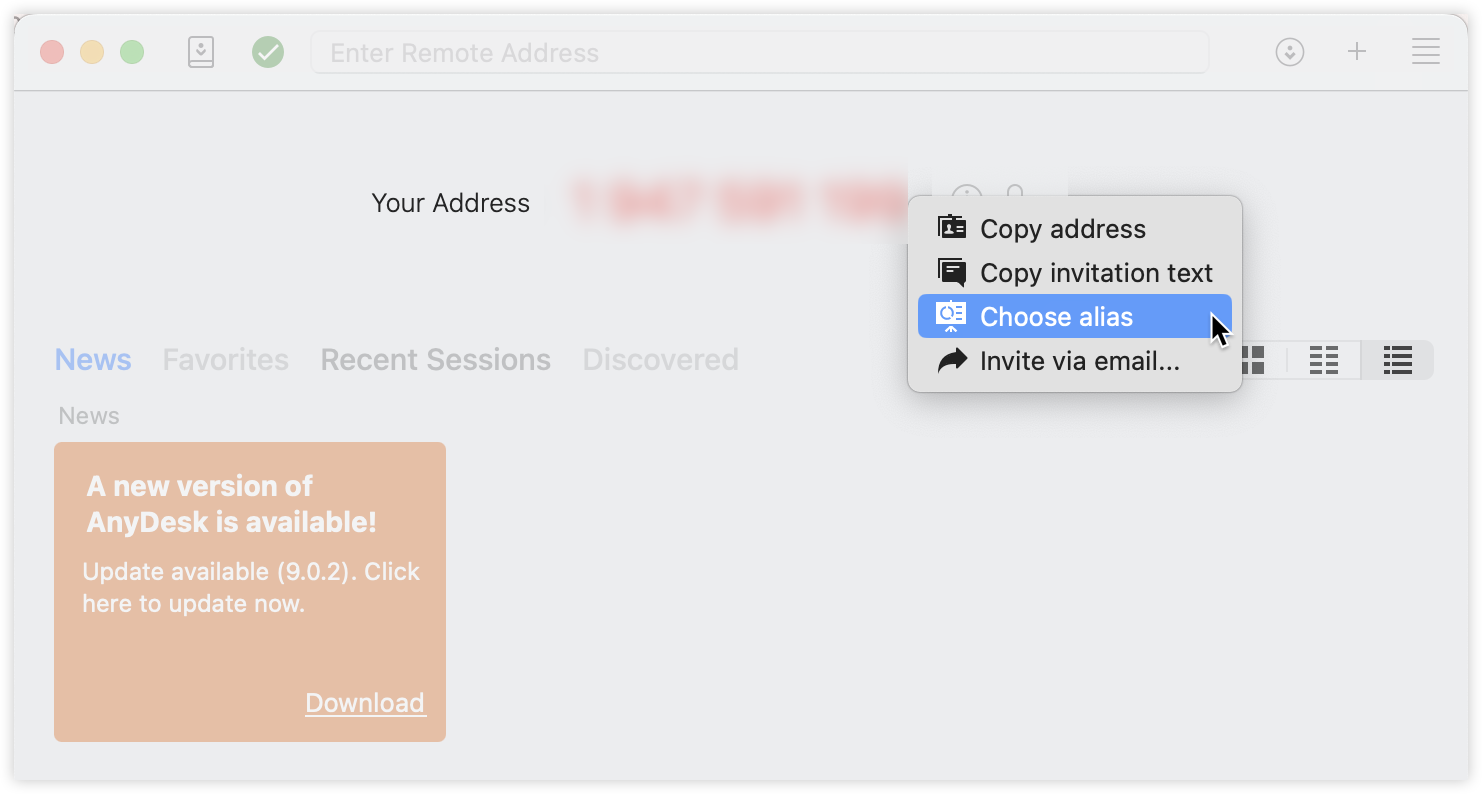
[ID] に移動し、[エイリアス] セクションで [エイリアスを選択] をクリックします。
新しいエイリアスを入力し、[ 登録] をクリックします。
💡 手記
[ エイリアスの選択 ] ボタンがグレー表示されている場合は、無料版を使用しているため、エイリアスを割り当てることができません。
🦉 また、AnyDesk IDを右クリックし、リストから「エイリアスを選択」を選択することもできます。
既存のエイリアスは、 my.anydesk IIで変更できます。
ライセンスにリンクされているすべてのクライアントのエイリアスを設定および変更できます。そのためには:
my.anydesk II にサインインし、[クライアント] タブに移動します。
.png)
目的のクライアントを選択し、ダブルクリックして [クライアントの詳細] ページを開きます。
[ バージョン情報 ] セクションで、[
.png) ] をクリックします。
] をクリックします。[エイリアス] で、目的のエイリアスを入力し、[変更の保存] をクリックします。
.png)
エイリアスの自動登録
開始する前に、ターゲットデバイスに既存のAnyDesk 構成ファイルがないことを確認してください。
エイリアスを自動登録するには:
my.anydesk II にサインインし、[ビルド] タブに移動します。
[Create Build] をクリックして カスタムクライアント Generator を開きます。
開いたページで、[ 詳細設定] を選択します。
[クライアント設定] セクションまで下にスクロールし、[ホスト名] を [エイリアス] として、パブリック名前空間またはカスタム名前空間を選択します。
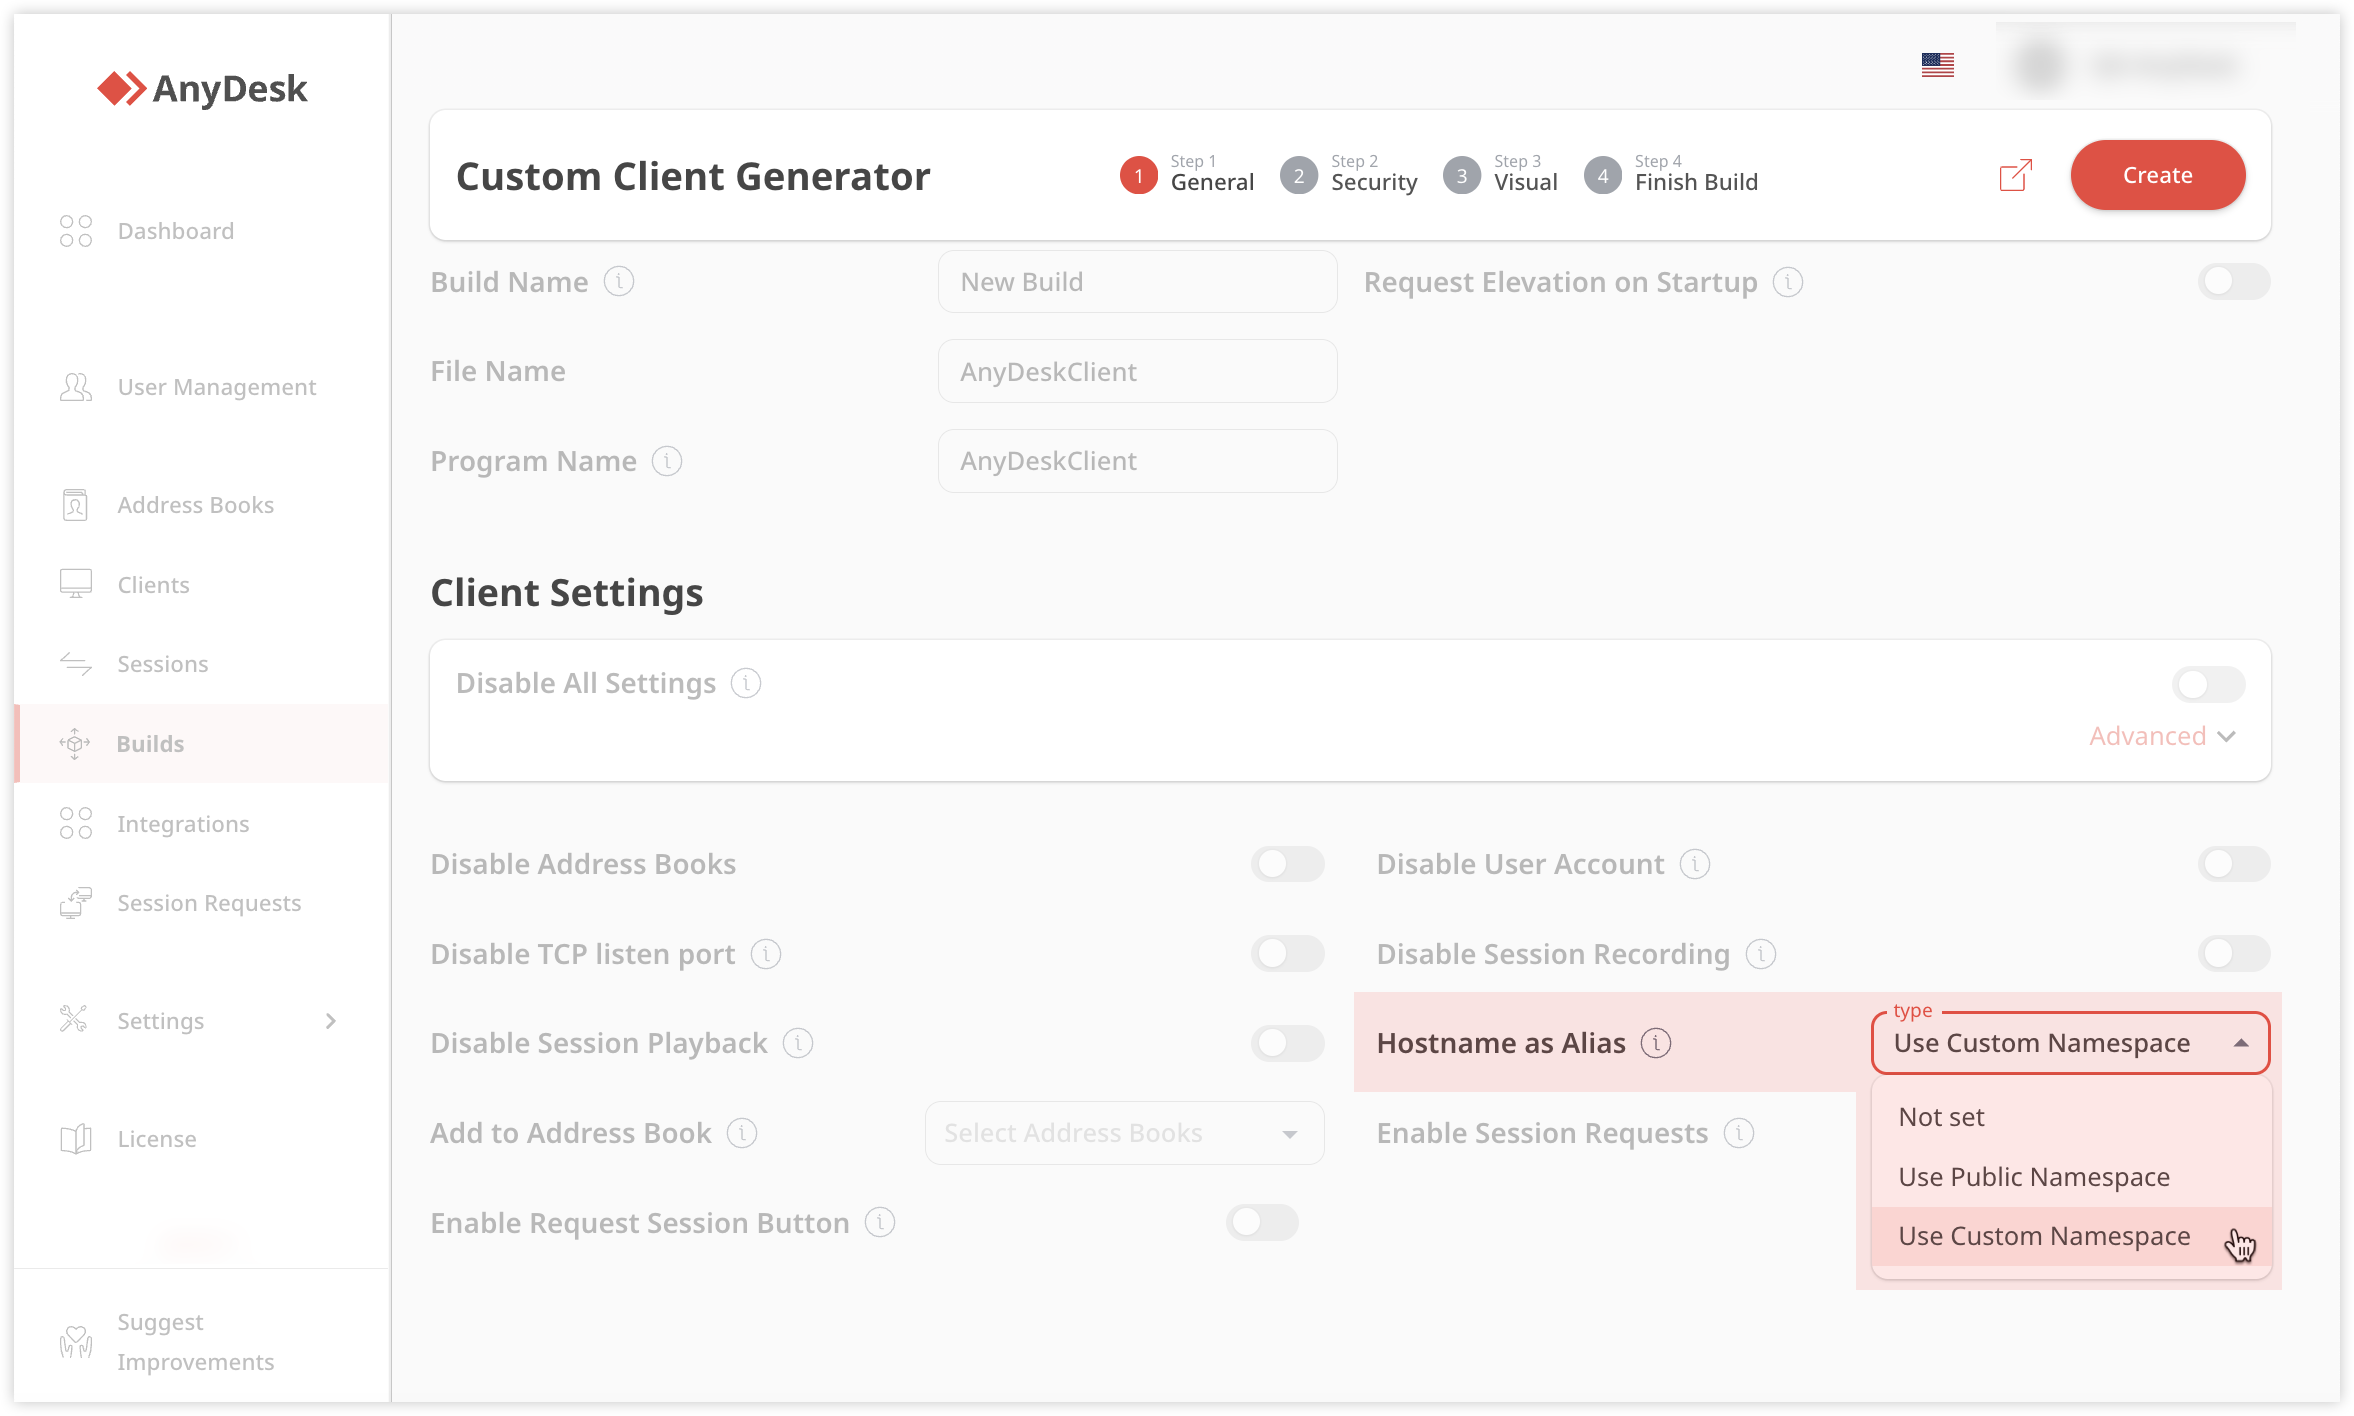
カスタムクライアント構成を完了し、ターゲットデバイスにインストールします。
laptop01@ad、 laptop01@yourcompanyなど)内で、デバイス名を使用して自動的に登録されます。
エイリアスのバックアップ
🦉 AnyDesk IDとエイリアスのバックアップの詳細については、this articleを参照してください 。
新しいデバイスに移行する場合、またはデータ損失から回復する場合、AnyDesk構成ファイルをバックアップすることで、AnyDesk ID、エイリアス、および構成設定を保持できます。エイリアスは service.conf ファイルに保存されます。
エイリアスと ID をバックアップするには:
service.confファイルを安全な場所に保存します。
完全なバックアップ(設定と セッション履歴を含む)の場合は、完全な構成ディレクトリをバックアップします。
インストールされた AneDesk:
%programdata%\AnyDesk\
ポータブルAnyDeskアプリ:
%appdata%\AnyDesk\
🚨 大事な
service.confが紛失してバックアップされていない場合、エイリアスとAnyDesk IDは復元できません。