Android 版 AnyDesk 支持用户跨平台发起和接收远程桌面会话,并提供无人值守访问、剪贴板同步和文件传输等关键功能。
系统要求
操作系统
传出连接 需要 Android 4.4 或更高版本。
传入连接 需要 Android 5.0 或更高版本。
远程控制功能 需要 Android 7.0 或更高版本。
控制插件
许多 Android 设备需要额外的 控制插件 以启用完整的输入控制。首次启动 AnyDesk 时,应用会根据你的设备型号自动提示你安装相应的插件。
功能限制: 仅 远程屏幕查看 在 ChromeOS 上受支持。由于供应商施加的限制,无法进行输入控制。
在 Android 上安装并设置 AnyDesk
安装
你可以通过以下两种方式之一在 Android 上安装 AnyDesk:
从官方应用商店下载。
AnyDesk 可在以下平台获取:通过 my.anydesk 管理门户部署自定义客户端。
使用 my.anydesk II 管理门户创建自定义 Android 客户端,并将其部署到受管设备。


控制插件
默认情况下,Android 不允许远程输入(例如鼠标、键盘或触控)。因此,Android 版 AnyDesk 只能查看设备屏幕,无法进行交互操作。
要启用输入控制,AnyDesk 必须从系统获取特殊的输入权限。这些权限通过单独安装的控制插件提供。
控制插件 是 AnyDesk 提供的小型附加应用,用于在 Android 设备上启用输入控制。
插件分为两种:
通用插件(
ad1): 可通过 Play 商店获取。该插件适用于多种设备,并支持大多数常见场景的输入控制。厂商插件: 由于制造商限制,部分 Android 设备需要此类插件。这些插件与具体设备型号相关,必须手动下载并安装。
要使用完整的远程控制功能(包括输入和触控交互),用户必须为其设备安装合适的控制插件。
🦉 你可以在 Android 控制插件 页面查看所有可用插件列表。
如何安装正确的插件
不要手动搜索或安装插件。 AnyDesk 会检测是否需要通用插件(
ad1),并提示你安装。如果需要 厂商插件 ,你将被重定向到 Android 控制插件,在那里你可以下载并安装适用于你设备的正确插件:
识别与你设备型号匹配的插件。
下载文件。
手动安装(如有需要,请启用未知来源/不受信任应用)。
如果没有可用的特定插件
如果你的设备没有可用的厂商插件,AnyDesk 将安装 通用插件 (
ad1)。这将允许 仅基础控制 (例如鼠标移动)。某些输入类型可能不受支持。
如需完全兼容,请联系设备制造商,确认是否支持专用的 AnyDesk 插件。
💡 注意
如果你的设备使用通用插件
ad1且控制受限,建议联系设备制造商并请求支持专用的 AnyDesk 控制插件。
自定义你的 AnyDesk 客户端
你可以创建 自定义客户端 APK 用于预配置、品牌化并在受管 Android 设备上部署 AnyDesk。本节概述如何安装客户端、处理 Android 安全限制,以及为企业部署设置自定义包名。
创建自定义客户端
你可以在 my.anydesk II中创建 Android 版 AnyDesk 自定义客户端。要创建自定义客户端:
前往 my.anydesk II > 构建 > 创建构建。
在 自定义客户端生成器 页面中, 选择 Android 作为操作系统。
根据你的部署需求配置所有必需设置。
点击 创建 以生成自定义 APK。
生成后,可下载该 APK 并通过 MDM 部署,或上传到内部应用商店。
设置自定义包名
如果你通过私有应用商店或设备管理平台分发自定义 AnyDesk APK,可能需要使用唯一的包名。
配置方法:
前往 my.anydesk II > 构建 > 创建构建。
在 自定义客户端生成器,启用 Android 包名后缀。

输入满足以下要求的后缀:
以字母开头
长度为 3 到 16 个字符
仅使用小写拉丁字母(不含数字或符号)
生成 APK 并将其上传到私有应用商店或部署系统。
安装自定义 AnyDesk APK
要在 Android 设备上安装自定义 AnyDesk APK:
打开设备设置并启用从 未知来源安装。建议仅为 文件管理器应用允许,而不是浏览器。
.png)
使用你的 文件管理器 或 MDM 工具 定位自定义 APK。
点击 APK 文件并按屏幕提示完成安装。
⚠️ 菜单名称可能因设备或 Android 版本而异。
在 Android 14 及某些 OEM 定制系统上,额外限制(例如 自动拦截器)可能会阻止 APK 安装。
解决安装被阻止的问题(Android 14 及更高版本)
从 Android 14 开始,Google 及部分设备制造商(例如 Samsung)引入了额外的安全功能,可能会阻止 APK 安装,包括自定义 AnyDesk 客户端。
如果安装失败并出现如下提示: “已阻止未知应用” ,请根据设备类型按以下步骤操作。
.png)
打开 设置 > 安全与隐私 > 其他安全设置。
点击 自动拦截器。
禁用 自动拦截器。
重新尝试安装自定义 AnyDesk APK。
打开 设置 > 安全与隐私 > 高级保护 / 设备保护。
⚠️ 菜单名称可能因设备或 Android 版本略有不同。关闭保护模式。
重新尝试安装自定义 AnyDesk APK。
授予所需权限
要启用完整的远程控制与功能,AnyDesk 需要多个 Android 系统权限。
自 Android 版 AnyDesk 7.2.0起,内置的 设置清单 可帮助你在初始设置期间配置这些权限。
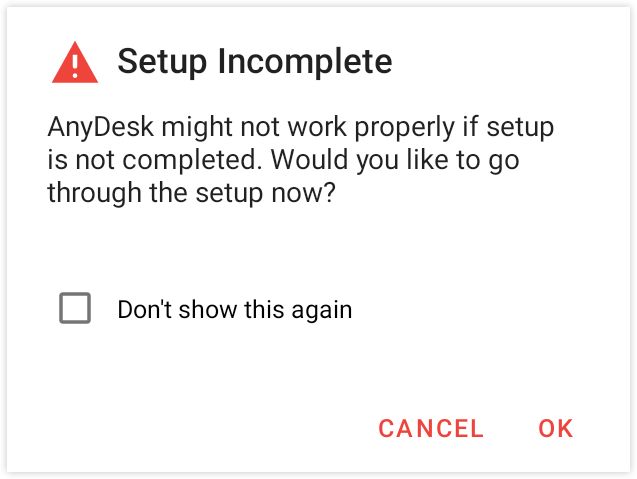
如果你在设置过程中关闭了清单,可随时从 AnyDesk 应用主界面重新打开。
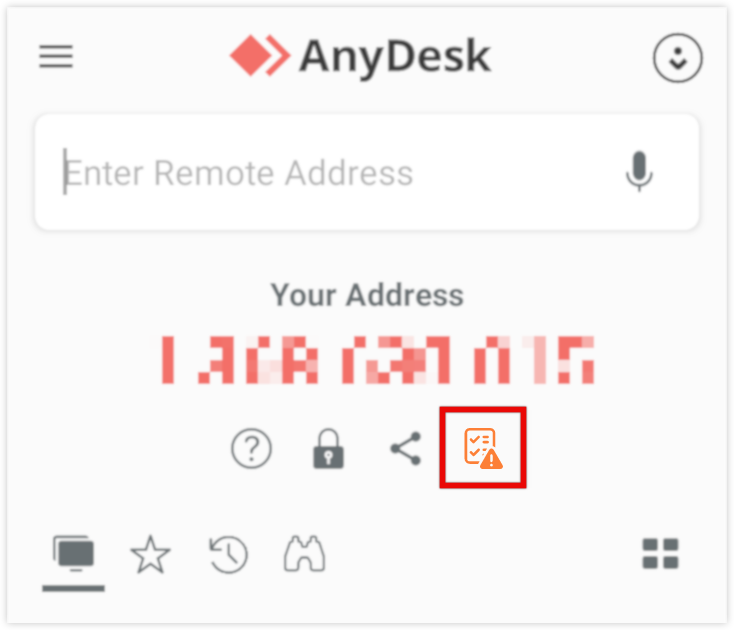
清单会显示每项所需权限及其用途说明。点击任一权限条目可查看其使用方式,并直接跳转到相应的 Android 设置页面进行授权。
.png)
.png)
注册你的许可证密钥
根据应用的部署与管理方式,你可以通过两种方式在 Android 上注册 AnyDesk 许可证。
注册方式:
此方法推荐用于 受管或大规模部署。
创建或下载 自定义 AnyDesk APK 并启用 分配到许可证 选项。
在 Android 设备上安装自定义 APK。
安装后,应用会自动与你的许可证关联。
你会看到一个名为 AnyDesk(自定义)的应用,授权功能将立即可用。
此方法推荐用于 个人用户或小型部署。
打开 AnyDesk (在 Android 设备上)。
使用你的 AnyDesk 账户凭据。
登录后,与你账户关联的许可证会自动应用。
无需自定义 APK 即可启用授权功能。
连接到 Android 设备
在连接 Android 设备之前,请确保已完成初始设置并安装所需的控制插件。更多信息请参见 在 Android 上安装并设置 AnyDesk。
即使无法进行完整的远程控制, 无人值守文件传输 在所有 Android 版本上都受支持,因为它不需要控制插件。
通过无人值守访问连接
无人值守访问允许你管理和控制远程设备,无需远端人员手动接受每个连接请求。
🦉 有关如何设置无人值守访问的说明,请参见 本文。
不过,在 Android 10 及更高版本上,当开始屏幕共享或录制时,可能会出现系统级提示。该提示由 Android 操作系统强制要求,大多数情况下必须由在 Android 设备旁的人员手动接受,即使 无人值守访问 已完成配置。
通过无人值守访问连接的步骤:
获取远程设备的 AnyDesk ID 或 别名。
在本地设备上(你要从该设备连接到远程设备),输入 AnyDesk ID 到 远程地址 字段中并点击
 或按 Enter。
 出现提示时,输入你先前在远程设备上设置的 无人值守访问 密码 。
当系统提示出现时,在远程 Android 设备上手动接受以允许屏幕录制或投屏。
连接后,会话将开始并显示远程设备的屏幕。你现在可以控制设备、传输文件等。
在 Android 上控制远程会话
在会话期间,你可以通过 会话菜单(也称为 饼形菜单)来访问重要控制项:长按 AnyDesk 徽标即可。你可以双击并拖动徽标,将其移动到屏幕任意位置。
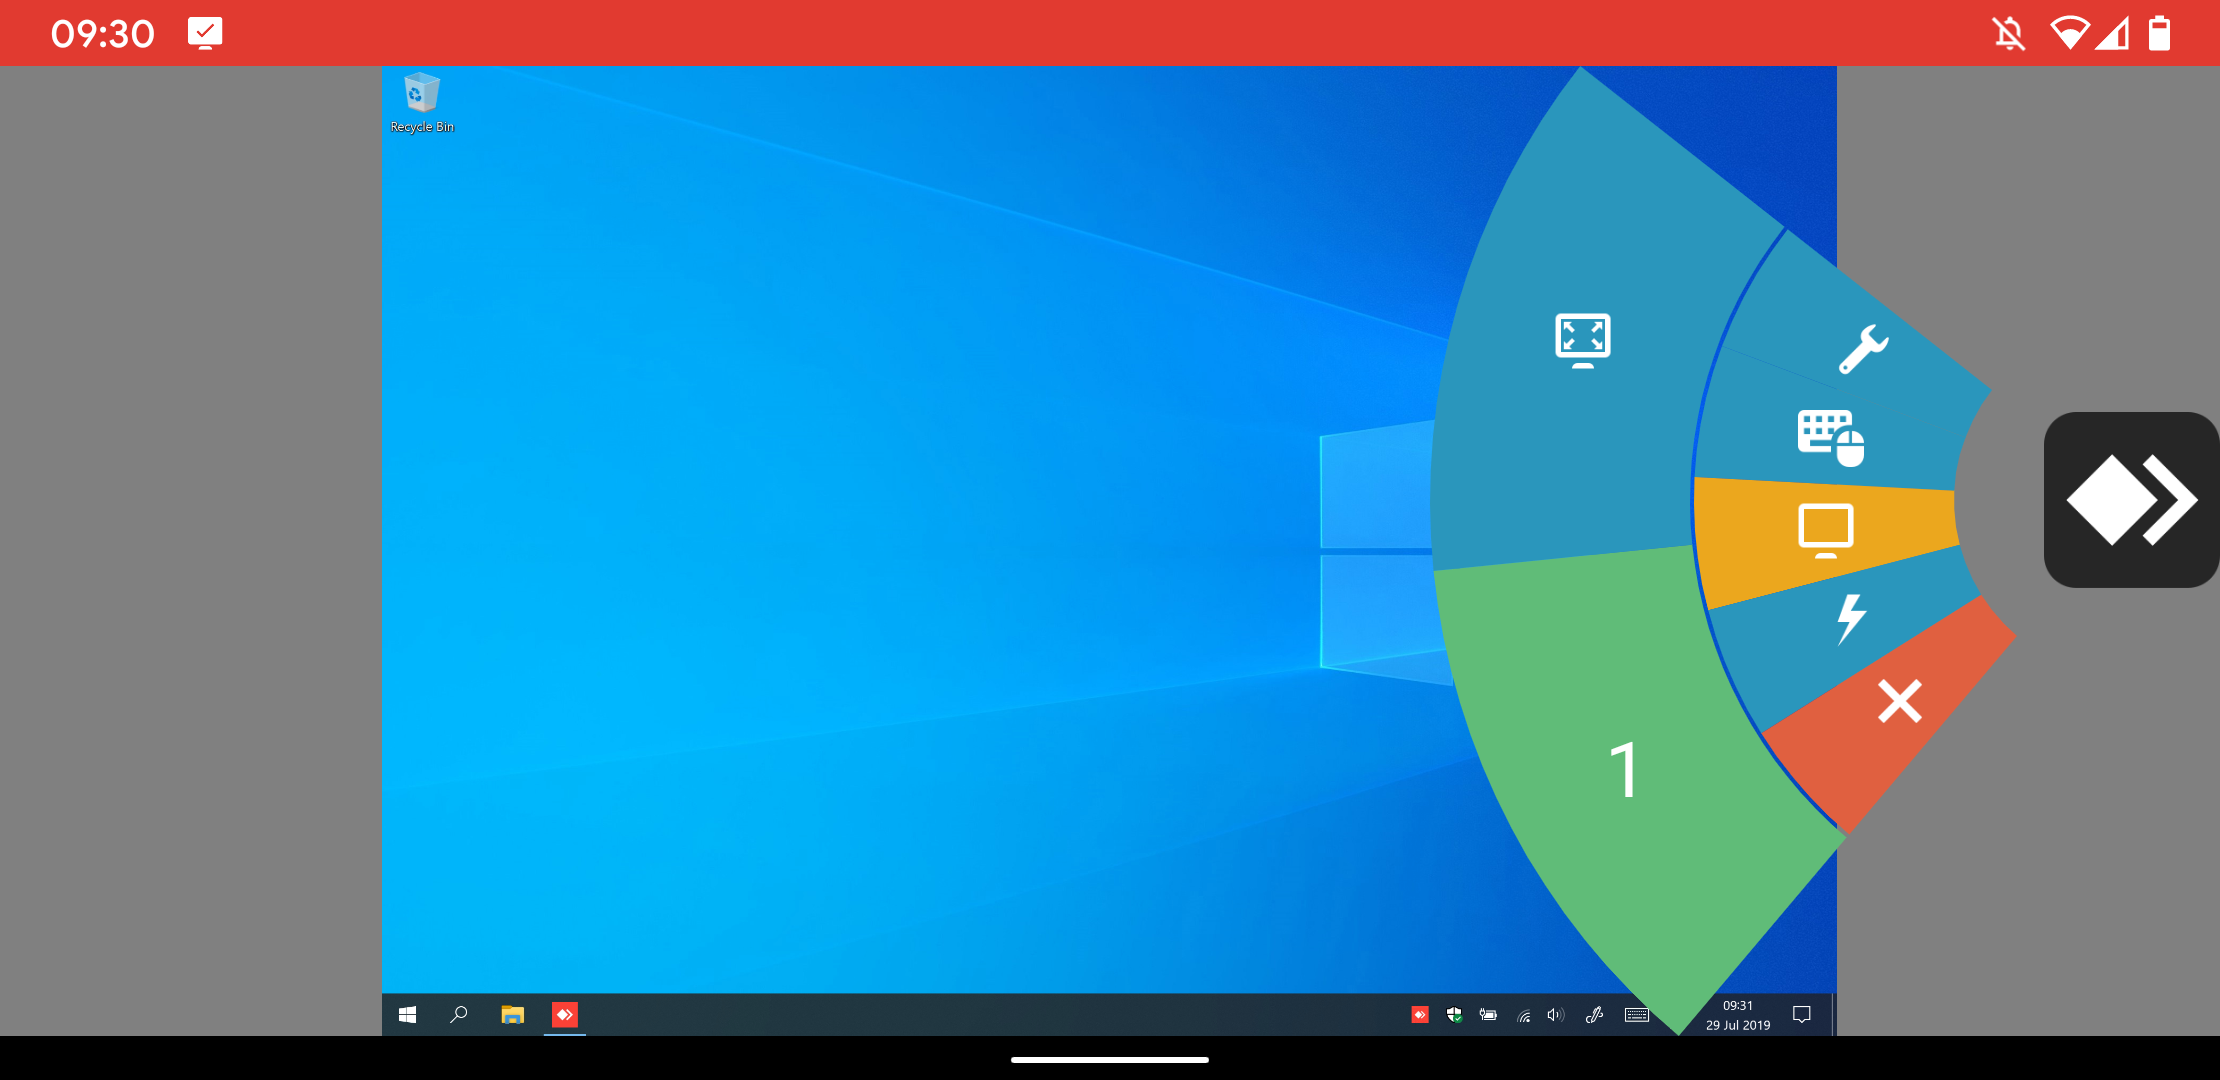
会话菜单包含多个用于以下功能的图块:
设置
输入类型
显示器选择
操作
关闭会话
你可以在会话期间使用会话菜单来:
结束会话
调整传输质量
切换输入控制、剪贴板同步、隐私屏幕
管理音频和显示设置
开始/停止 VPN 或会话录制
发送
Ctrl + Alt + Del或请求提升权限(UAC)截图
通过剪贴板上传/下载文件
切换显示器(如果远程设备有多个显示器)
进入/退出全屏模式
更改输入类型
打开会话菜单并滑动到 输入 图块。你可以选择:
特殊键盘(例如 F1、Windows 键、Tab)
已安装的 Android 键盘
自动切换键盘
输入模式 | 说明 |
鼠标模式 | 模拟鼠标(Android 连接桌面端的默认模式) |
触控板模式 | 滑动操作类似触控板 |
触控对触控模式 | 直接交互(Android 连接 Android 的默认模式) |
将鼠标输入转换为触控输入 | 允许将鼠标事件模拟为触控输入 |
支持的手势
当使用 鼠标 或 触控板 模式时:
单指滑动——移动鼠标
双指滑动——缩放
三指滑动——滚动
轻触——左键单击
按住——右键单击
三指轻触——中键单击
快捷键
从 Windows 连接到 Android 设备时,你可以使用键盘快捷键执行 Android 系统操作。
要使用快捷键,请按住 Ctrl + Alt + Shift 并按下以下按键之一,或从会话菜单打开键盘设置:
按键 | Android 操作 |
F5 | 返回 |
F6 | 主页 |
F7 | 最近应用 |
F8 | 应用菜单 |
F9 | 电源 |
F11 | 音量减 |
F12 | 音量加 |
End | 确定按钮 |
主菜单与常规设置
打开 主菜单 的方法是在开始屏幕从左向右滑动,或点击三横线图标。
设置概览
“ 设置 ”菜单在 Android 版 AnyDesk 中分为几个部分: 应用, 安全, 会话以及 账户。
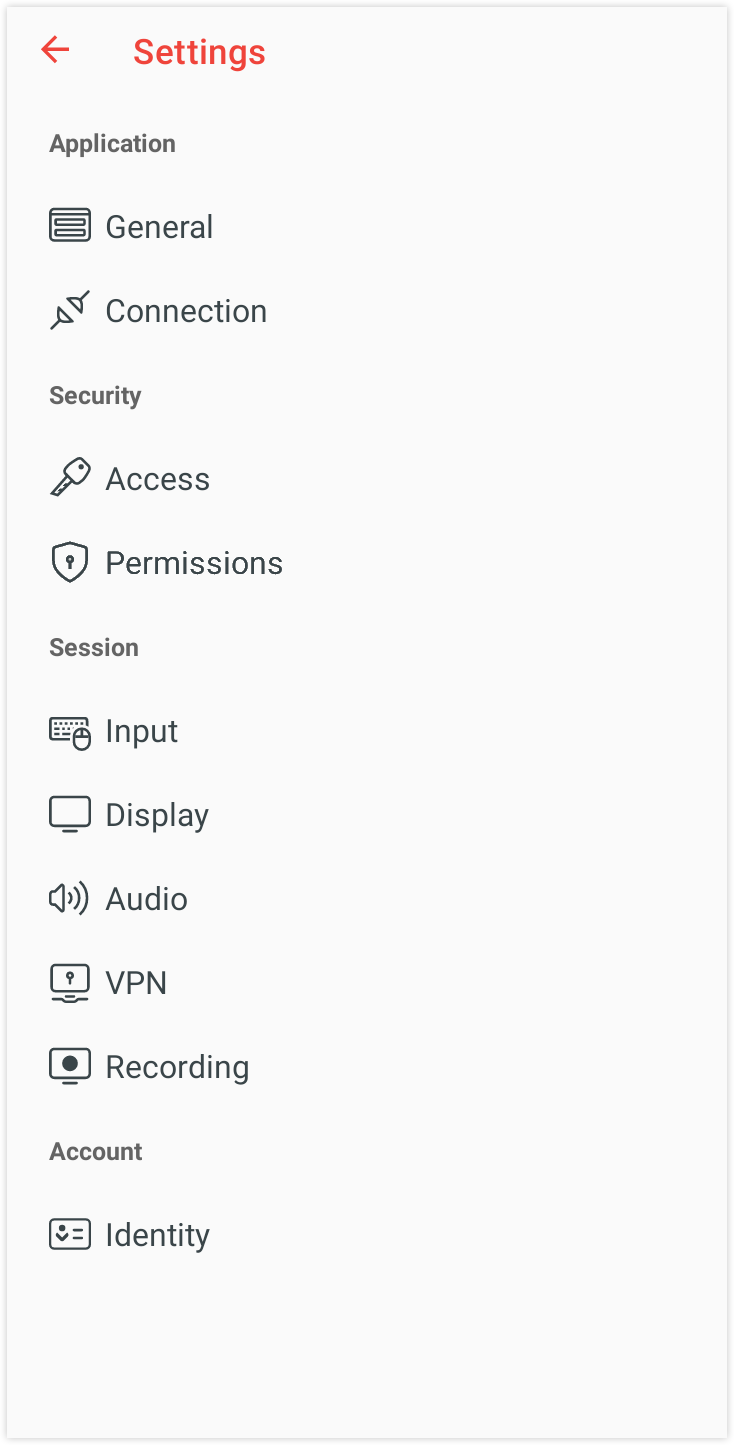
设置类别 | 说明 |
常规 | 设置别名或显示 ID。 |
连接 | 配置代理设置和连接行为 |
访问 | 管理交互访问、无人值守访问、双因素认证以及设备保护设置。 |
权限 | 管理标准 Android 应用权限,例如屏幕录制、输入访问和悬浮窗权限。 |
输入 | 选择输入模式(鼠标、触控板、触控对触控),配置自动键盘并启用键盘类型。 |
显示 | 设置是否显示远程光标,并选择视频质量(例如:最佳响应时间、均衡、原始)。 |
音频 | 配置麦克风与远程音频传输。 |
VPN | 如已启用,管理 AnyDesk VPN 设置。 |
录制 | 启用或禁用会话录制,包括对传入和传出会话的自动录制选项。 |
身份 | 设置远程会话中显示的用户名和图像。 |
使用 MDM 管理设备
Android 版 AnyDesk 支持与第三方移动设备管理(MDM)平台集成,例如 Microsoft Intune。
从 AnyDesk 6.1.10 版本起支持 MDM。
目前集成仅支持 标准客户端 (Google Play 商店提供的版本)。
兼容的 MDM 控制台可检测可用的 AnyDesk 配置选项,并显示每个受支持功能的说明。
工作配置文件中的远程控制
要在 Android 工作配置文件(非个人配置文件)中启用远程控制功能,需要对 ad1 控制插件进行特殊配置。这是由于 Android 的配置文件隔离机制。
要将 ad1 插件跨配置文件配对:
安装
ad1插件到 个人配置文件。在 辅助功能设置 中,启用该插件。
打开
ad1插件应用到 工作(非个人)配置文件。在插件菜单中,点击 选择插件。
前往 个人 选项卡并选择 AD1
⚠️ 标签格式可能因 Android 版本而异,尤其是在 Android 8.1 与 10 之间。接受 配置请求。
点击 确定 以开始配对。
💡 注意
如果配对失败,请尝试反转设置顺序(先从工作配置文件开始)。
跨配置文件通信 必须在 MDM 配置中允许。
使用厂商专用插件的设备通常 不需要 插件配对。
与 Android API 集成
AnyDesk 提供 Android API ,可实现类似 Windows 命令行界面(CLI)的基本控制与状态监控。该 API 仅供系统级应用使用。
🚨 重要对 Android API 的访问仅限于 系统应用。如需完整文档与集成支持,请向 AnyDesk 支持团队提出申请。
支持的 API 功能
该 API 支持与以下功能集成:
获取信息
应用版本
连接状态
AnyDesk ID
别名
用户名
检查状态
是否 无人值守访问 已启用
是否发生过任何 传入会话
是否已配置 自定义用户头像
设置参数
无人值守访问密码
连接行为
发现模式(启用/禁用)
用户名
自定义用户头像
故障排除
插件未激活
某些 Android 设备需要 重启 才能使控制插件正常工作。
Android TV 上的控制插件被禁用
如果 辅助功能 在 Android TV 或 Fire TV 设备上被禁用,则 AnyDesk 的控制插件无法激活。在这种情况下:
仅 远程查看 可用——无法进行输入控制。
此限制通常源于制造商限制。
⚠️ 可选的 ADB 变通方案(风险自负):
一种可能的变通方法是使用 Android 调试桥(ADB)手动启用插件:
🚨 重要此方法会使用 Android 调试桥(ADB),可能影响设备安全或违反保修条款。仅在你理解并接受风险的情况下使用。
adb shell settings put secure enabled_accessibility_services com.anydesk.adcontrol.ad1/com.anydesk.adcontrol.AccService屏幕录制提示(Android 10+)
自 Android 10起,Android 要求用户在 AnyDesk 等应用开始屏幕共享或录制之前手动确认系统提示。该行为由操作系统强制执行,无法通过应用设置禁用,即使已启用无人值守访问也不例外。
⚠️ 可选的 ADB 变通方案(风险自负):
在某些情况下(例如企业受管设备),以下 ADB shell 命令 可用于自动确认:
🚨 重要此方法会使用 Android 调试桥(ADB),可能影响设备安全或违反保修条款。仅在你理解并接受风险的情况下使用。
标准客户端:
adb shell appops set com.anydesk.anydeskandroid PROJECT_MEDIA allow自定义客户端:
adb shell appops set com.anydesk.anydeskandroid.custom PROJECT_MEDIA allow
Android 电池优化
Android 提供了一项名为 电池优化的功能,旨在通过限制后台活动来延长电池续航。但当为 AnyDesk 启用该功能时,可能会在应用转入后台 30–60 秒后自动关闭,从而干扰远程会话。这会中断正在进行的远程控制会话,导致会话意外结束。
为在远程控制 Android 设备时保持连接稳定,你应将 AnyDesk 及其控制插件从电池优化中排除。
Google Pixel 设备
打开 设置 应用。
前往 应用 > AnyDesk > 电池。
点击 不受限制 以允许完整的后台活动。
对 AnyDesk 插件。
Motorola 设备
打开 设置 应用。
前往 电池 > 电池优化。
点击 未优化 并切换到 所有应用。
找到 AnyDesk,然后选择 不优化。
对 AnyDesk 插件。
其他设备的通用指南
如果你的 Android 设备与所提供的示例不同:
在设置搜索栏中搜索 电池优化 或 应用电池使用情况 。
确保 AnyDesk 以及任何已安装的插件(例如
ad1)均设置为 不受限制 或 未优化。如需精确步骤,请参阅设备用户手册或支持网站。
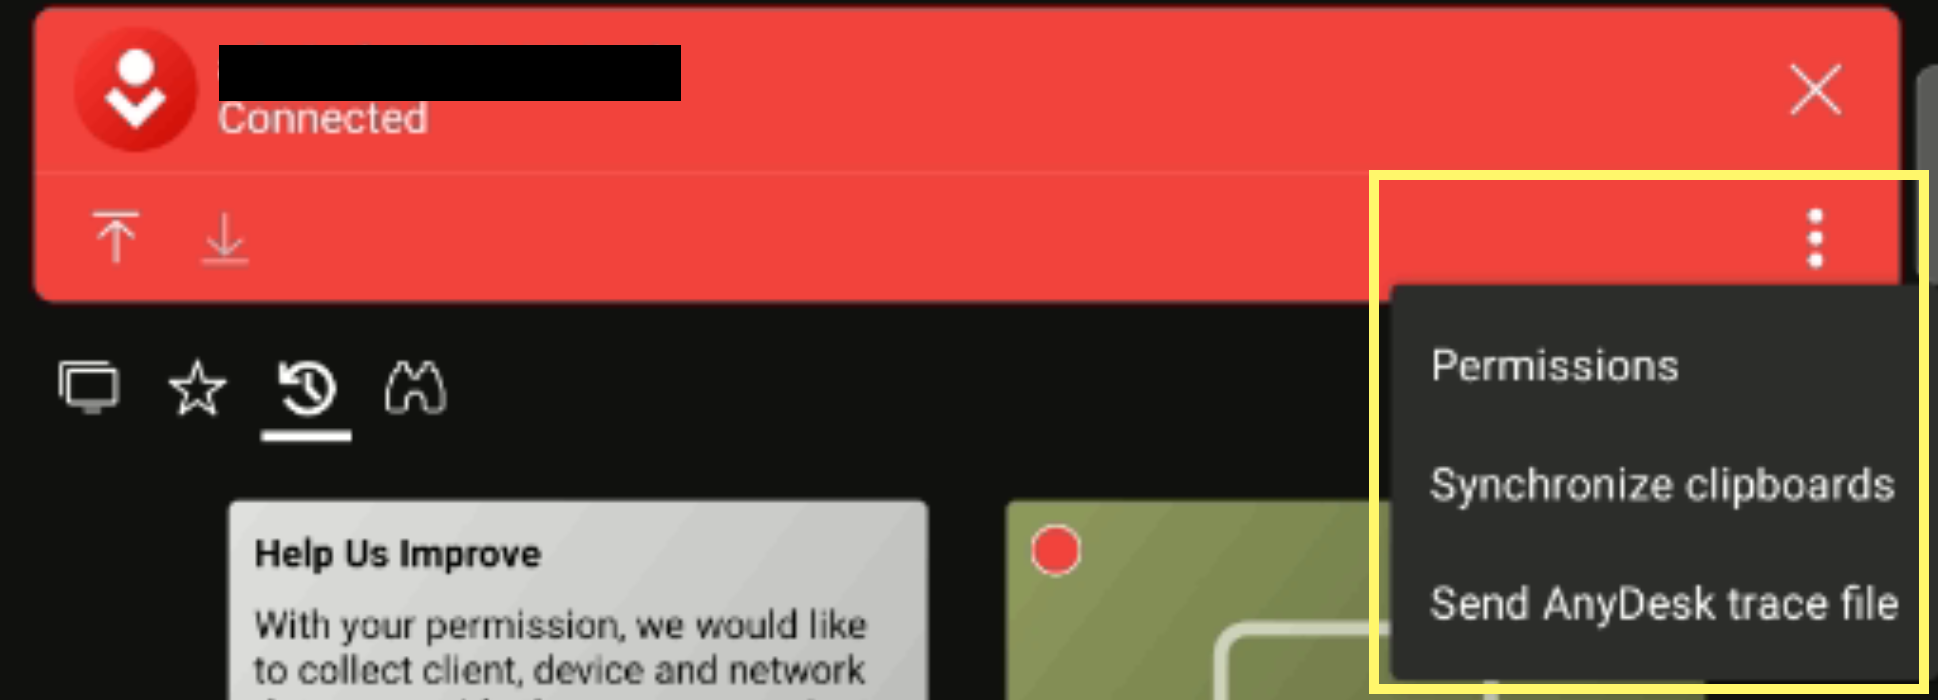
发送支持信息(跟踪文件)
如果 Android 设备上的 AnyDesk 崩溃或出现异常行为,你可以通过发送 跟踪文件 (支持信息)并附上对问题的详细描述,帮助我们的支持团队进行排查。
通过电子邮件发送跟踪文件
在 Android 设备上打开 AnyDesk 并点击
 。
。 选择 关于 AnyDesk > 发送支持信息。

添加对问题的详细描述并点击 发送邮件。
通过桌面连接获取跟踪文件
在桌面端使用 AnyDesk。
确保桌面 AnyDesk 客户端具有以下权限:
控制设备
访问剪贴板
传输文件
在 Android 设备上的 接受 窗口中,点击 三点菜单 然后 选择 发送 AnyDesk 跟踪文件。
在桌面端使用 Ctrl+V 或右键单击并选择 粘贴。
本地查看并筛选日志(Android 7.2.0 及更高版本)
在 Android 设备上打开 AnyDesk 并点击
。 选择 关于 AnyDesk > 打开 AnyDesk 日志。
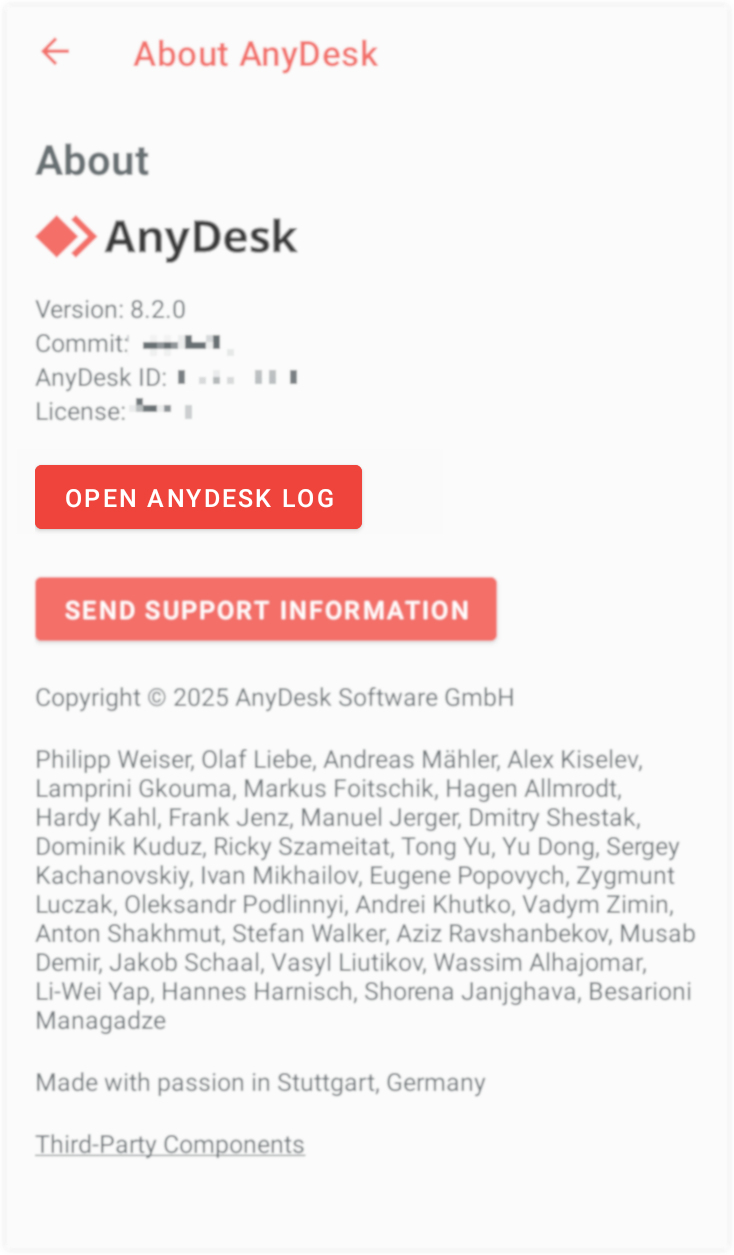
你可以按需筛选或复制日志条目。