To open display settings:
Open the AnyDesk app on your device.
In the upper-right corner, click
.png) and select Settings.
and select Settings.In the Settings window, navigate to Display.
To learn more about all the configuration options, check the Configuring default display settings section in this article.
🦉 You can also adjust display settings during a session via the session toolbar.
Configuring default display settings
Use the default display settings to define how remote devices appear during connections. These options affect session quality, view mode, rendering method, and interface behavior.
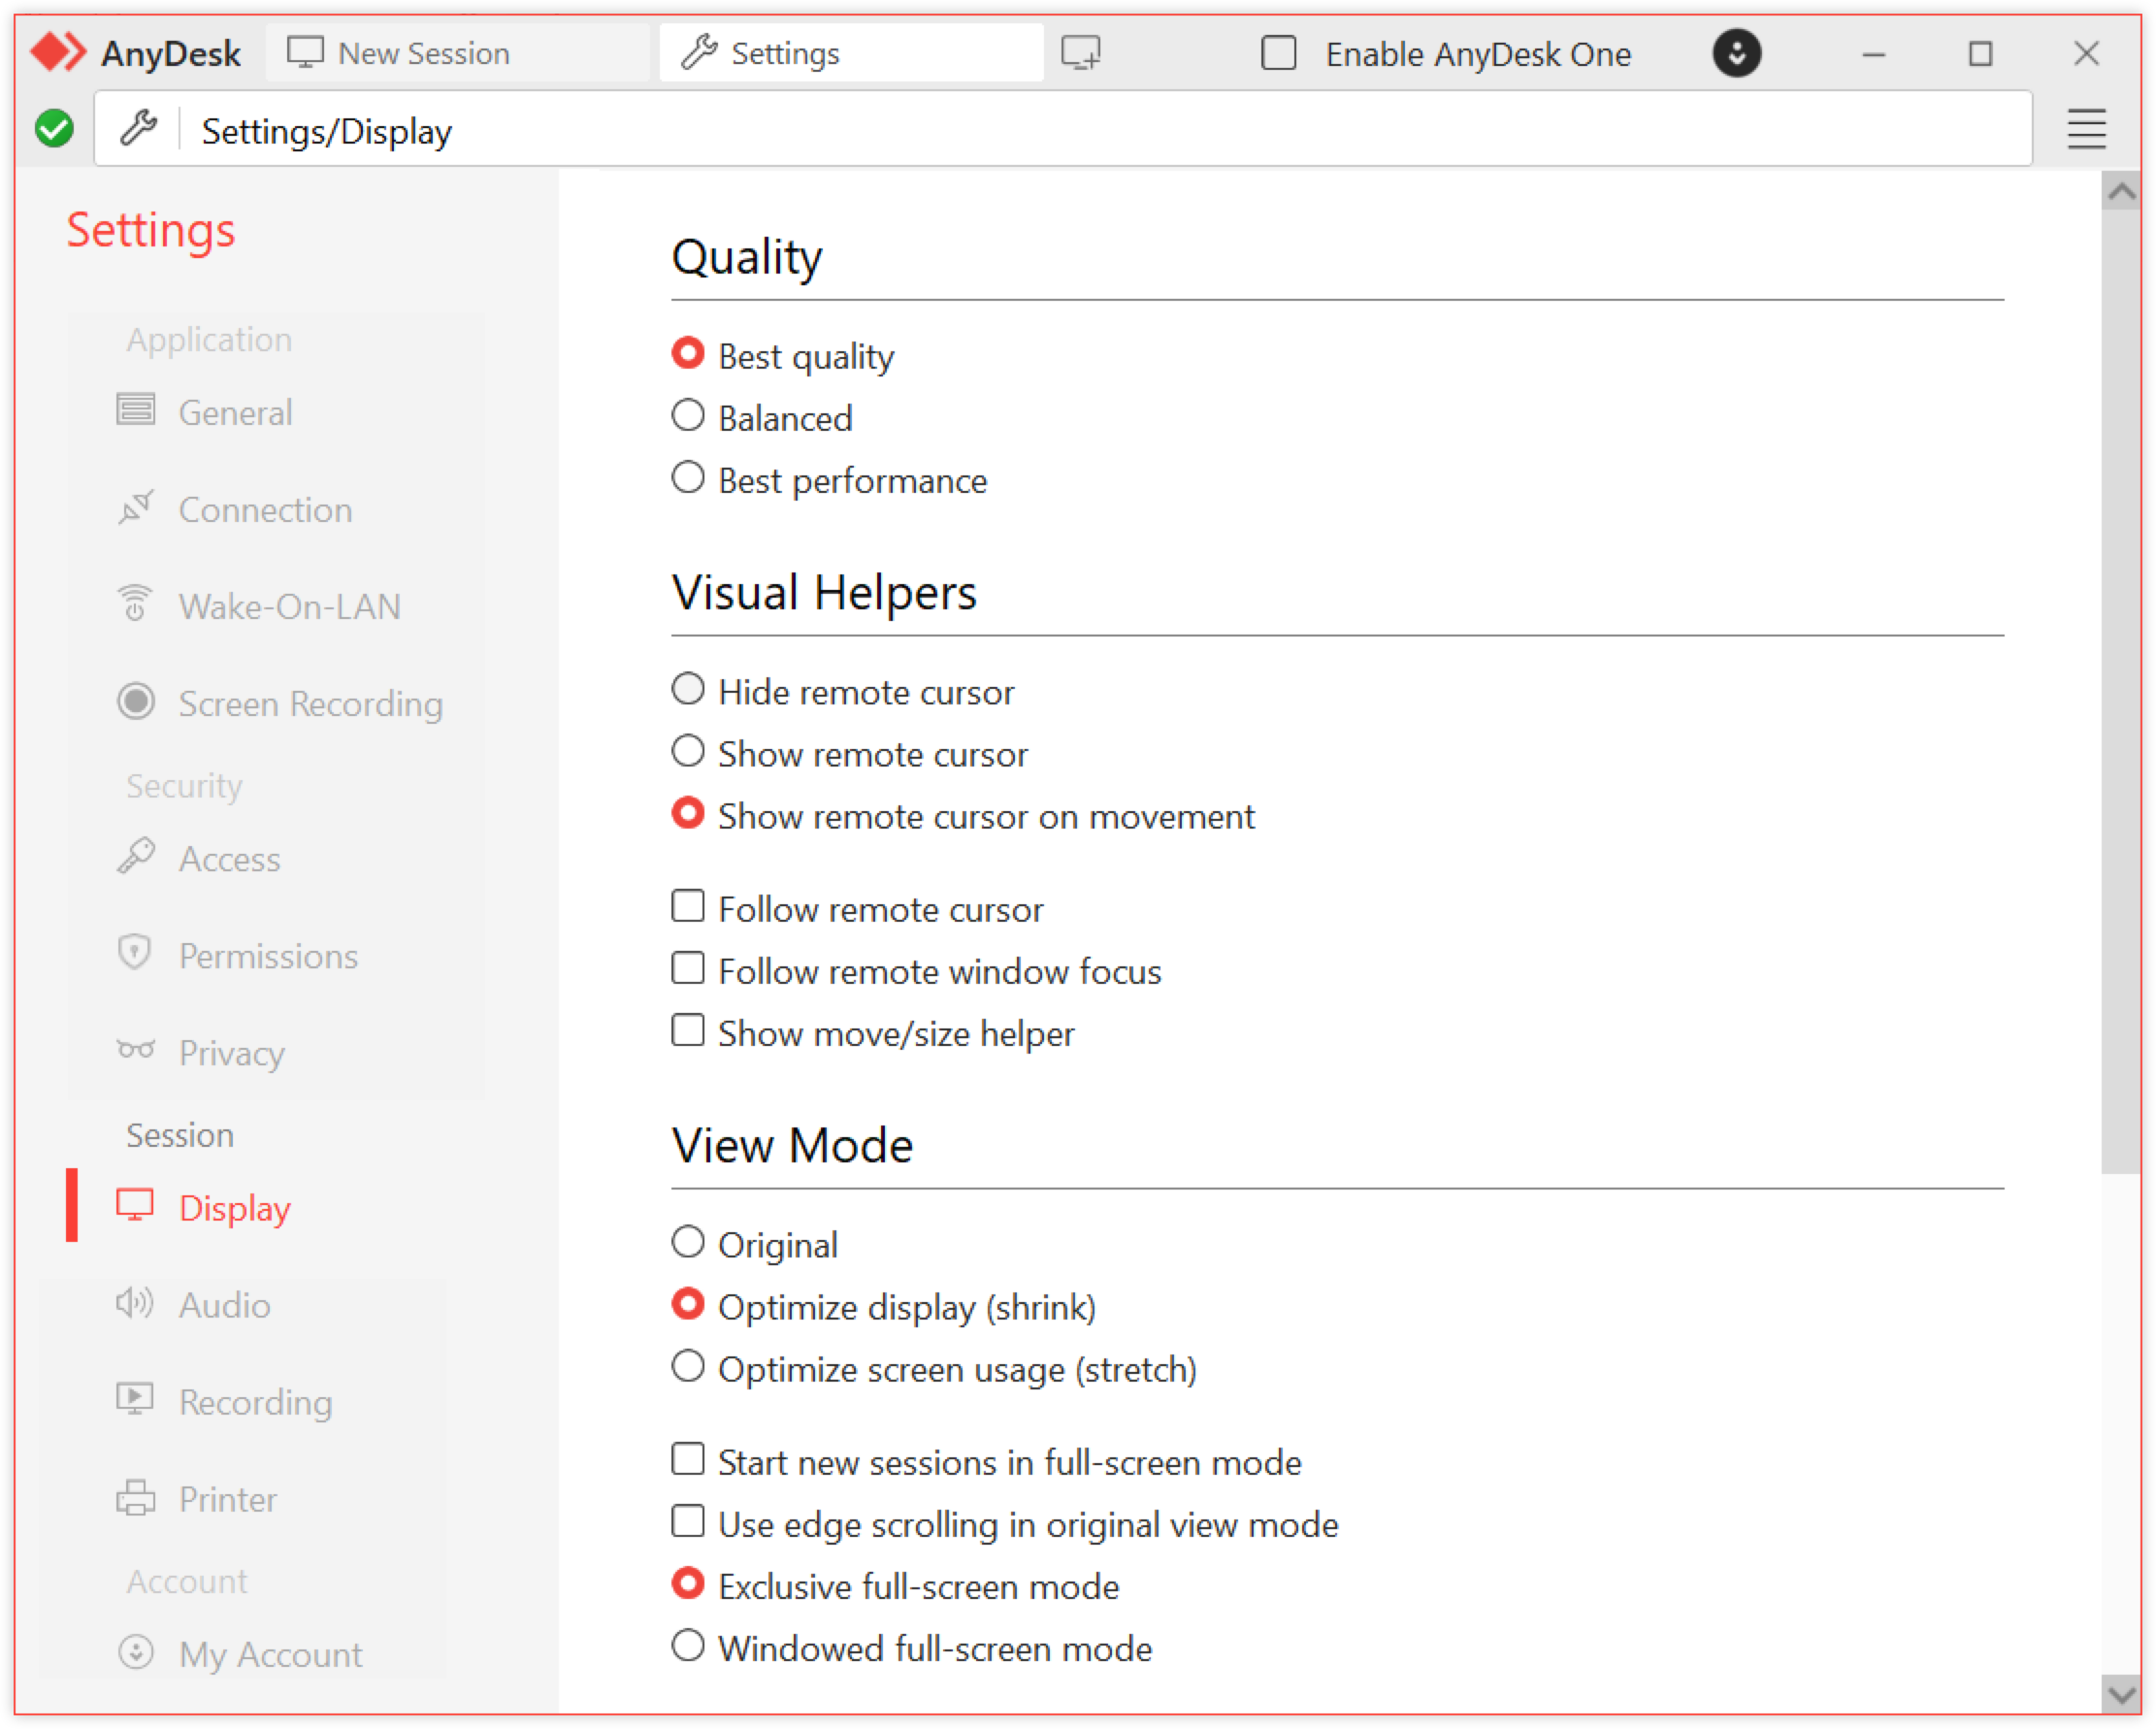
Quality
The Quality settings control image quality and speed based on your network and usage needs:
Best quality - maximizes image clarity and detail, ideal for design or media tasks. Requires a high-performance system and fast internet connection.
Balanced - provides a mix of image quality and performance. Recommended for general use.
Best performance - optimized for speed and low latency. Useful on slower connections or when fast interaction is needed. Recommended for slower networks or when quick interaction is needed.
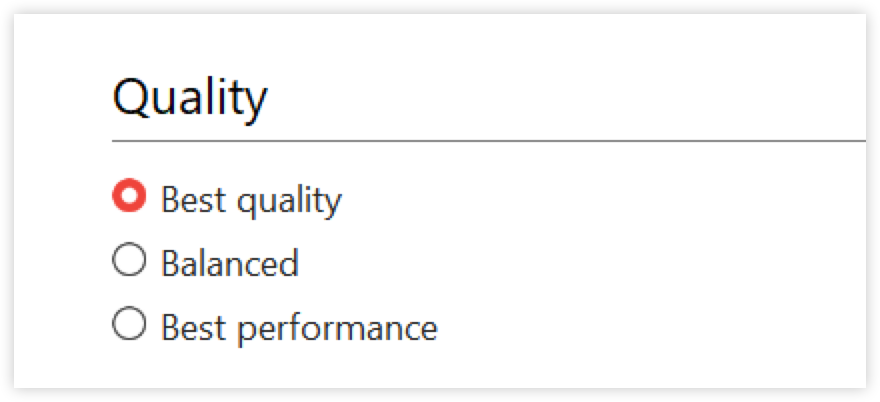
Visual Helpers
The Visual Helpers settings improve clarity and navigation during a remote session by enhancing cursor visibility and window interaction.
Remote cursor display - choose how the remote mouse cursor is shown:
Hide remote cursor - the cursor is not displayed.
Show remote cursor - always visible in the session.
Show remote cursor on movement - visible only when the Remote User moves the cursor.
Follow display behavior:
Follow remote cursor - automatically switches to the monitor where the remote cursor is located.
Follow remote window focus - follows the window currently in focus on the remote side.
Show move/size helper - select the checkbox to highlight windows being moved or resized with a visible border, making them easier to track.
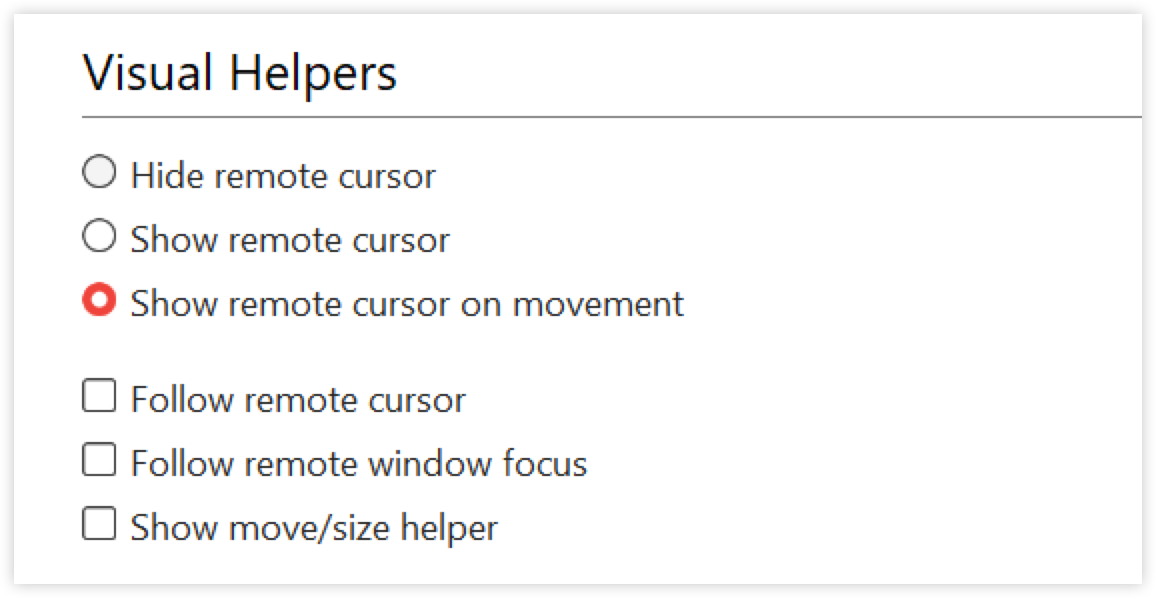
View Mode
The View Mode settings define how the remote screen appears on your local device during a session.
You can choose from the following options:
Original - shows the remote screen in its actual size. Use edge scrolling to navigate if the resolution exceeds your local display.
Optimize display (shrink) - scales down the remote screen to fit within the local window without stretching.
Optimize screen usage (stretch) - scales the remote screen to fill the local window, which may distort the aspect ratio.
Additional options:
Start new sessions in full-screen mode - automatically turn on full-screen when a session begins.
Use edge scrolling in original view mode - enables scrolling when viewing in original size and the remote screen is larger than your window.
Exclusive full-screen mode - hides your local taskbar and interface elements. Required for Direct3D rendering.
Windowed full-screen mode - enters full-screen without hiding local interface elements. Recommended for multi-monitor setups.
Hardware Acceleration
The Hardware Acceleration settings define how the remote image is rendered locally.
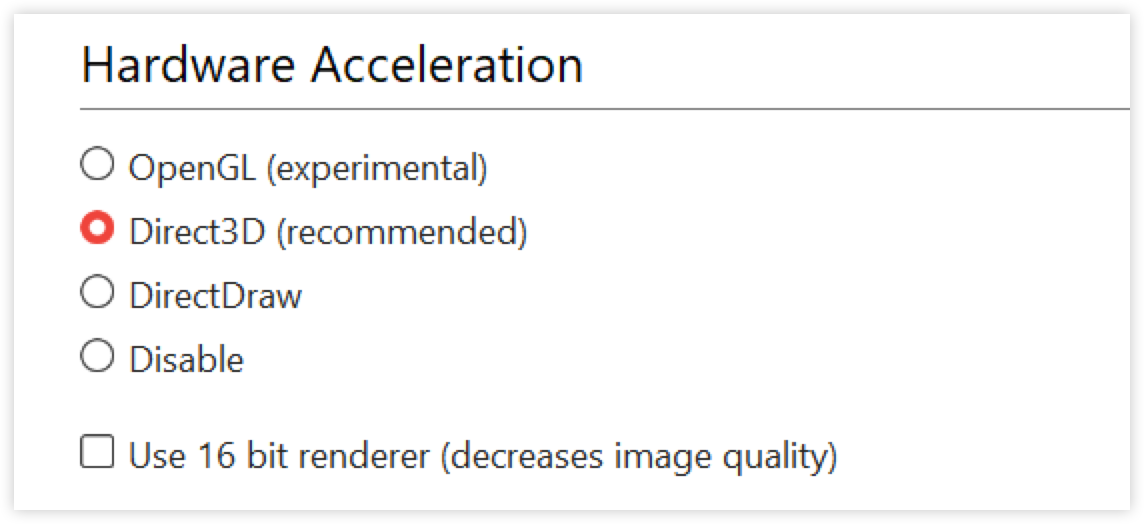
Select a rendering method based on your system and performance needs:
Direct3D (recommended) - uses GPU acceleration for smooth performance. Enables exclusive fullscreen mode (AnyDesk minimizes if focus is lost). Default on Windows.
DirectDraw - suitable for systems with multiple monitors. Offers good compatibility and performance. Use when Direct3D causes disruptions.
OpenGL (experimental) - advanced option for testing alternative rendering. May not be stable on all systems.
Disable - turns off hardware acceleration. Use only if the other options cause display issues.
To optimize rendering:
Close or minimize other GPU-intensive applications (e.g., video players).
Use fullscreen to prioritize GPU resources for AnyDesk.
On legacy systems (Windows XP, Windows 7 without Aero), consider installing the Mirror Driver to boost performance.
Individual Settings
Controls how display settings are applied during remote sessions.
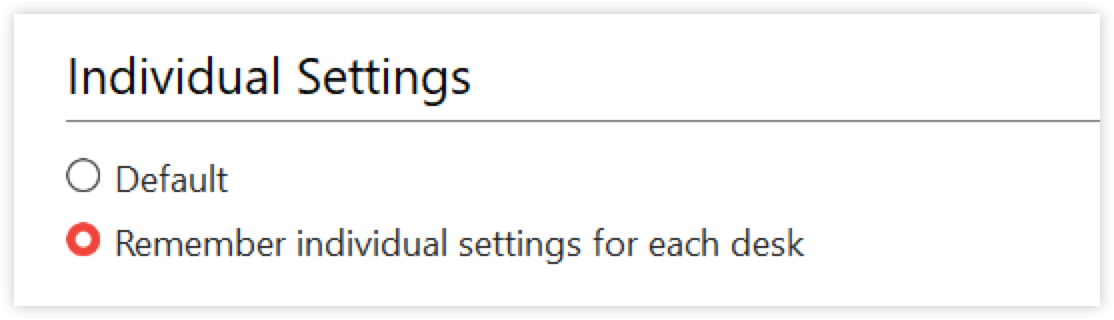
Default - uses the same display settings for all connections.
Remember individual settings for each desk - saves display preferences separately for each remote device.
This helps maintain custom configurations when connecting to multiple devices.
In-session display settings
You can adjust session display settings in real time using the session toolbar. These options help optimize visibility, performance, and workflow based on local and remote system characteristics.
To access display menu during the session:
During an active remote session, click
 in the session’s toolbar.
Use the session toolbar’s display menu to adjust display behavior in real time:
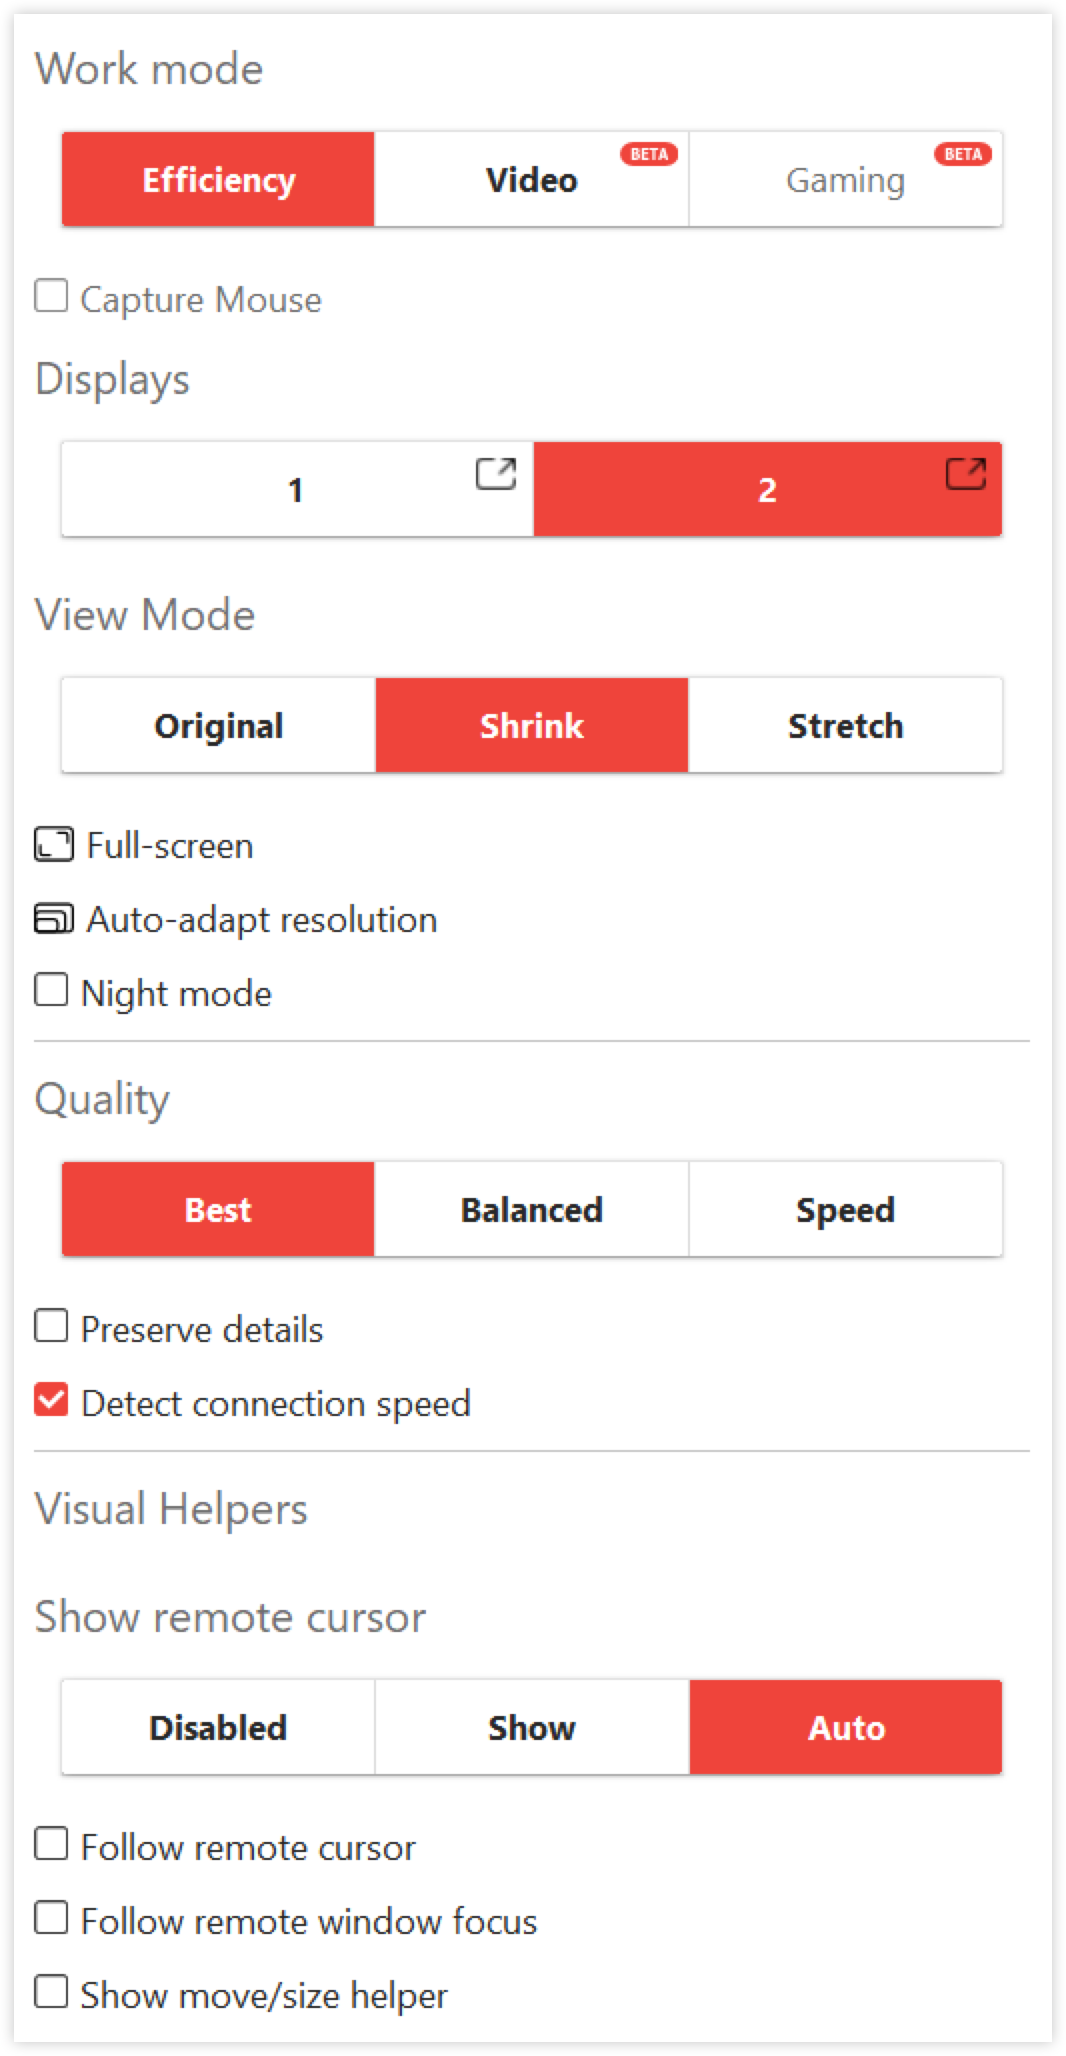
Work mode (Windows only) - provides pre-configured display profiles tailored to specific tasks. Each profile is designed to optimize visual performance for different use cases.
Efficiency (default) - optimized for general tasks.
Video (Beta) - smooths media playback.
Gaming (Beta) - adds Mouse Capture for immersive 3D interaction.
Capture mouse - select the checkbox to enable full remote control of the cursor. During mouse capture, the local mouse becomes inactive. To release, press CTRL + ALT + SHIFT + SPACE.
Displays (multi-display support) - switch between remote monitors. To open display in a new window, click
 ; available for AnyDesk 9.5+.
 View Mode - select either Original, Shrink, or Stretch.
Fullscreen - toggles based on renderer mode.
Auto-adapt resolution - adjusts remote resolution to fit your window. Remote settings are restored after session ends.
Night mode - inverts colors locally to reduce eye strain. This only affects the visual display, not the remote system itself.
Fullscreen mode
AnyDesk for Windows supports two types of fullscreen, depending on the hardware acceleration selected.
Direct3D (exclusive fullscreen)
When Direct3D is selected in Settings > Display > Hardware Acceleration, it provides the best performance by dedicating the GPU to AnyDesk.
However, only one display can be fullscreen at a time, and the session minimizes when losing focus.
Hover over the top edge of the screen during fullscreen to access:

Icon | Name | Description |
Monitor switcher | Toggle between remote displays. | |
| Minimize button | Temporarily hide the AnyDesk window. |
| Exit fullscreen | Return to windowed mode. |
| Session settings | Access Actions and Permissions via the dropdown menu. |
DirectDraw/OpenGL (windowed fullscreen)
When DirectDraw or OpenGL is selected in Settings > Display > Hardware Acceleration, it allows multiple monitors to run in parallel without interruption. The session behaves like a maximized window, retaining stability even if focus shifts.
The menu bar offers the same functions as with Direct3D:

Icon | Name | Description |
| Monitor switcher | Toggle between remote displays. |
| Exit fullscreen | Return to windowed mode. |
| Session settings | Access Actions and Permissions via the dropdown menu. |