License: Ultimate-Cloud
Relevant for: License owner
In the my.anydesk II management console, you can configure your organization. Only users you add and who know your organization ID will be able to sign in and access organization.
🦉 For more details on how to set up SSO, see this article.
Setting up an Organization
As the license owner, you are responsible for setting up your organization, adding users, and assigning feature access within my.anydesk II.
To set up an organization:
Open the email from my.anydesk II and follow the verification link to set your password.
Create a password for your account and click Continue.
On the login page, enter your credentials and click Sign in.
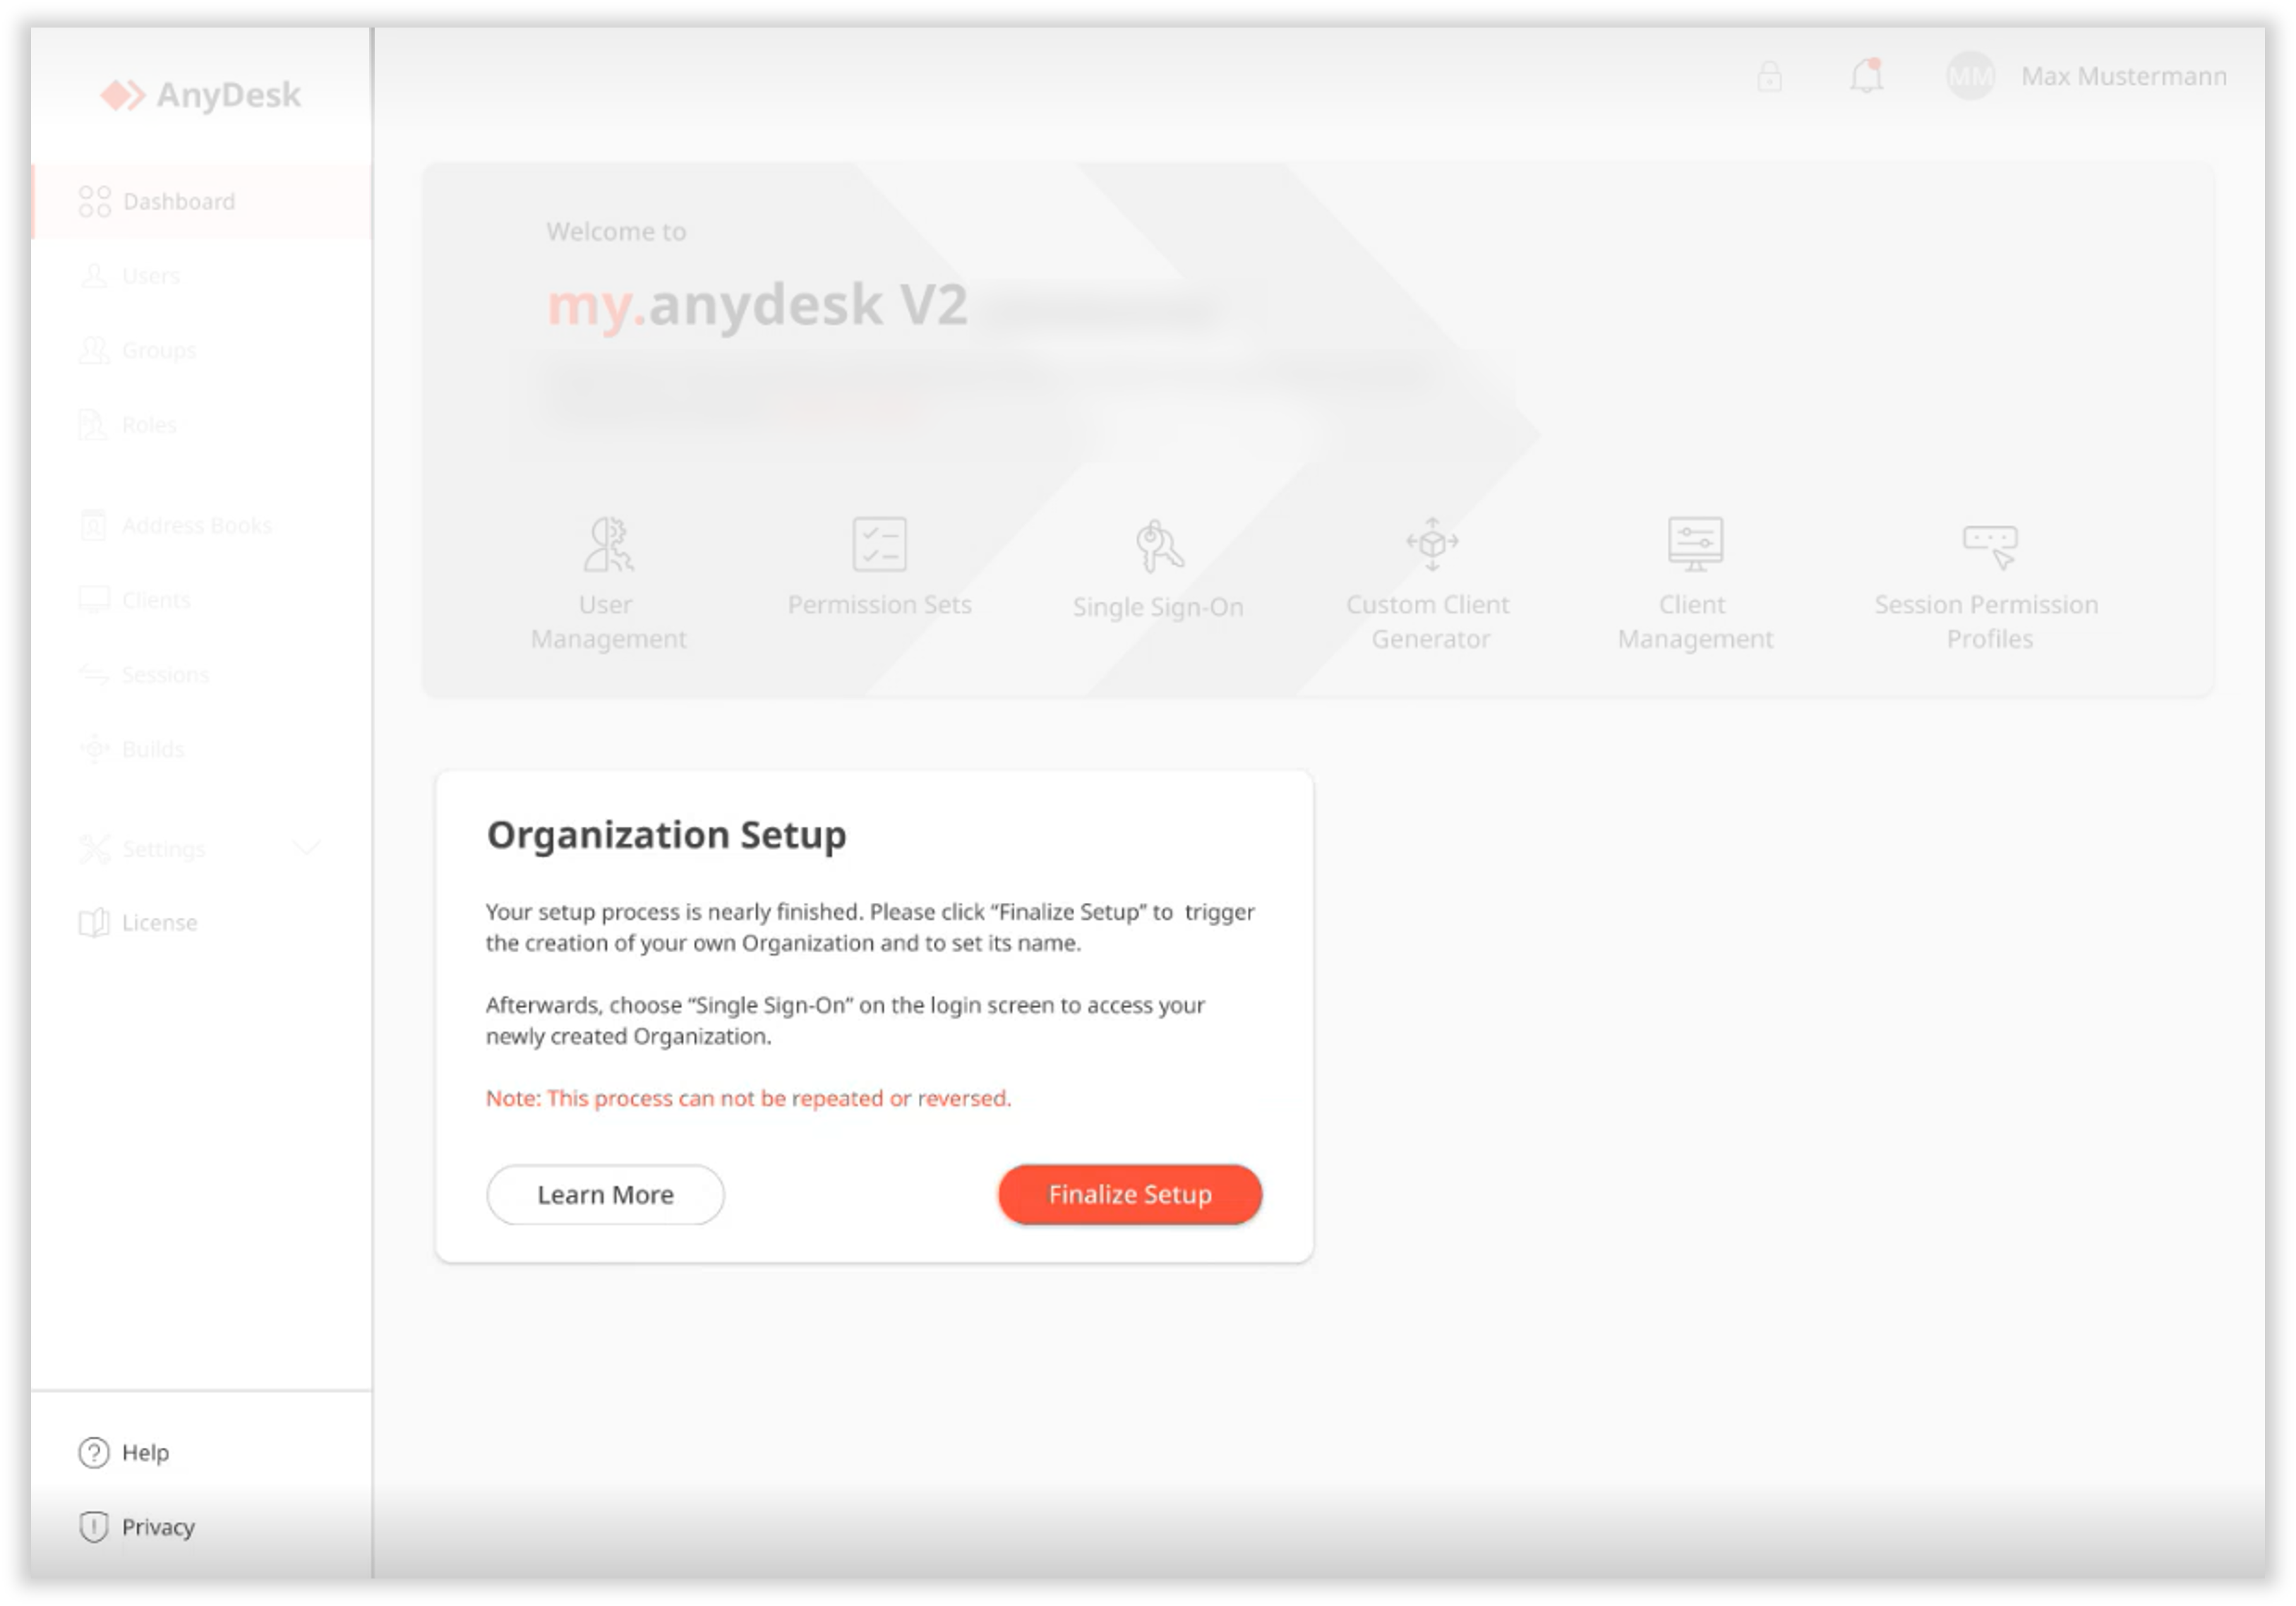
Go to the Organization Setup window, click Finalize Setup. Enter a name for your organization. This name will be used for signing in via SSO.
Click Create Organization.
In the Save Private Key window, click
 to copy the Private Key,
  to save it to your device, select the checkbox and only after that, click Continue.
⚠️ Private Key is generated only once and cannot be recovered. We kindly ask you to securely store your Private Key. For details on the Private Key and Dynamic client management, see this article.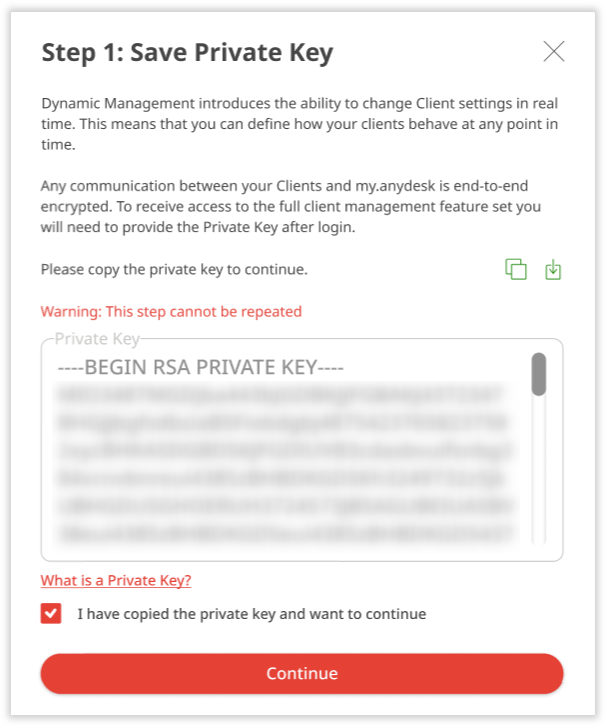
Check your email for an access link to your organization.
Once the setup is complete, you can sign in to my.anydesk II using your organization ID. You can also manage users and assign permissions for feature access.
🦉 For more details on user management, see this article.
Manage Organization settings
You can update your organization name, industry, description, central management setting, and connection policy.
To manage organization settings:
Sign in to my.anydesk II.
Go to Settings > Organization.
On the Organization page, update the required settings:
⚠️ The Organization ID cannot be changed. It is created when the organization is set up and is used for SSO sign-in.Name - enter a name for your organization.
Central Management - turn on this option to modify client settings without redeploying clients.
Industry - enter the organization’s industry.
Description - enter a short description of the organization.
Connection Policy - select how devices under your license can connect to, or receive connections from, devices under other licenses.
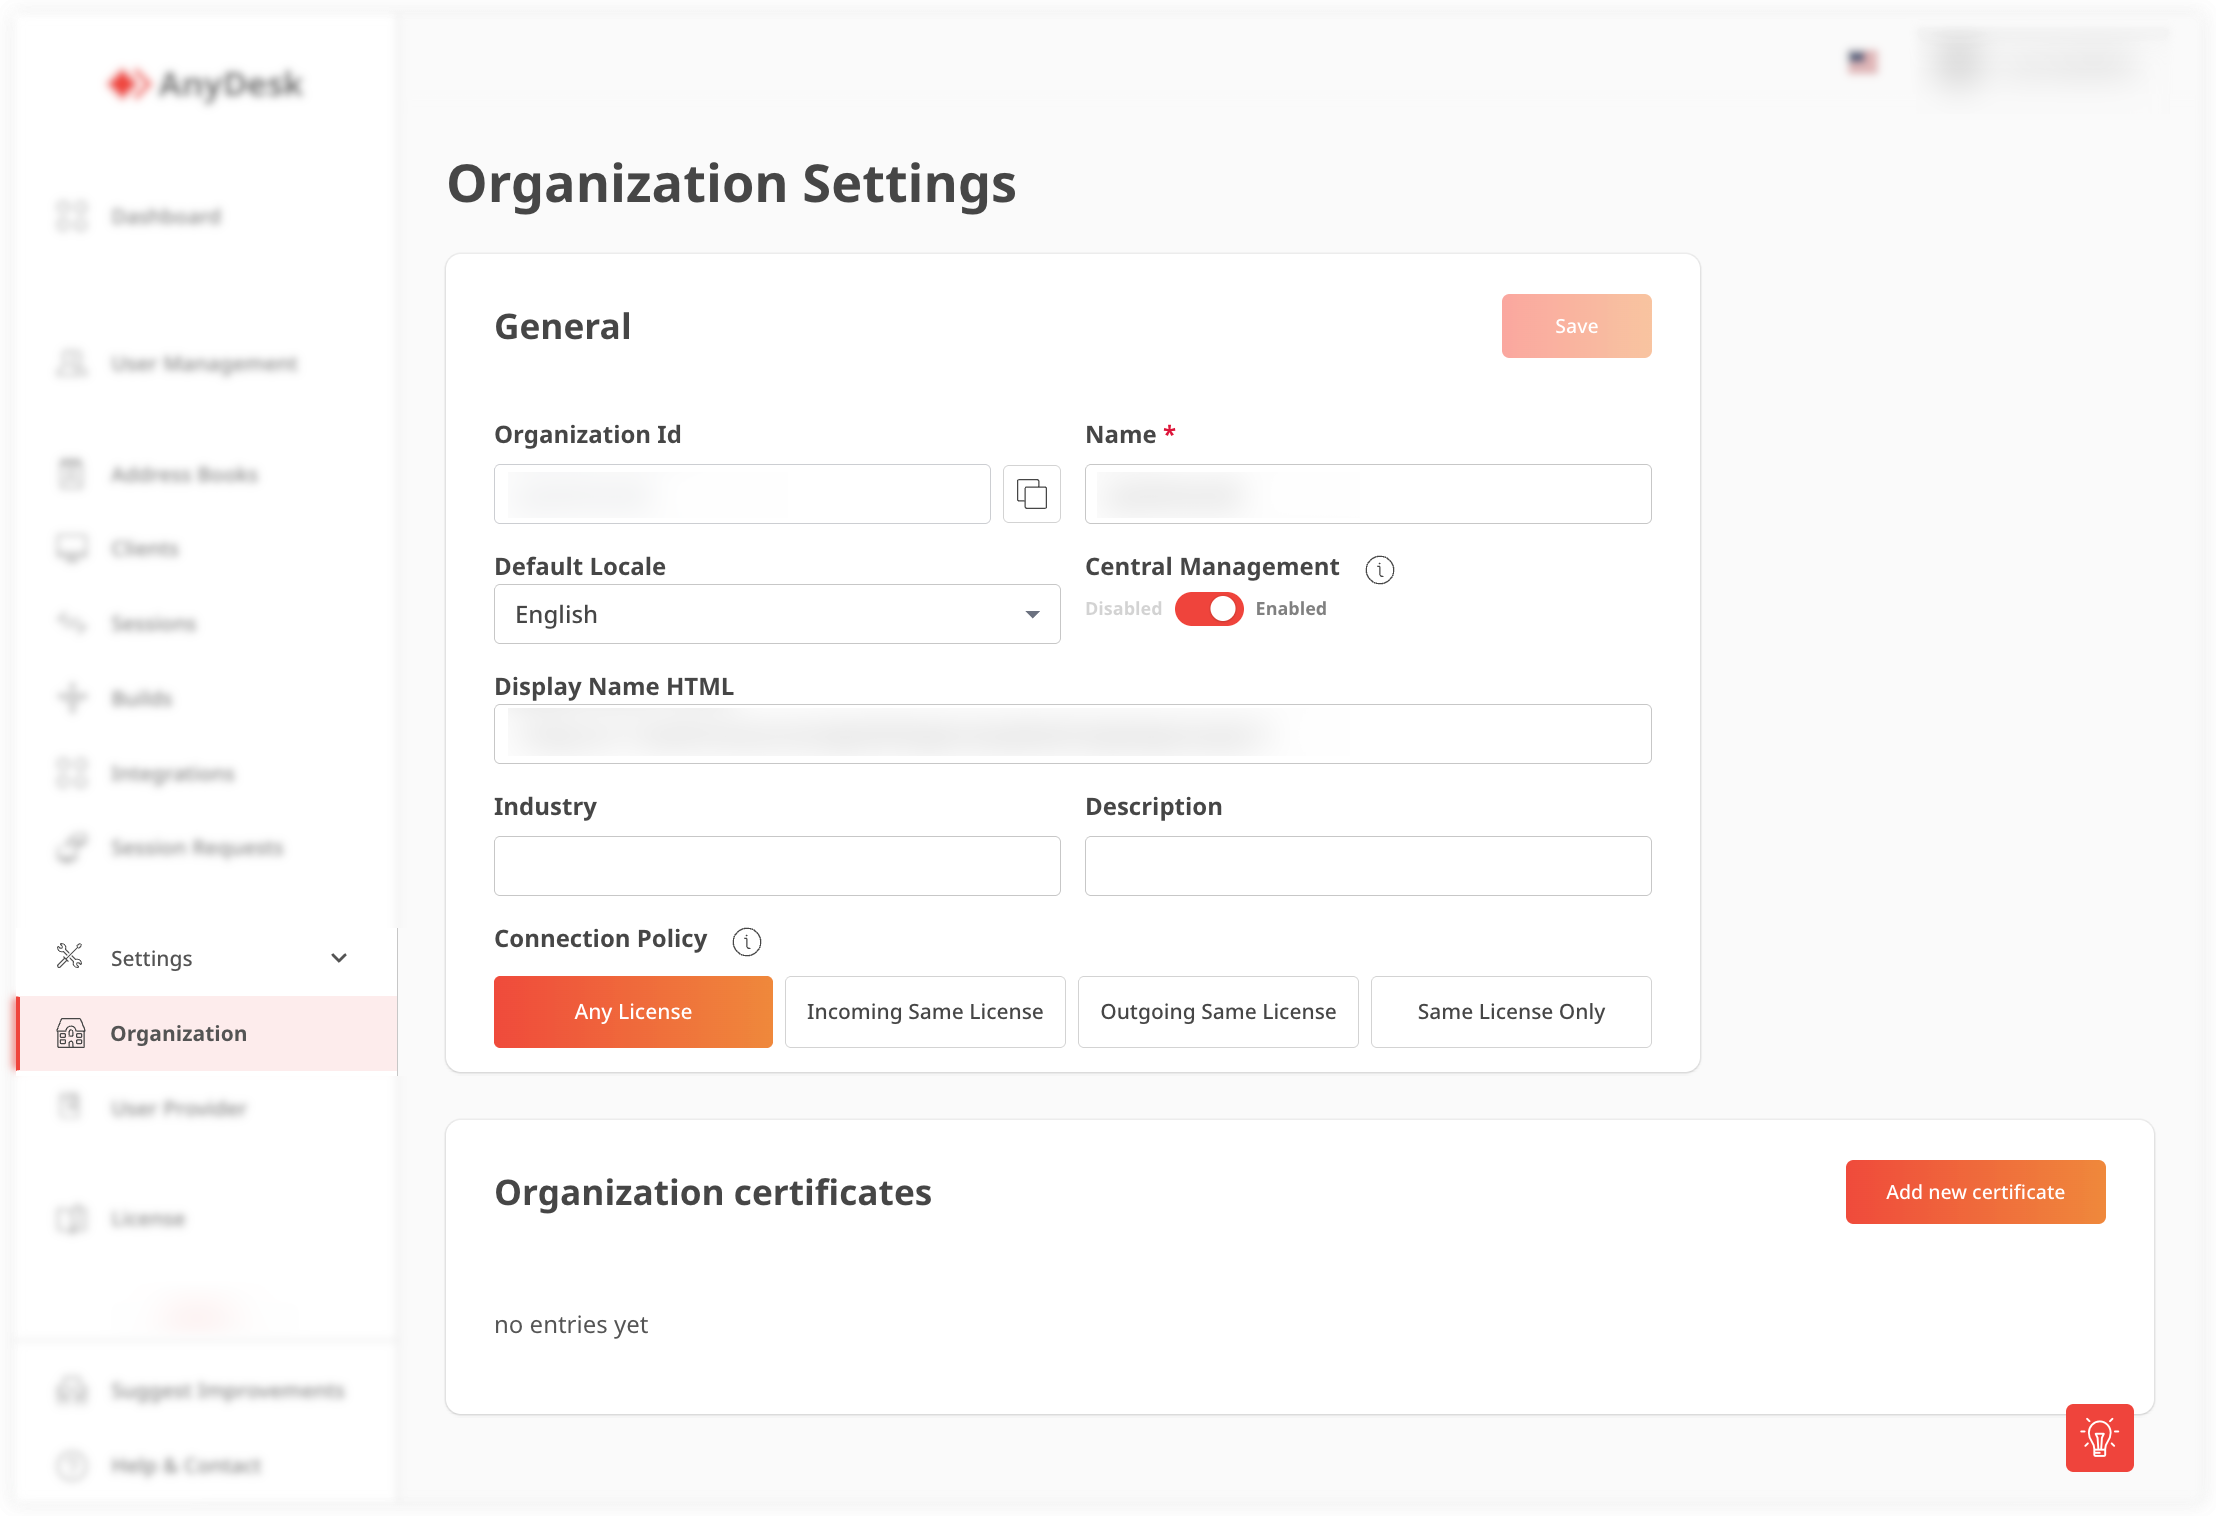
Click Save.
Connection Policy options
Option | Description |
Any License | Devices can start and receive connections with devices under any license. |
Incoming Same License | Devices can receive connections only from devices under the same license. |
Outgoing Same License | Devices can start connections only to devices under the same license. |
Same License Only | Devices can start and receive connections only with devices under the same license. |