You can customize AnyDesk to fit your needs using a variety of available settings.
To open AnyDesk Client Settings:
Open the AnyDesk app on your device.
In the upper-right corner, click
.png) and select Settings.
and select Settings. Choose a category from a menu.
Settings in the AnyDesk client are grouped into categories for easier navigation:
Category | Description | |
| Configure general app behavior, connection preferences, Screen Recording, and Wake-on-LAN settings. | |
| Set up Interactive and Unattended Access, permission profiles, privacy settings, and Access Control List rules. | |
| Manage display, audio, recording, and Remote Printing settings used during active remote sessions. | |
| View or change your license key, Alias, and desk preview image. | |
.png)
.png)
.png)
In this article, find detailed information on each setting category.
Application
Learn how to configure general app behavior, connection preferences, screen recording, and Wake-on-LAN settings.
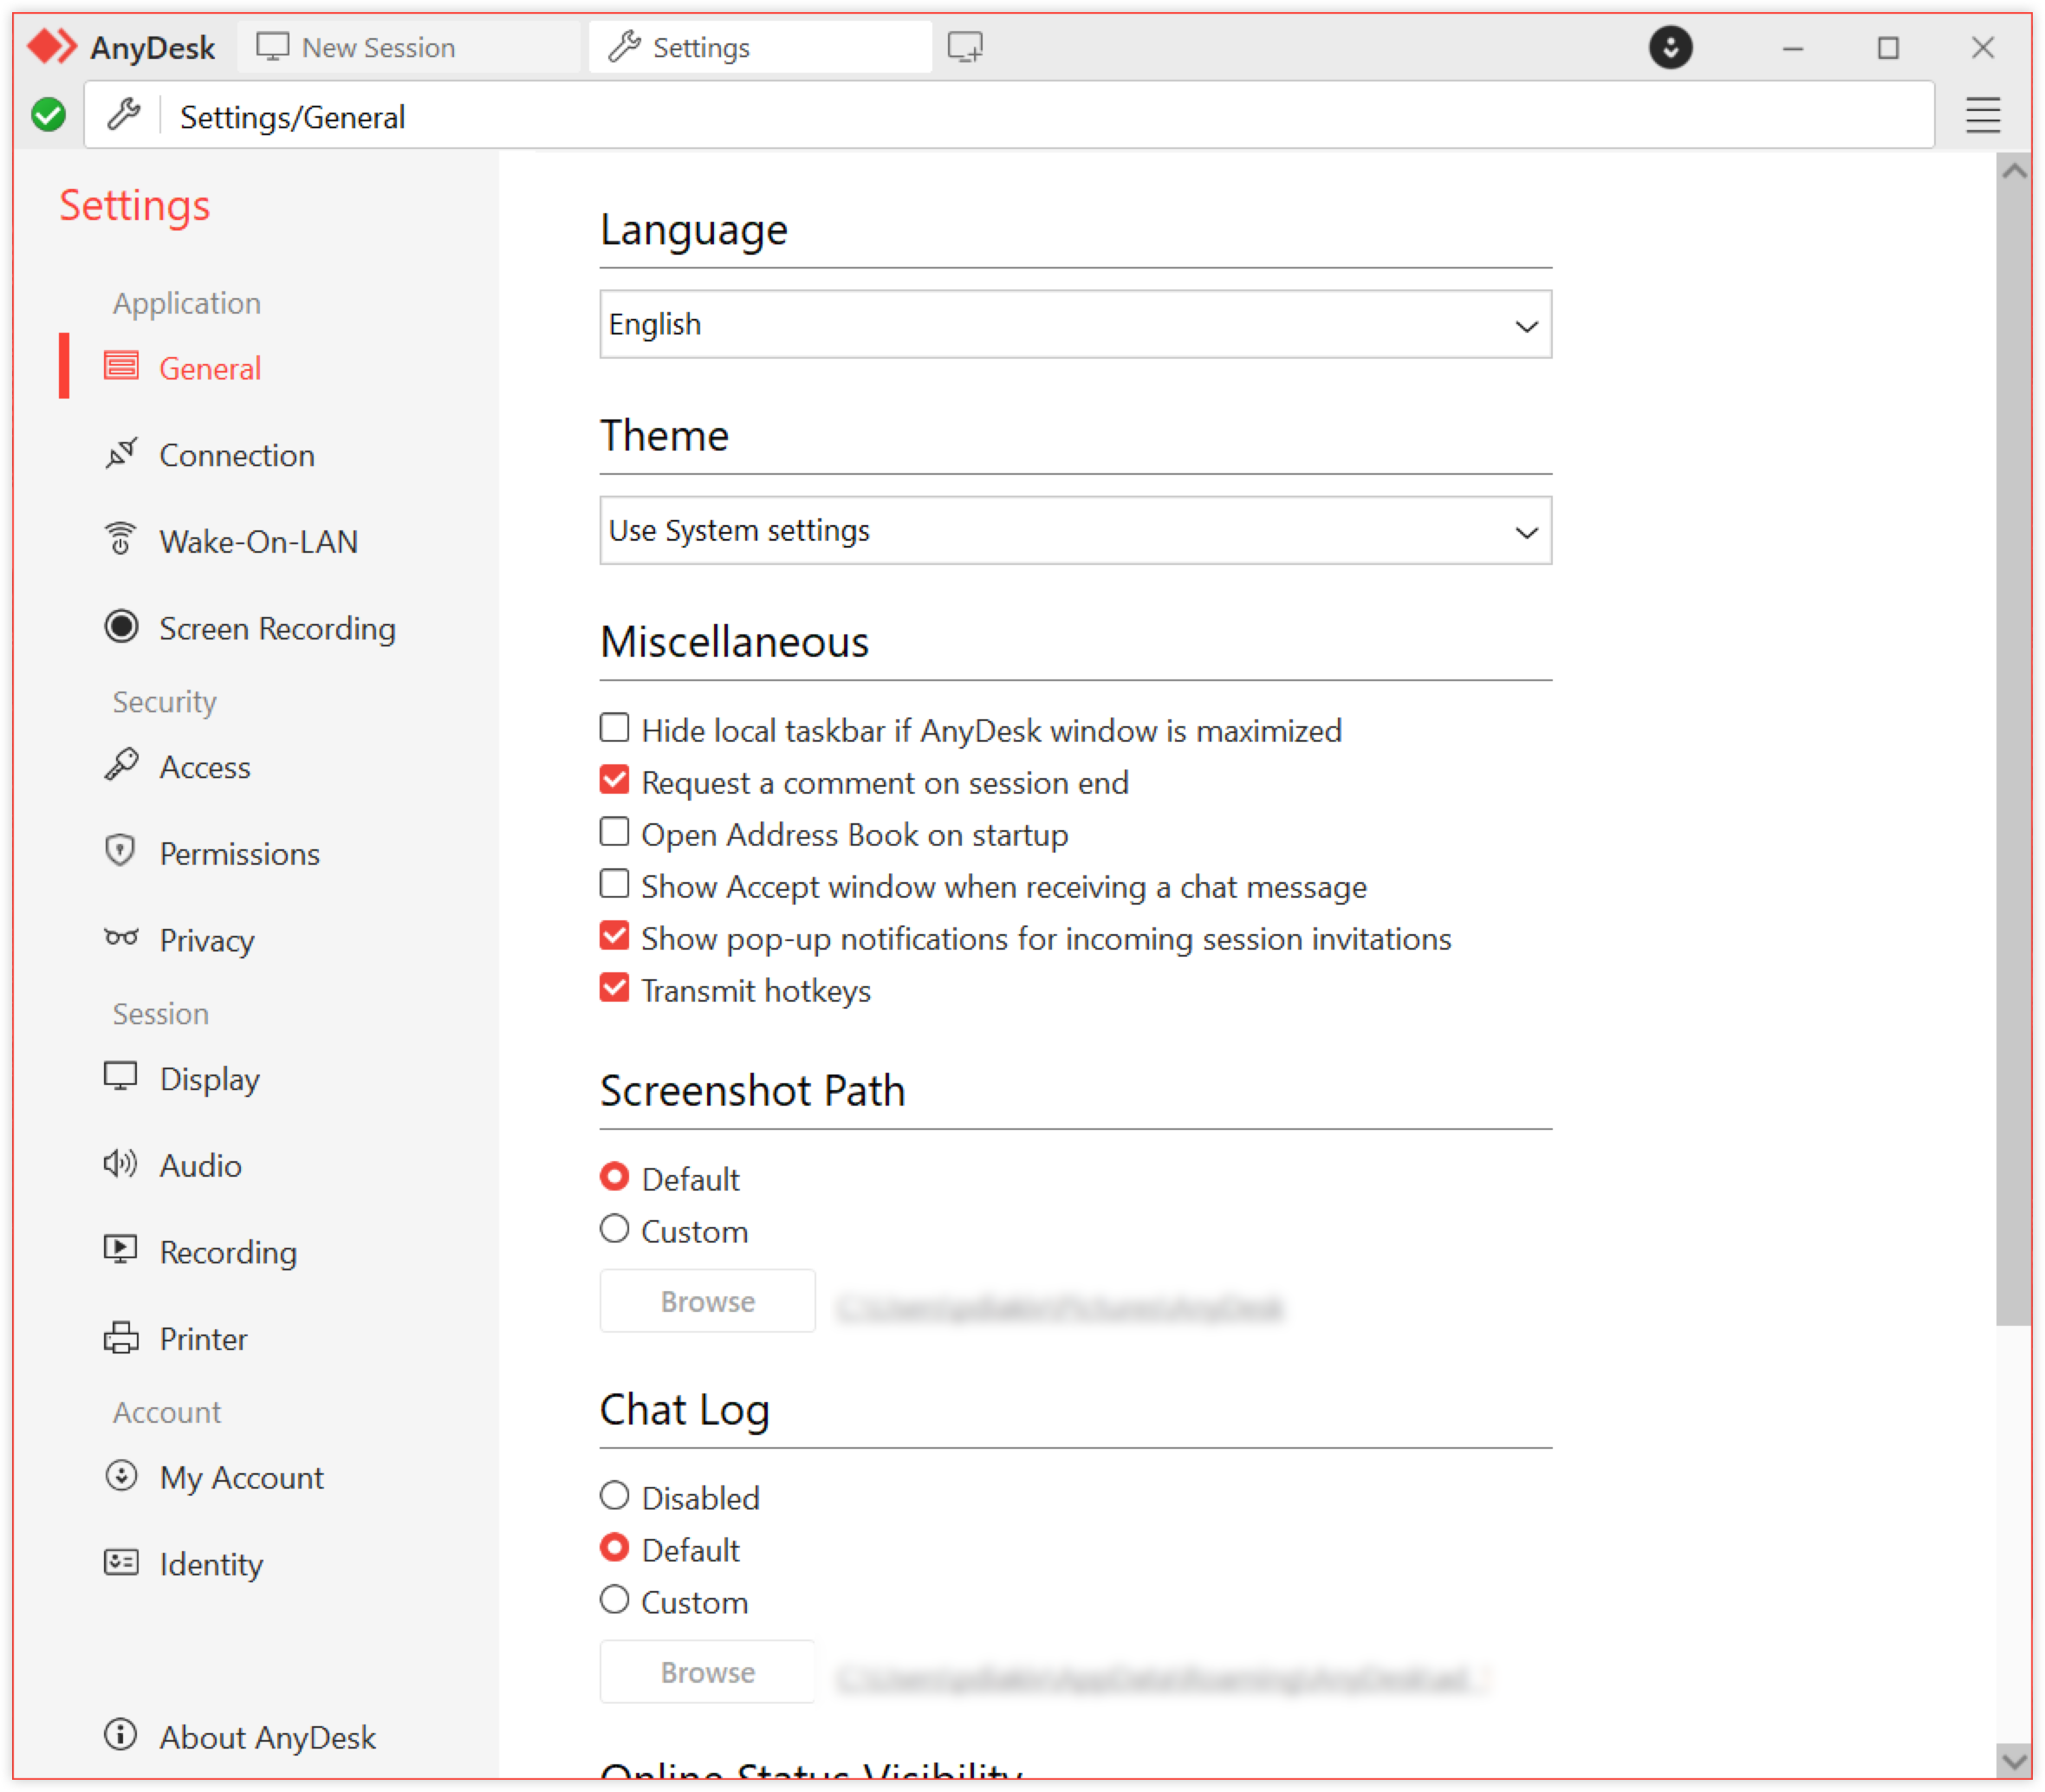
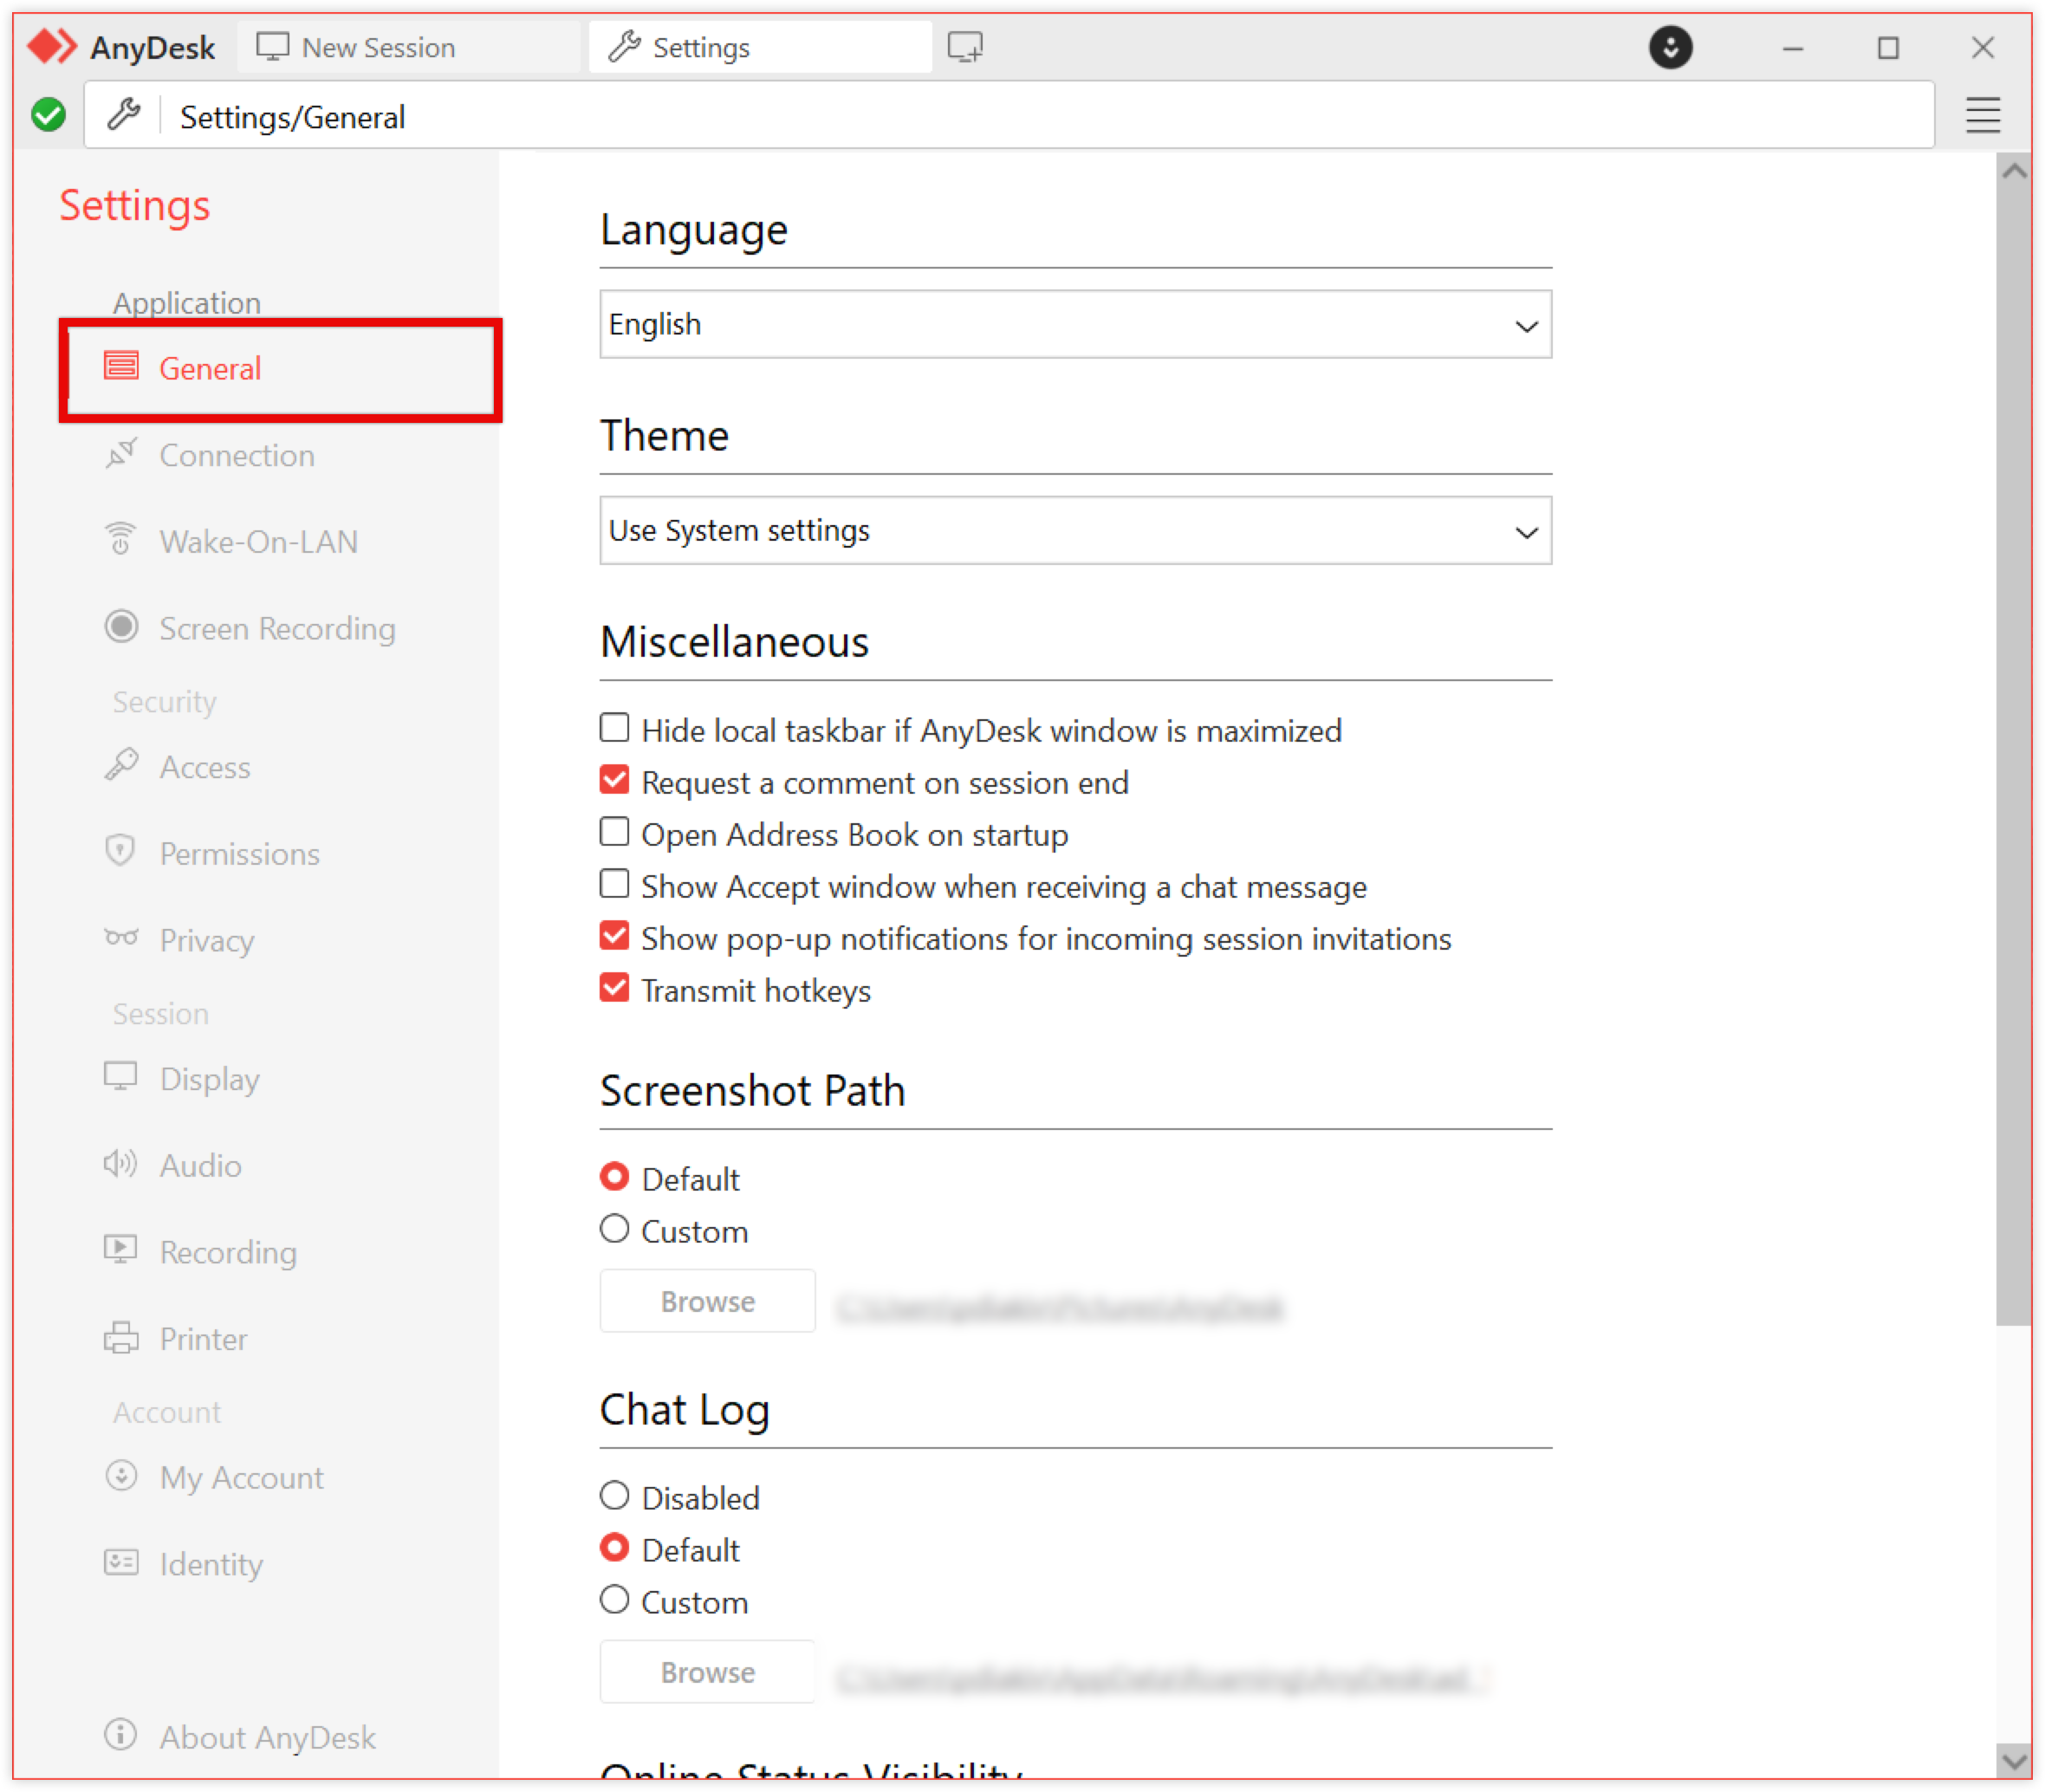
General
The General section in AnyDesk settings allows you to customize application behavior, session preferences, and data storage.
Configure the followings settings:
Language - select the interface language from the dropdown list.
Theme (Windows) - switch between light, dark, or system theme.
Keyboard (macOS) - control how keyboard input is handled during remote sessions.
Transmit keyboard shortcuts - enables the transmission of system-level shortcuts (such as Command or Ctrl+Alt+Del) to the remote device.
Use Right Command as a Host Key - the right Command key acts as a host key to trigger local shortcuts.
Accept all remote keyboard shortcuts - if enabled, AnyDesk accepts all shortcuts from the remote side, overriding local ones.
Miscellaneous - additional behavioral settings for Session Management and resolution handling.
Request a comment on session end - prompts the user to leave a comment when a session ends. You can then see the comments after session in my.anydesk.
Open Address Book on startup - automatically opens the address book when AnyDesk launches.
Transmit Original Resolution (Retina) - sends the full native resolution (e.g., Retina on Mac) to the remote device for optimal clarity.
Prevent display sleep in outgoing sessions - keeps the display on the local device active during an outgoing session to avoid interruptions.
Screenshot Path - specify the default save location for screenshots taken during sessions.
Default - saves screenshots to the predefined system location.
Custom - specify a custom directory by browsing to a preferred folder.
Chat Log - manage how chat logs are stored locally.
Disabled - turns off chat logging.
Default - saves chat logs in the default AnyDesk directory.
Custom - lets the user define a specific folder for chat log storage.
Online Status Visibility - select the Show remote clients' online status checkbox to display the online availability of other clients in your address book or recent connections.
Help Us Improve - select the Allow collection of usage data checkbox to allow AnyDesk to collect client, device, and network usage data to enhance product quality. This data is used only with your consent.
Connection
This section manages how AnyDesk communicates over networks, including direct connections, ports, and proxies. To modify the Connection settings, click ![]() at the top of the Connection section.
at the top of the Connection section.
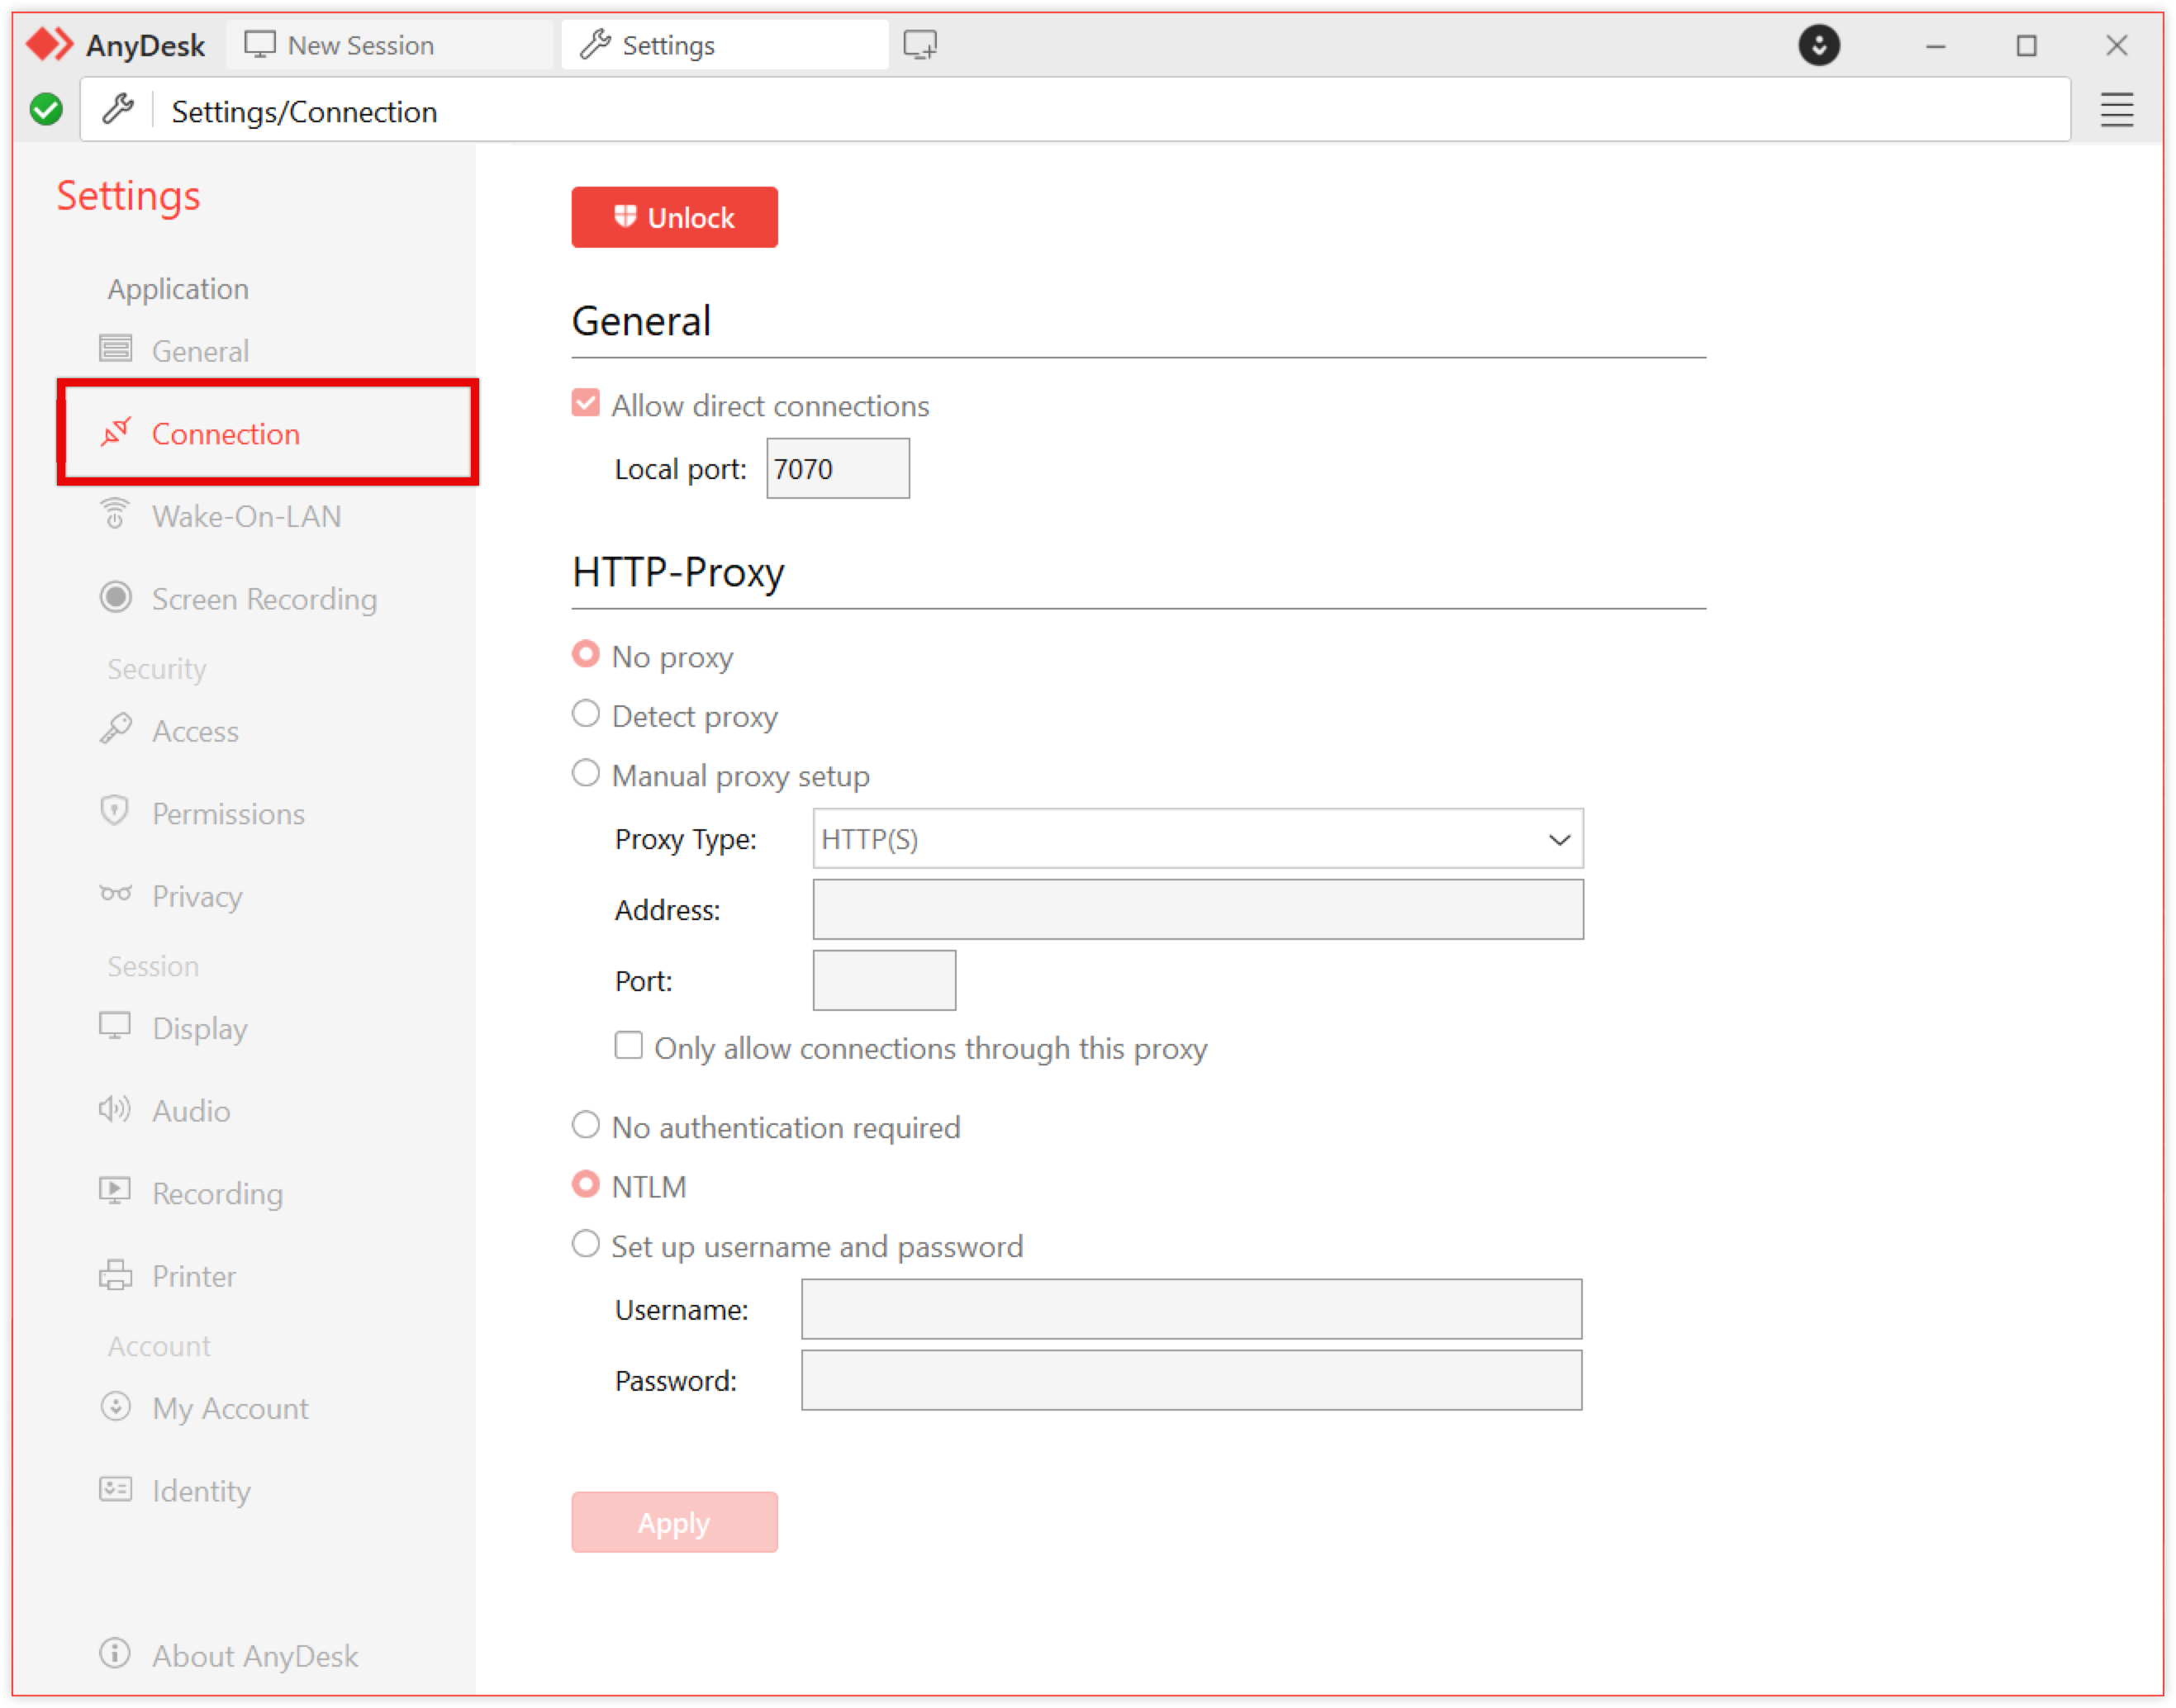
General
Allow direct connections - select the checkbox to allow faster, direct connections between clients. If disabled, sessions are routed through AnyDesk servers. All session data is end-to-end encrypted, regardless of connection type.
Local port - AnyDesk uses TCP port 7070 by default for direct connections. You can specify a custom port here.
HTTP-Proxy (Windows, macOS, Linux) - configure how the client connects through a proxy:
No proxy - connects directly without using a proxy.
Detect proxy - uses Proxy Auto-Config (PAC) to detect proxy settings.
Manual proxy setup - specify the proxy’s IP address, Port, and authentication details.
⚠️ The proxy must support the CONNECT method and must not interfere with SSL/TLS traffic.
NTLM Authentication - if you're using a proxy, AnyDesk supports NTLM authentication on Windows (v6.3 and later). This allows secure proxy login using your existing Windows domain credentials, without needing separate login details.
Wake-On-LAN
Configure remote wake via Wake‑On‑LAN.
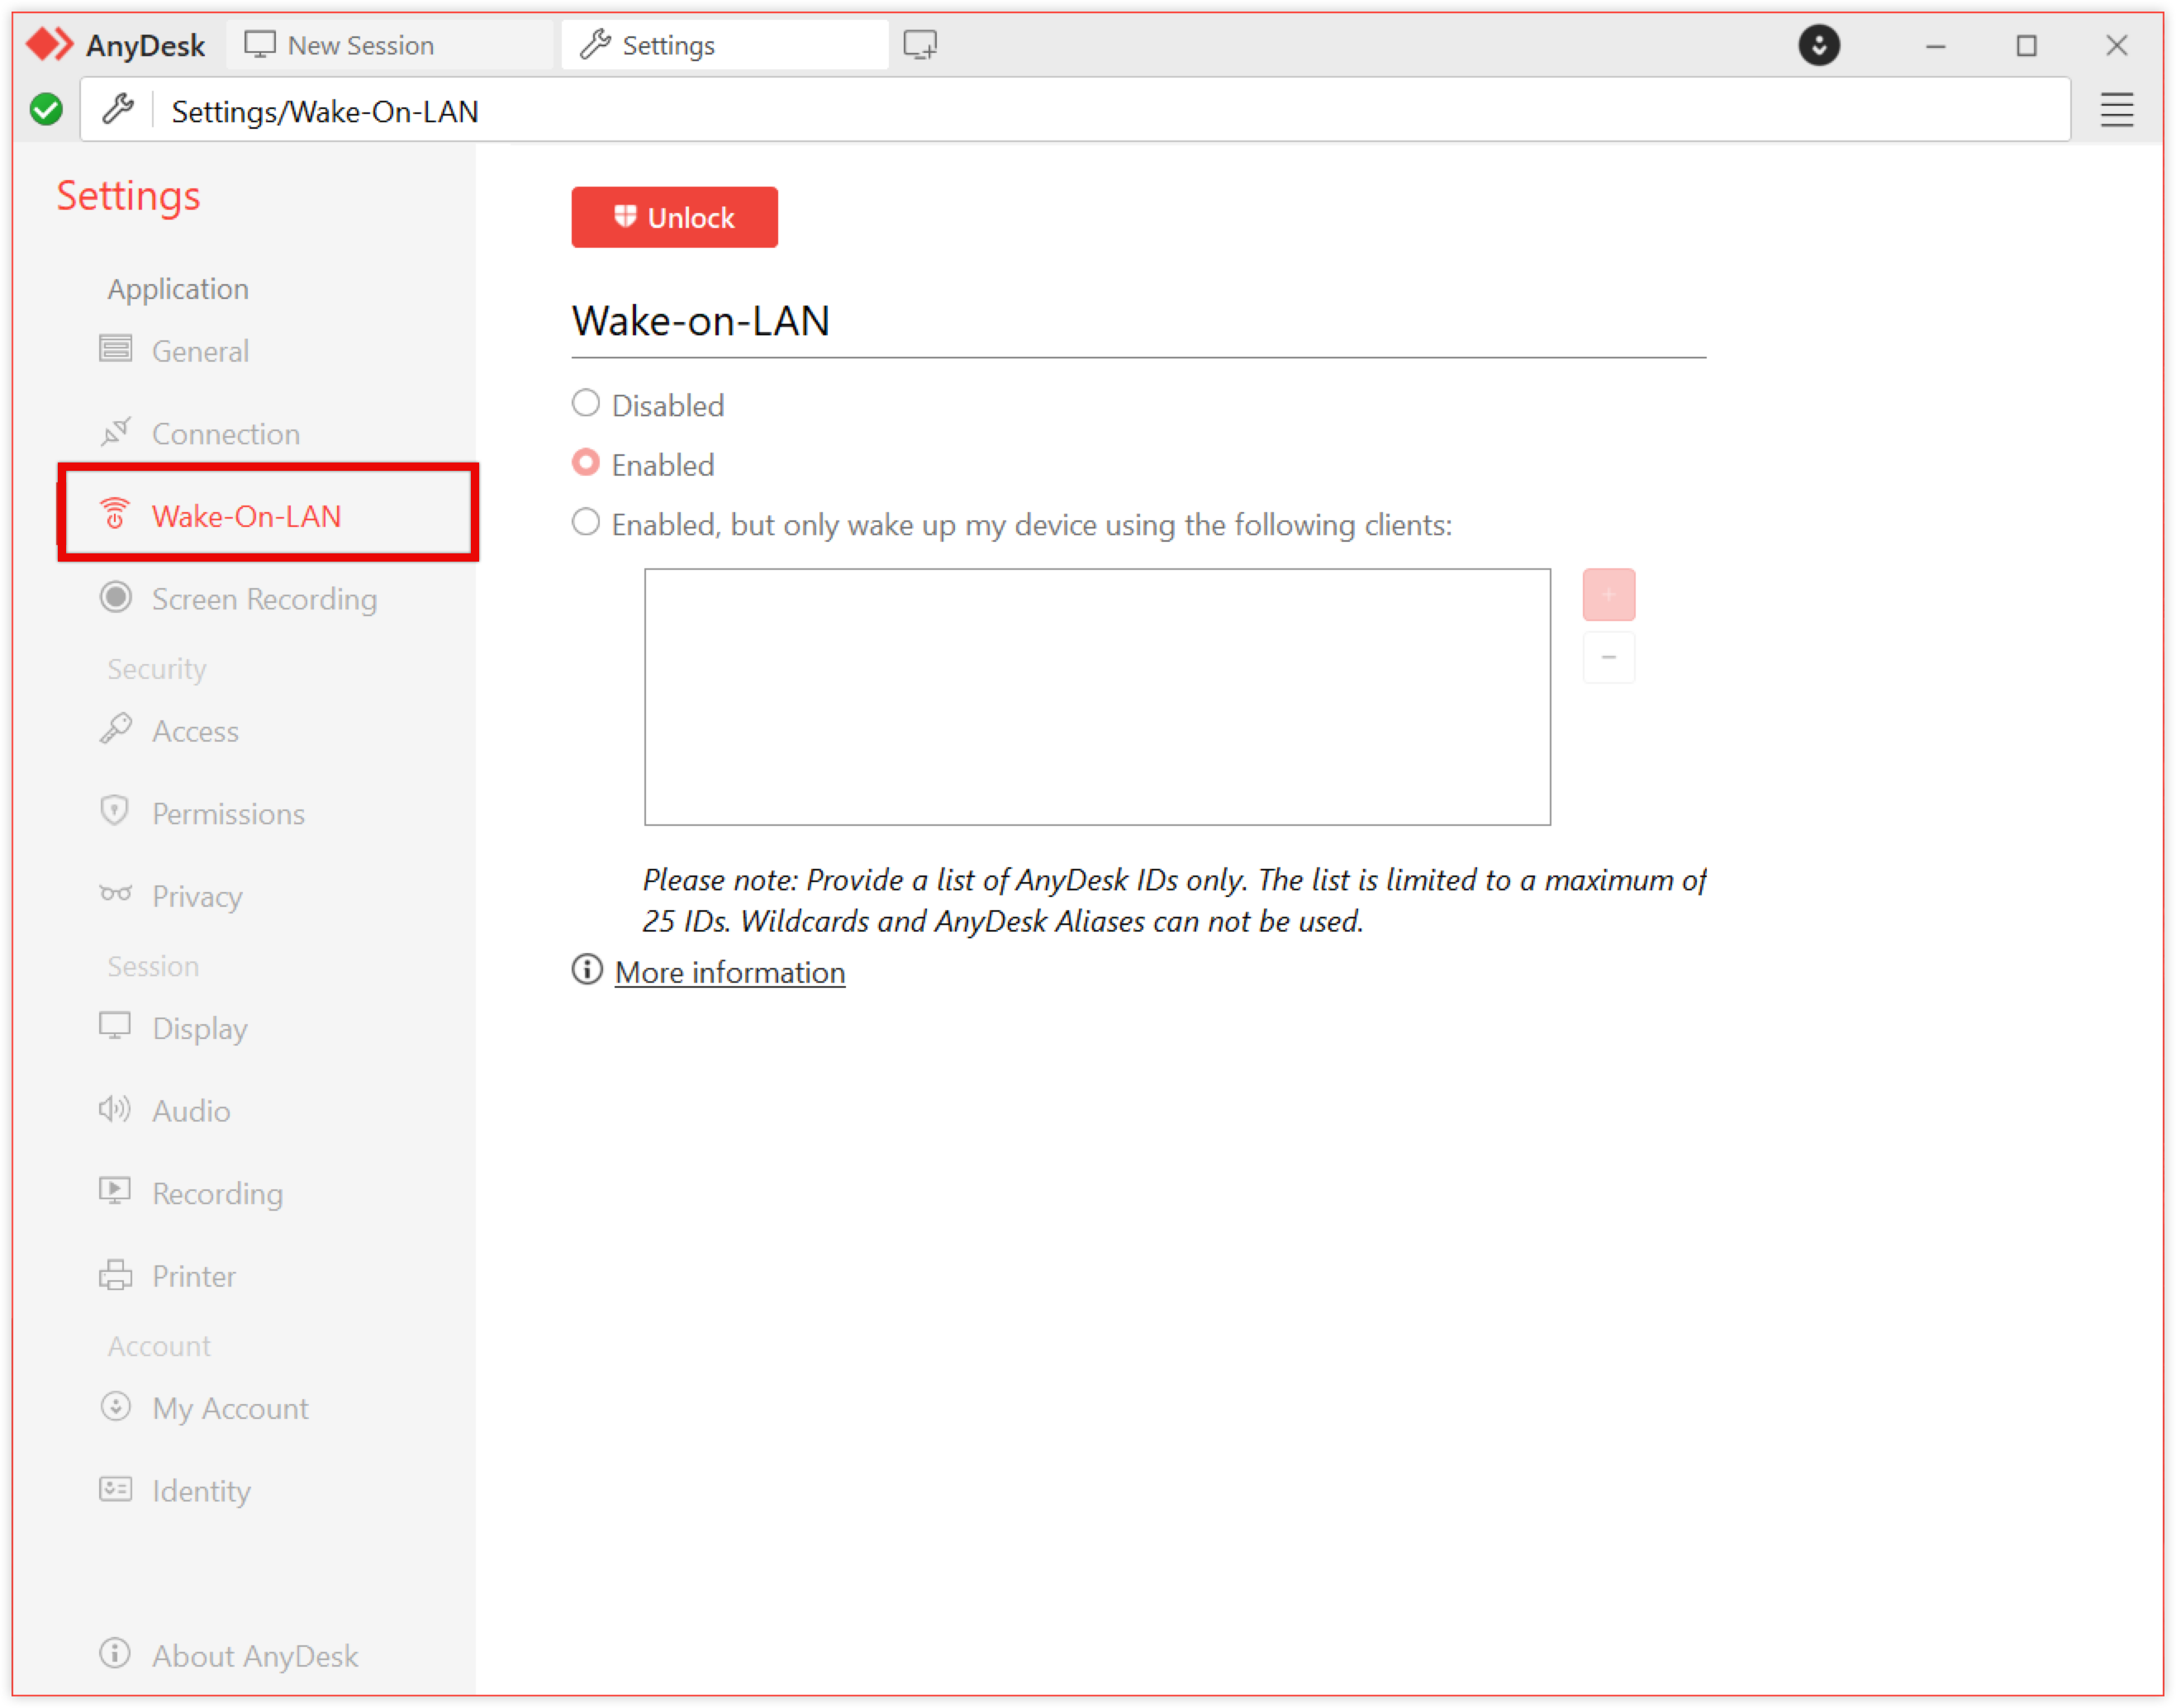
🦉 For more details on Wake-on-LAN, see this article.
Screen recording (Windows only)
Enable and configure screen recording and audio options.
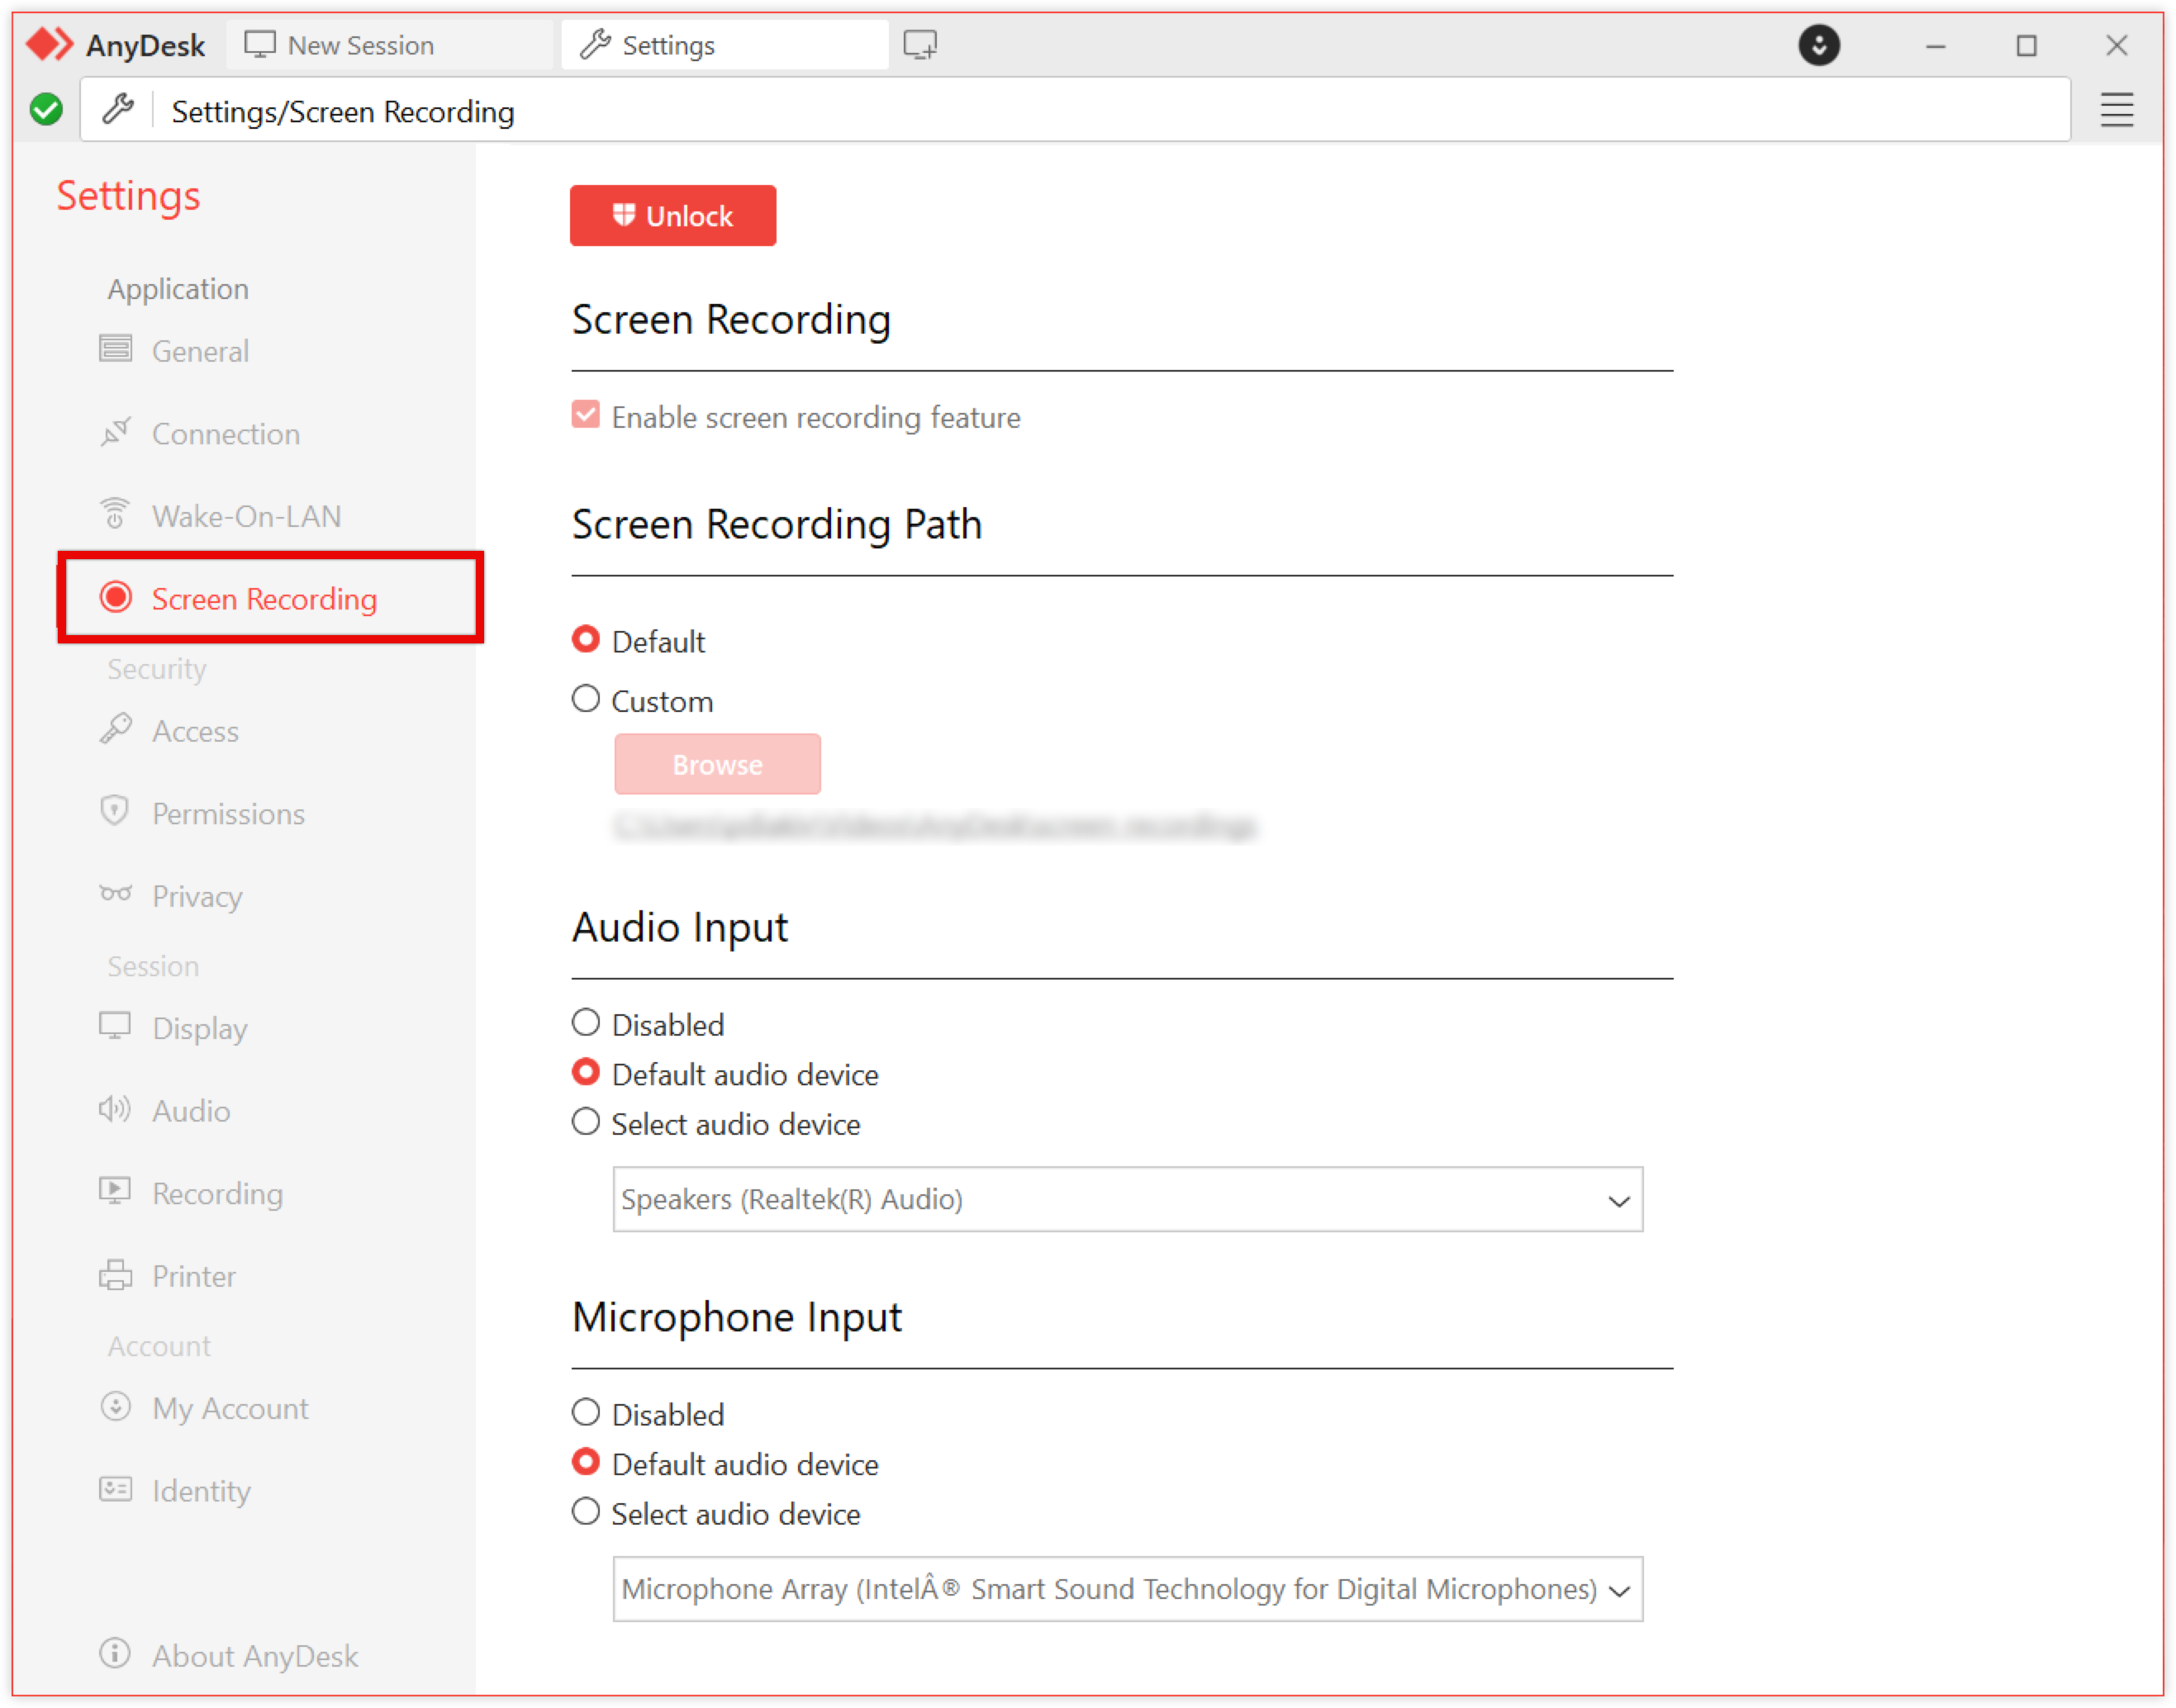
🦉 For more details about the Screen Recording feature, see this article.
Security
Learn how to set up Interactive and Unattended access, permission profiles, privacy settings, and Access Control List rules.
Access
If AnyDesk is installed on your device, administrative privileges are required to modify Security Settings. To modify the Access settings, click ![]() at the top of the Access section.
at the top of the Access section.
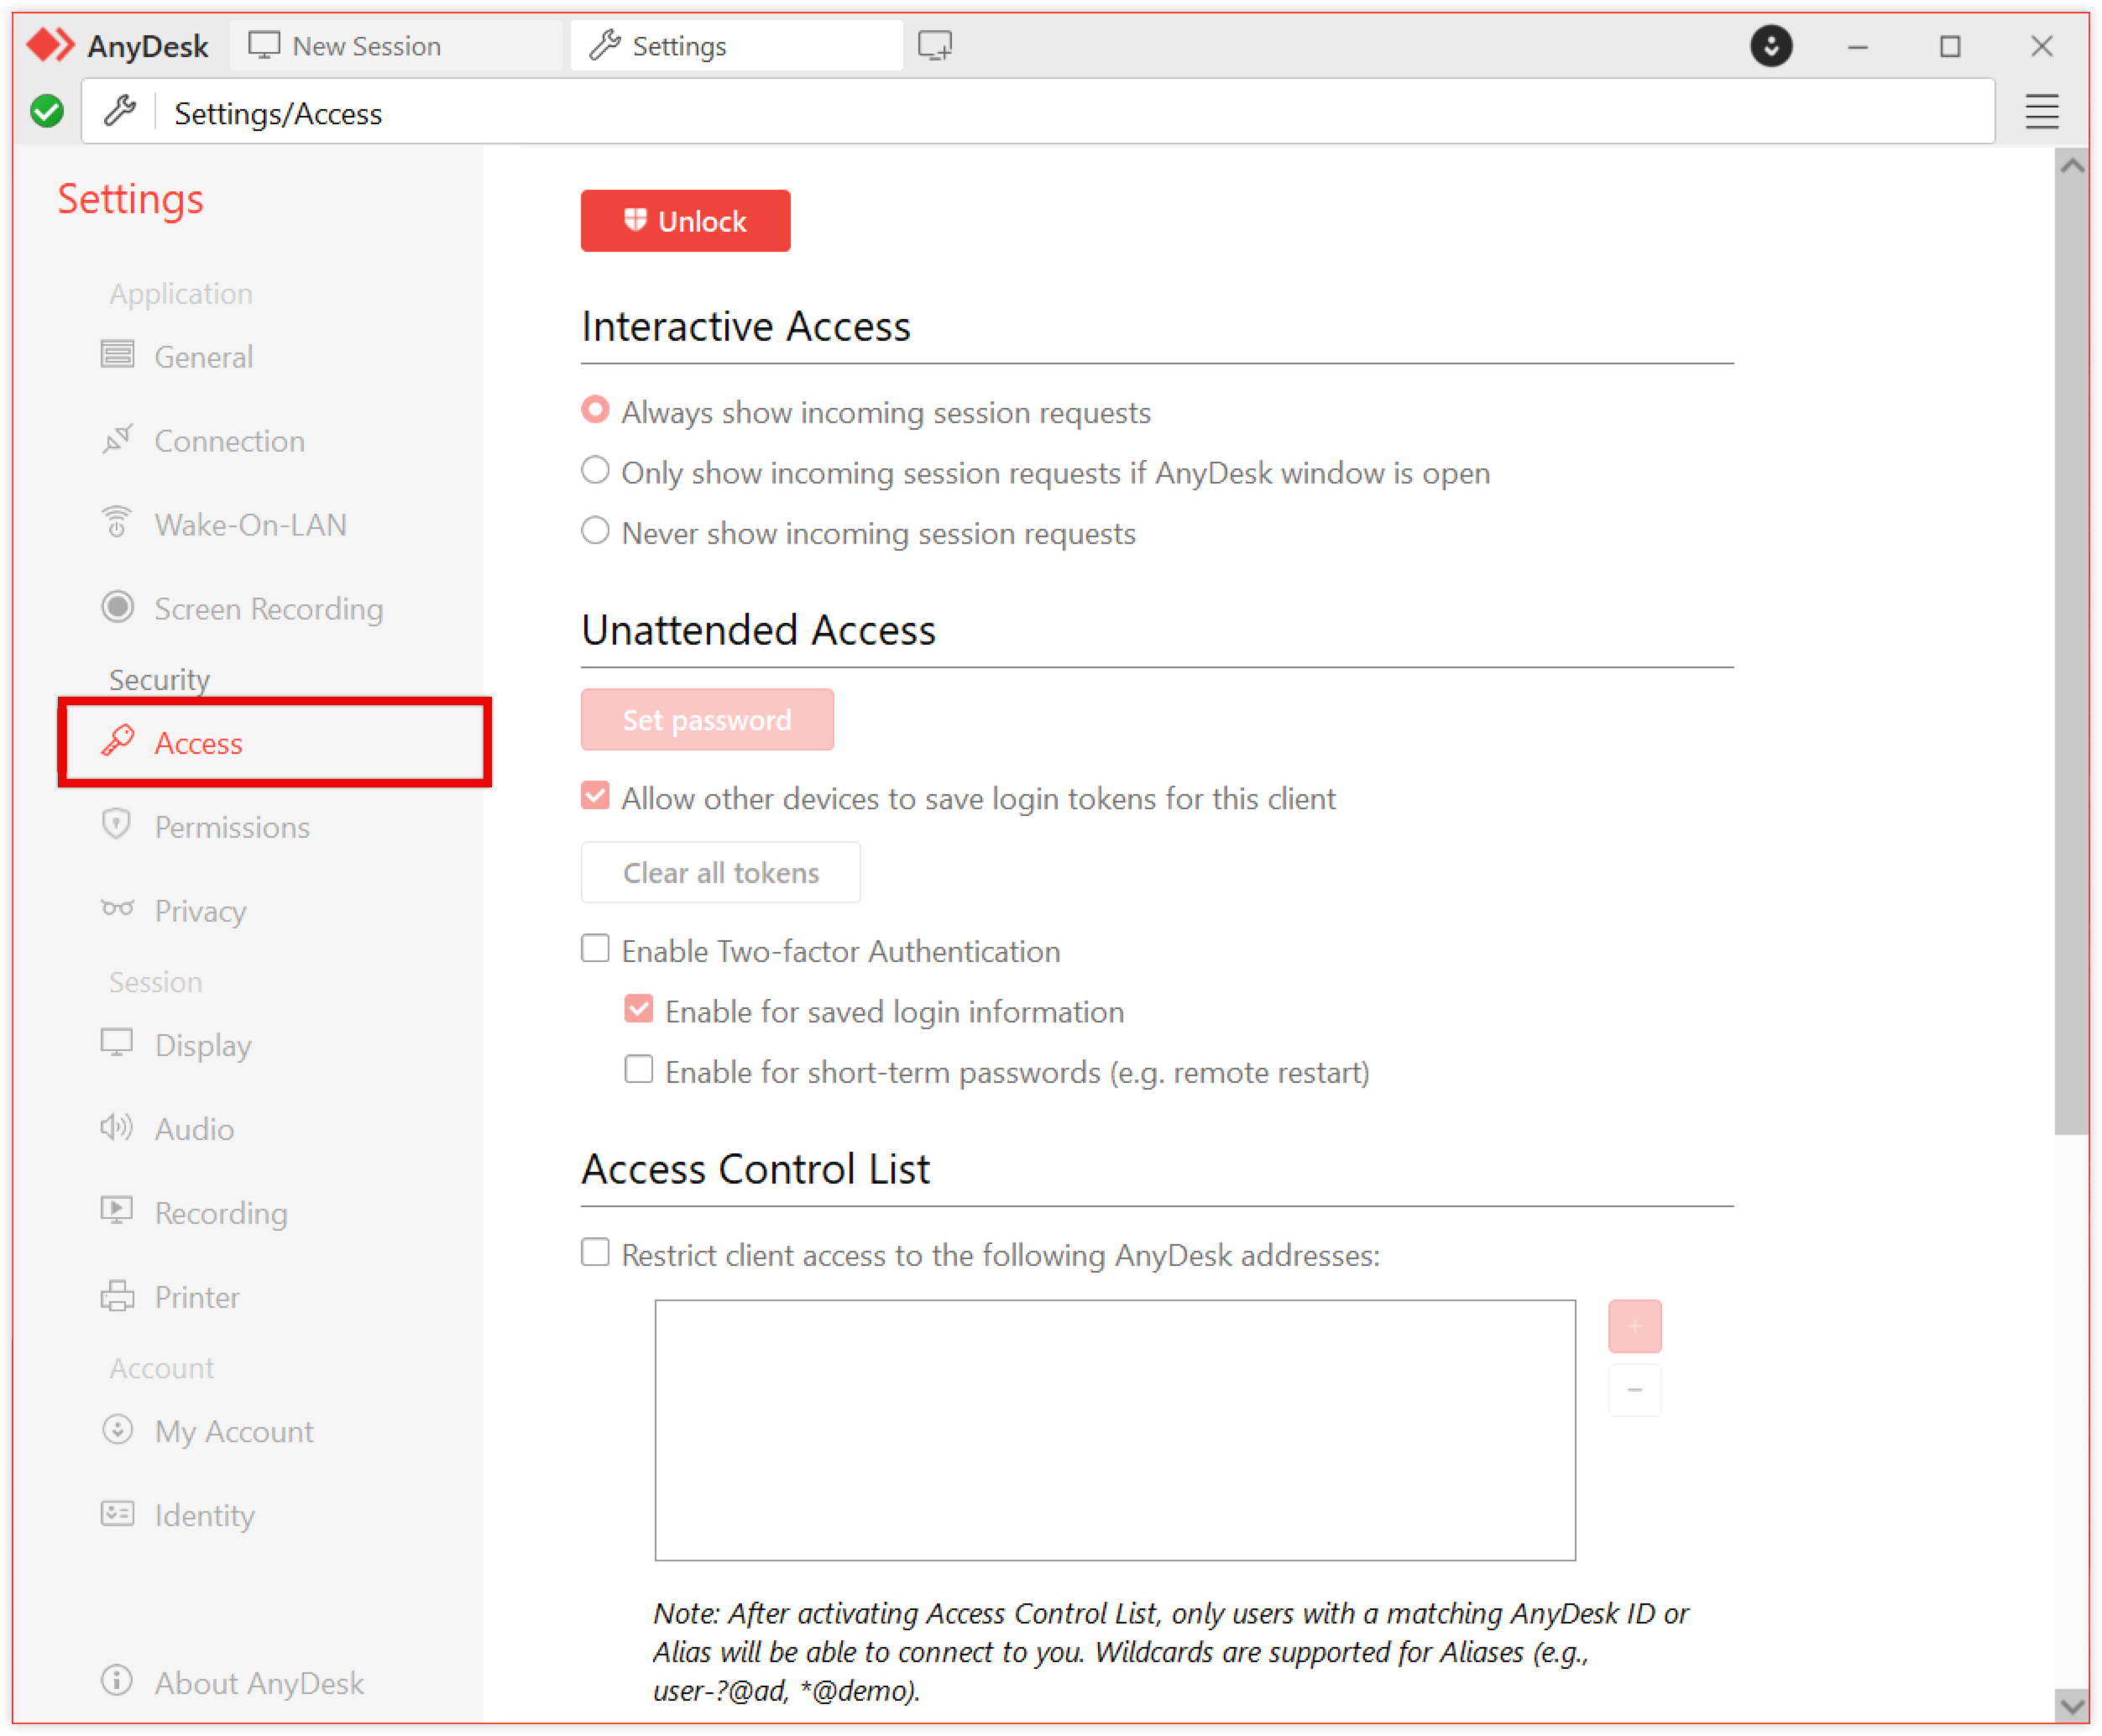
Interactive Access
Control how incoming Session Requests are handled. This setting determines when the Accept Window appears:
Always show incoming session requests - always prompt the user to accept the session.
Only show incoming session requests if AnyDesk window is open - show the prompt only if AnyDesk is open.
Never show incoming session requests - do not prompt. Sessions require valid Unattended Access credentials to connect.
Unattended Access
Configure access credentials that allow connections without manual confirmation. This is required when Interactive Access is set to Never show incoming session requests.
🦉 For more on Unattended Access, see this article.
Access Control List
Restrict connections to specific AnyDesk IDs or aliases. This whitelist-based feature ensures only defined entries can establish a connection.
Use wildcards (
*,?) to define patterns.*matches any number of characters.?matches a single character.
Example:
*@companyallows access only from aliases within your custom Namespace.
🦉 For more on Namespaces, see this article.
Discovery
Enable automatic detection of AnyDesk apps on the same local network, and allow your AnyDesk app to be discovered by others. It is enabled by default for the installed AnyDesk app and can be manually enabled in portable mode.
Discovered items include:
Operating system
Device name
Alias/ID
💡 NOTE
If Discovery is enabled, you may need to adjust your firewall settings to allow traffic.
Permissions
Define default permission profiles for remote users:
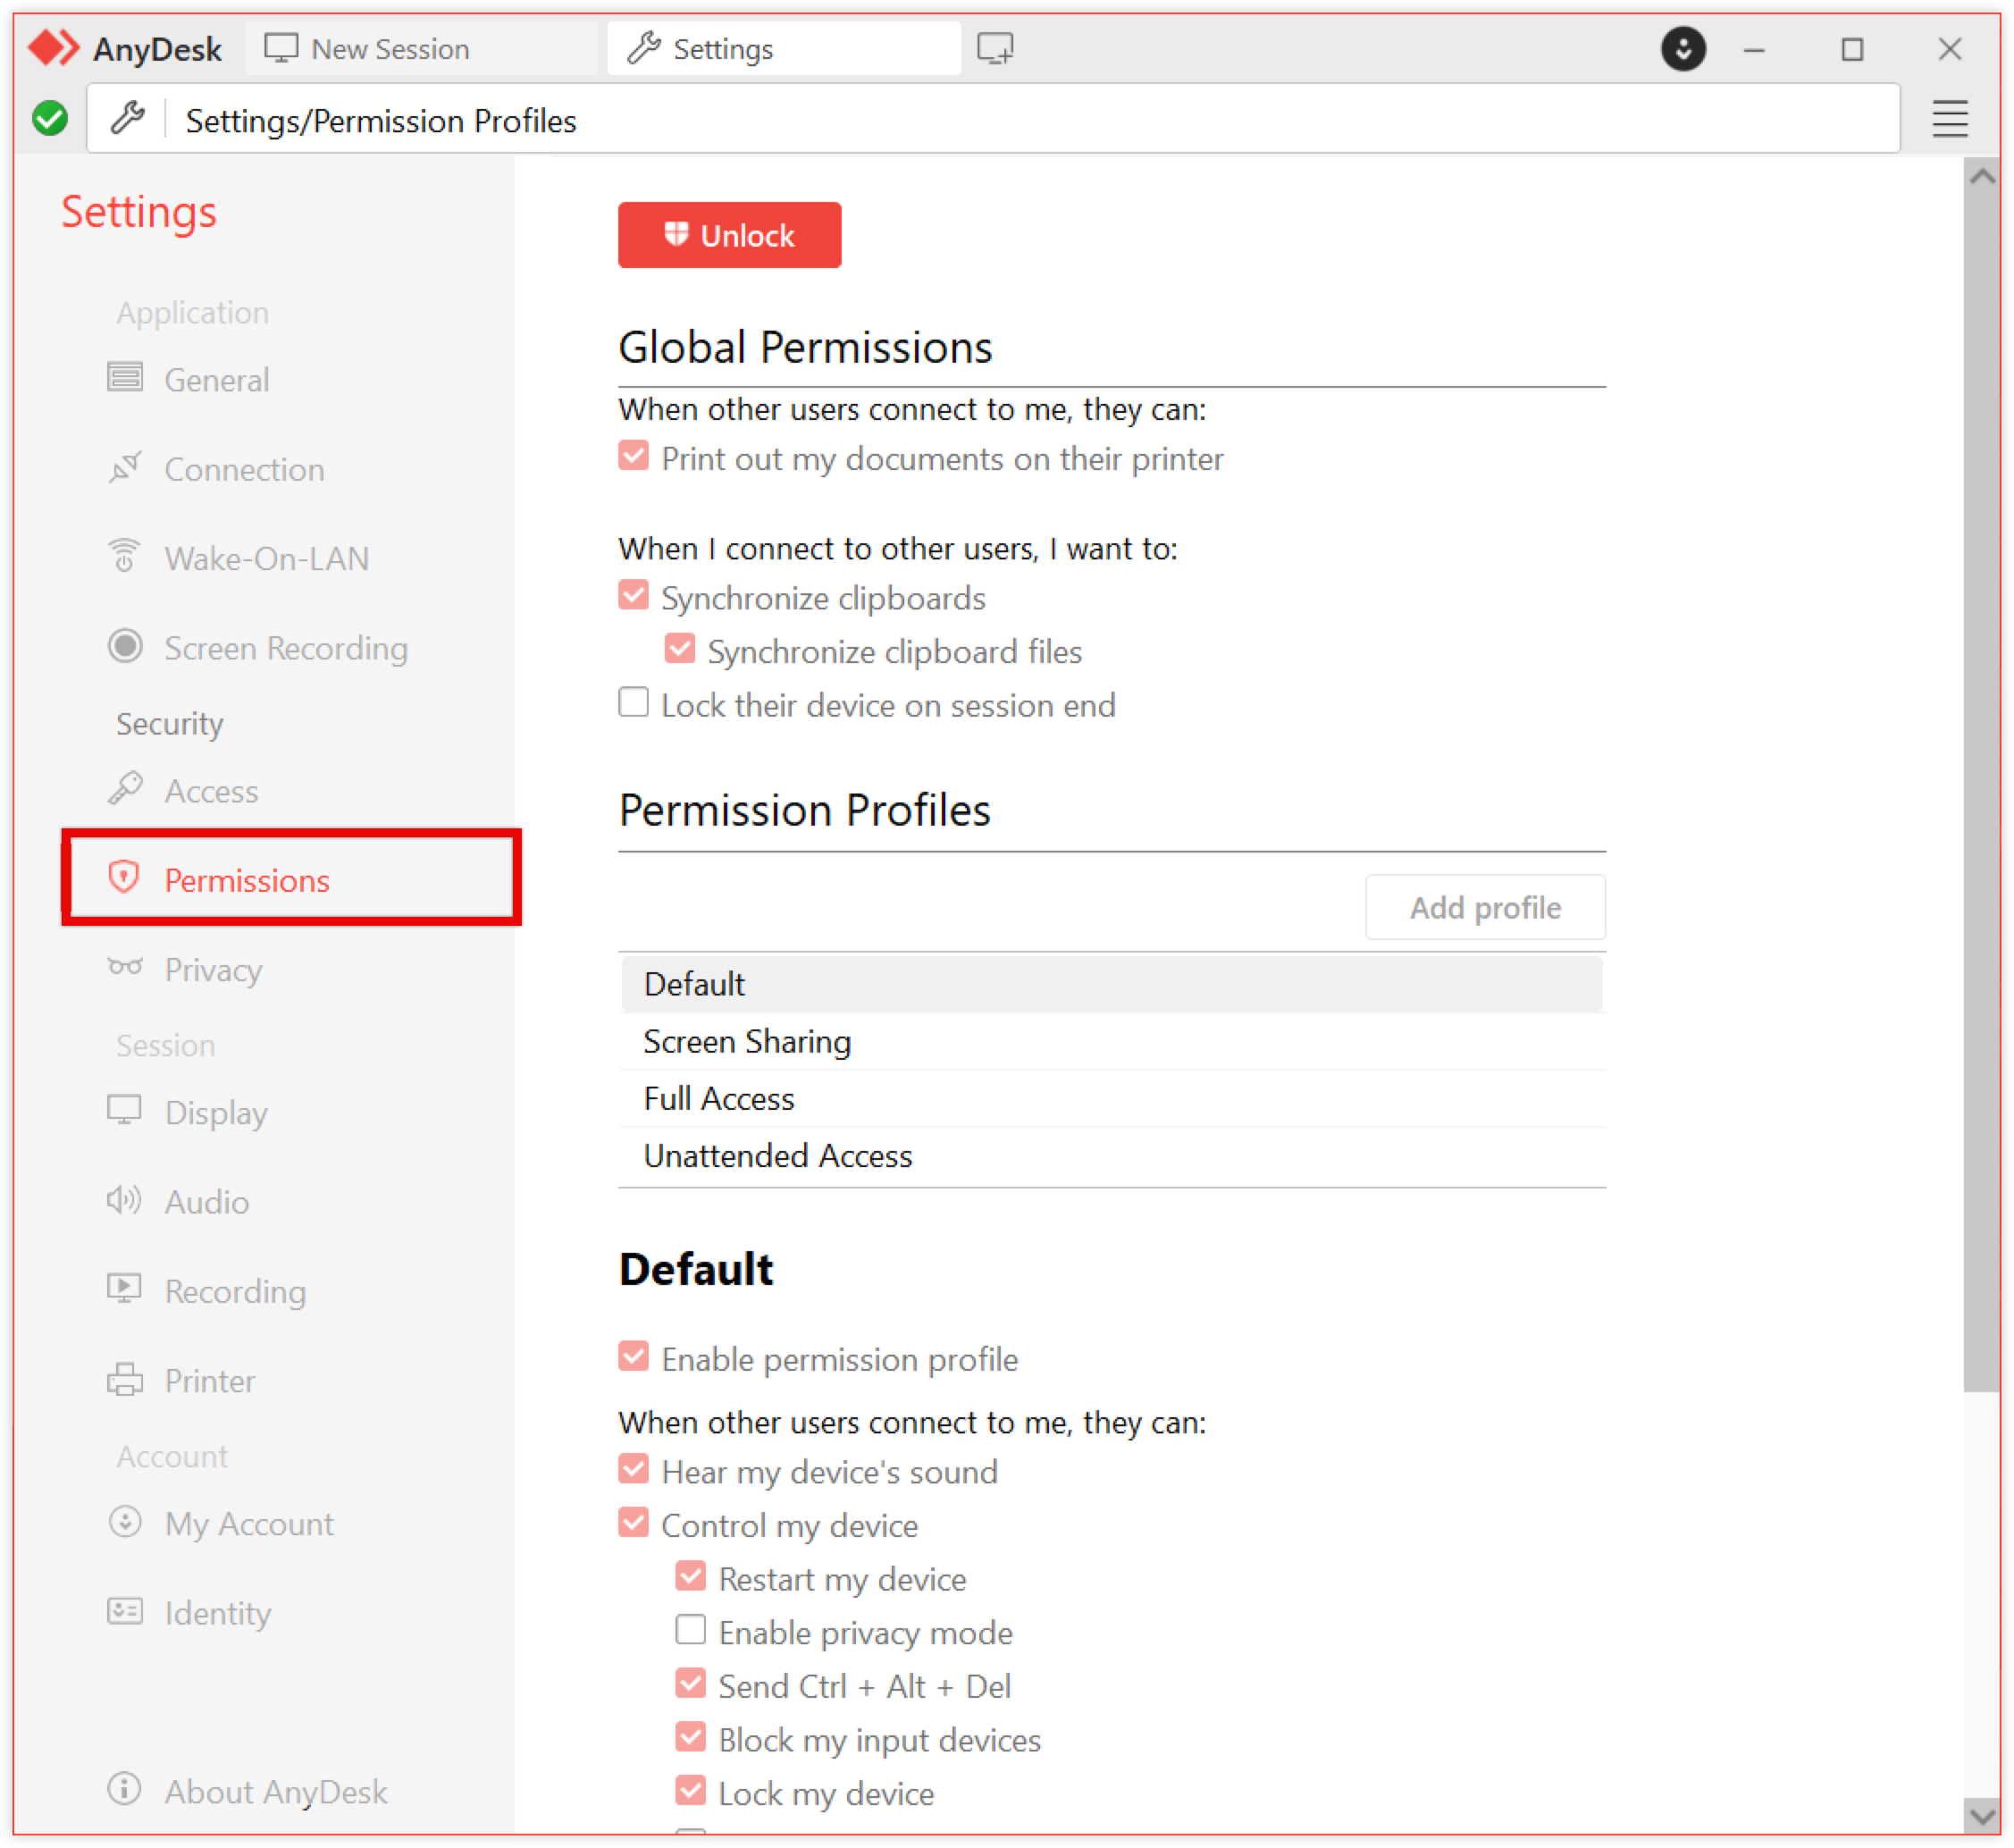
🦉 For more details about permission profiles, see this article.
Privacy
Screen Frame - enable this option to display an always-on-top border around your screen during a session. This helps you quickly see when someone is connected to your device.
Session
Learn how to manage display, audio, recording, and remote printing settings used during active remote sessions.
Display
🦉 For more details about Display settings, see this article.
Audio
Adjust whether to transmit local audio and/or receive remote sound.
🦉 For more details about Audio settings, see this article.
Recording
You can choose to automatically record incoming or outgoing sessions.
Set Session Recording preferences and default or custom save paths. The default path is %HOME%\Videos\AnyDesk.
.png)
🦉 For more details on Session recording, see this article.
Printer
Select how to manage remote print jobs:
Dismiss
Use default printer
Use specific printer
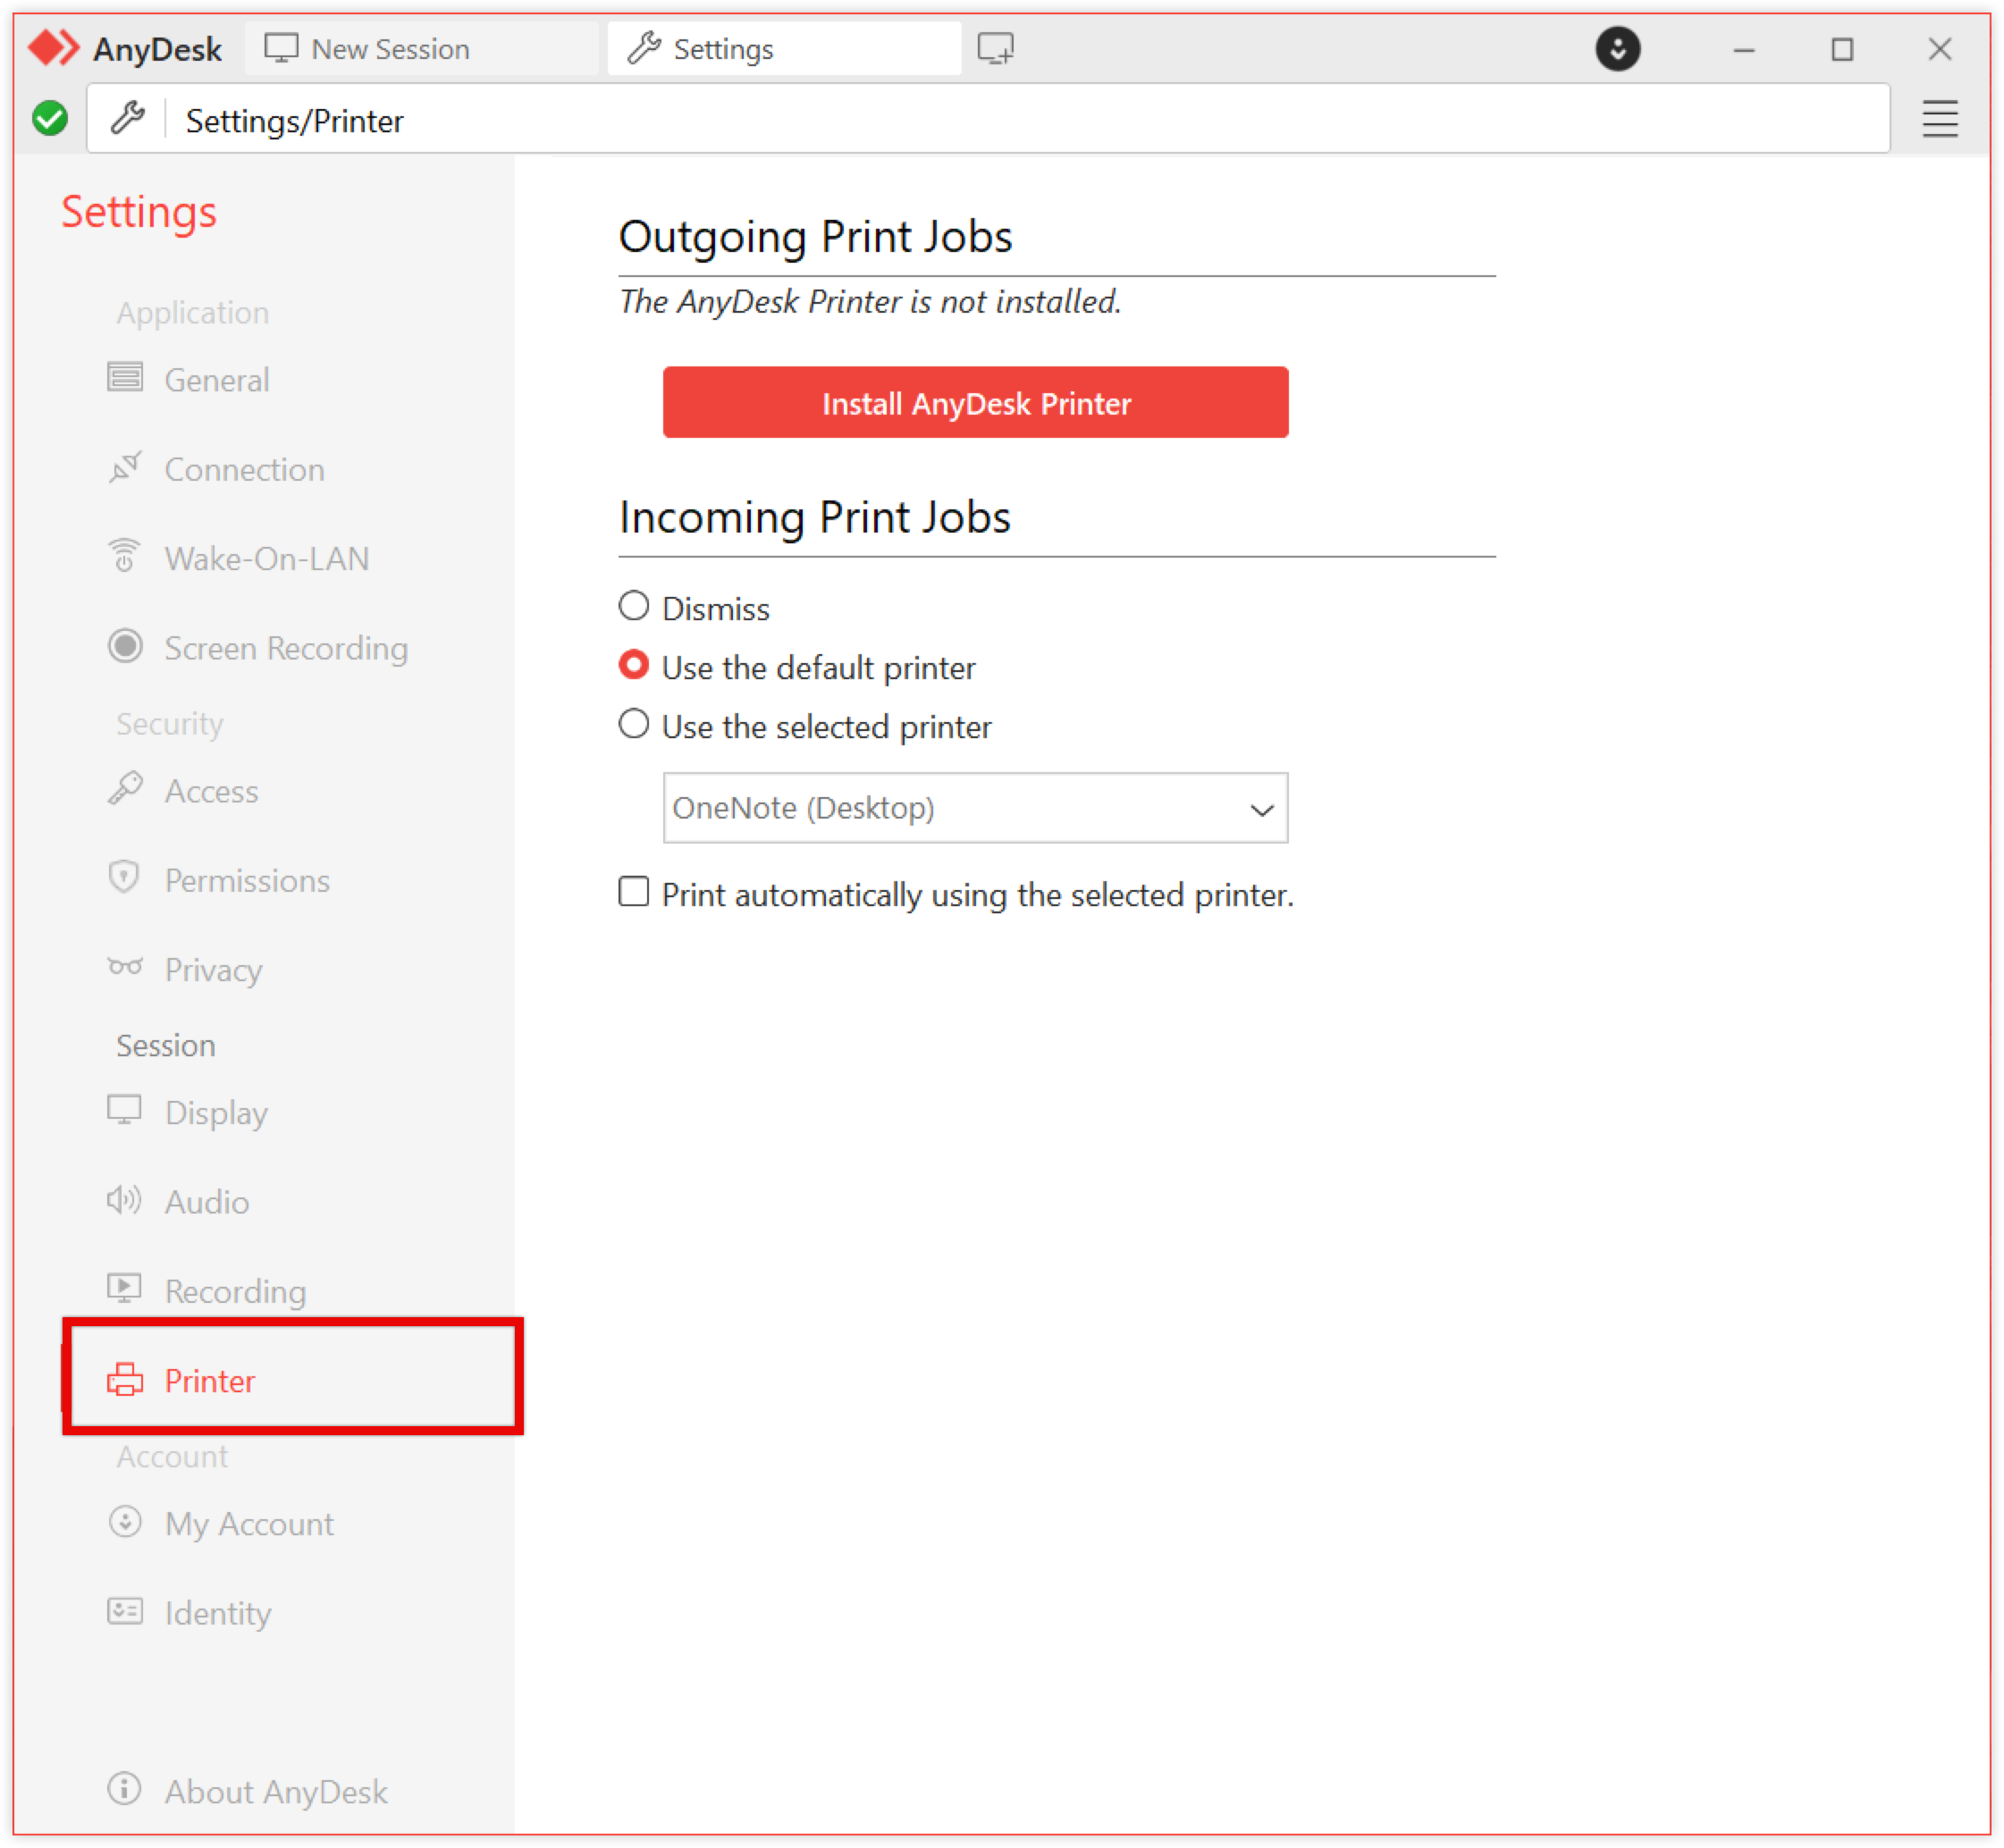
🦉 For more details about Remote Print feature, see this article.
Account
Learn how to change your license, Alias, user image, and other identity details associated with your AnyDesk account.
My account
On this page, you can do the following:
Log in / Register - sign in to link your AnyDesk client to an existing account or create a new one.
Current License - displays the license currently assigned to your AnyDesk client.
Change License Key - enter a new license key to switch or upgrade your license.
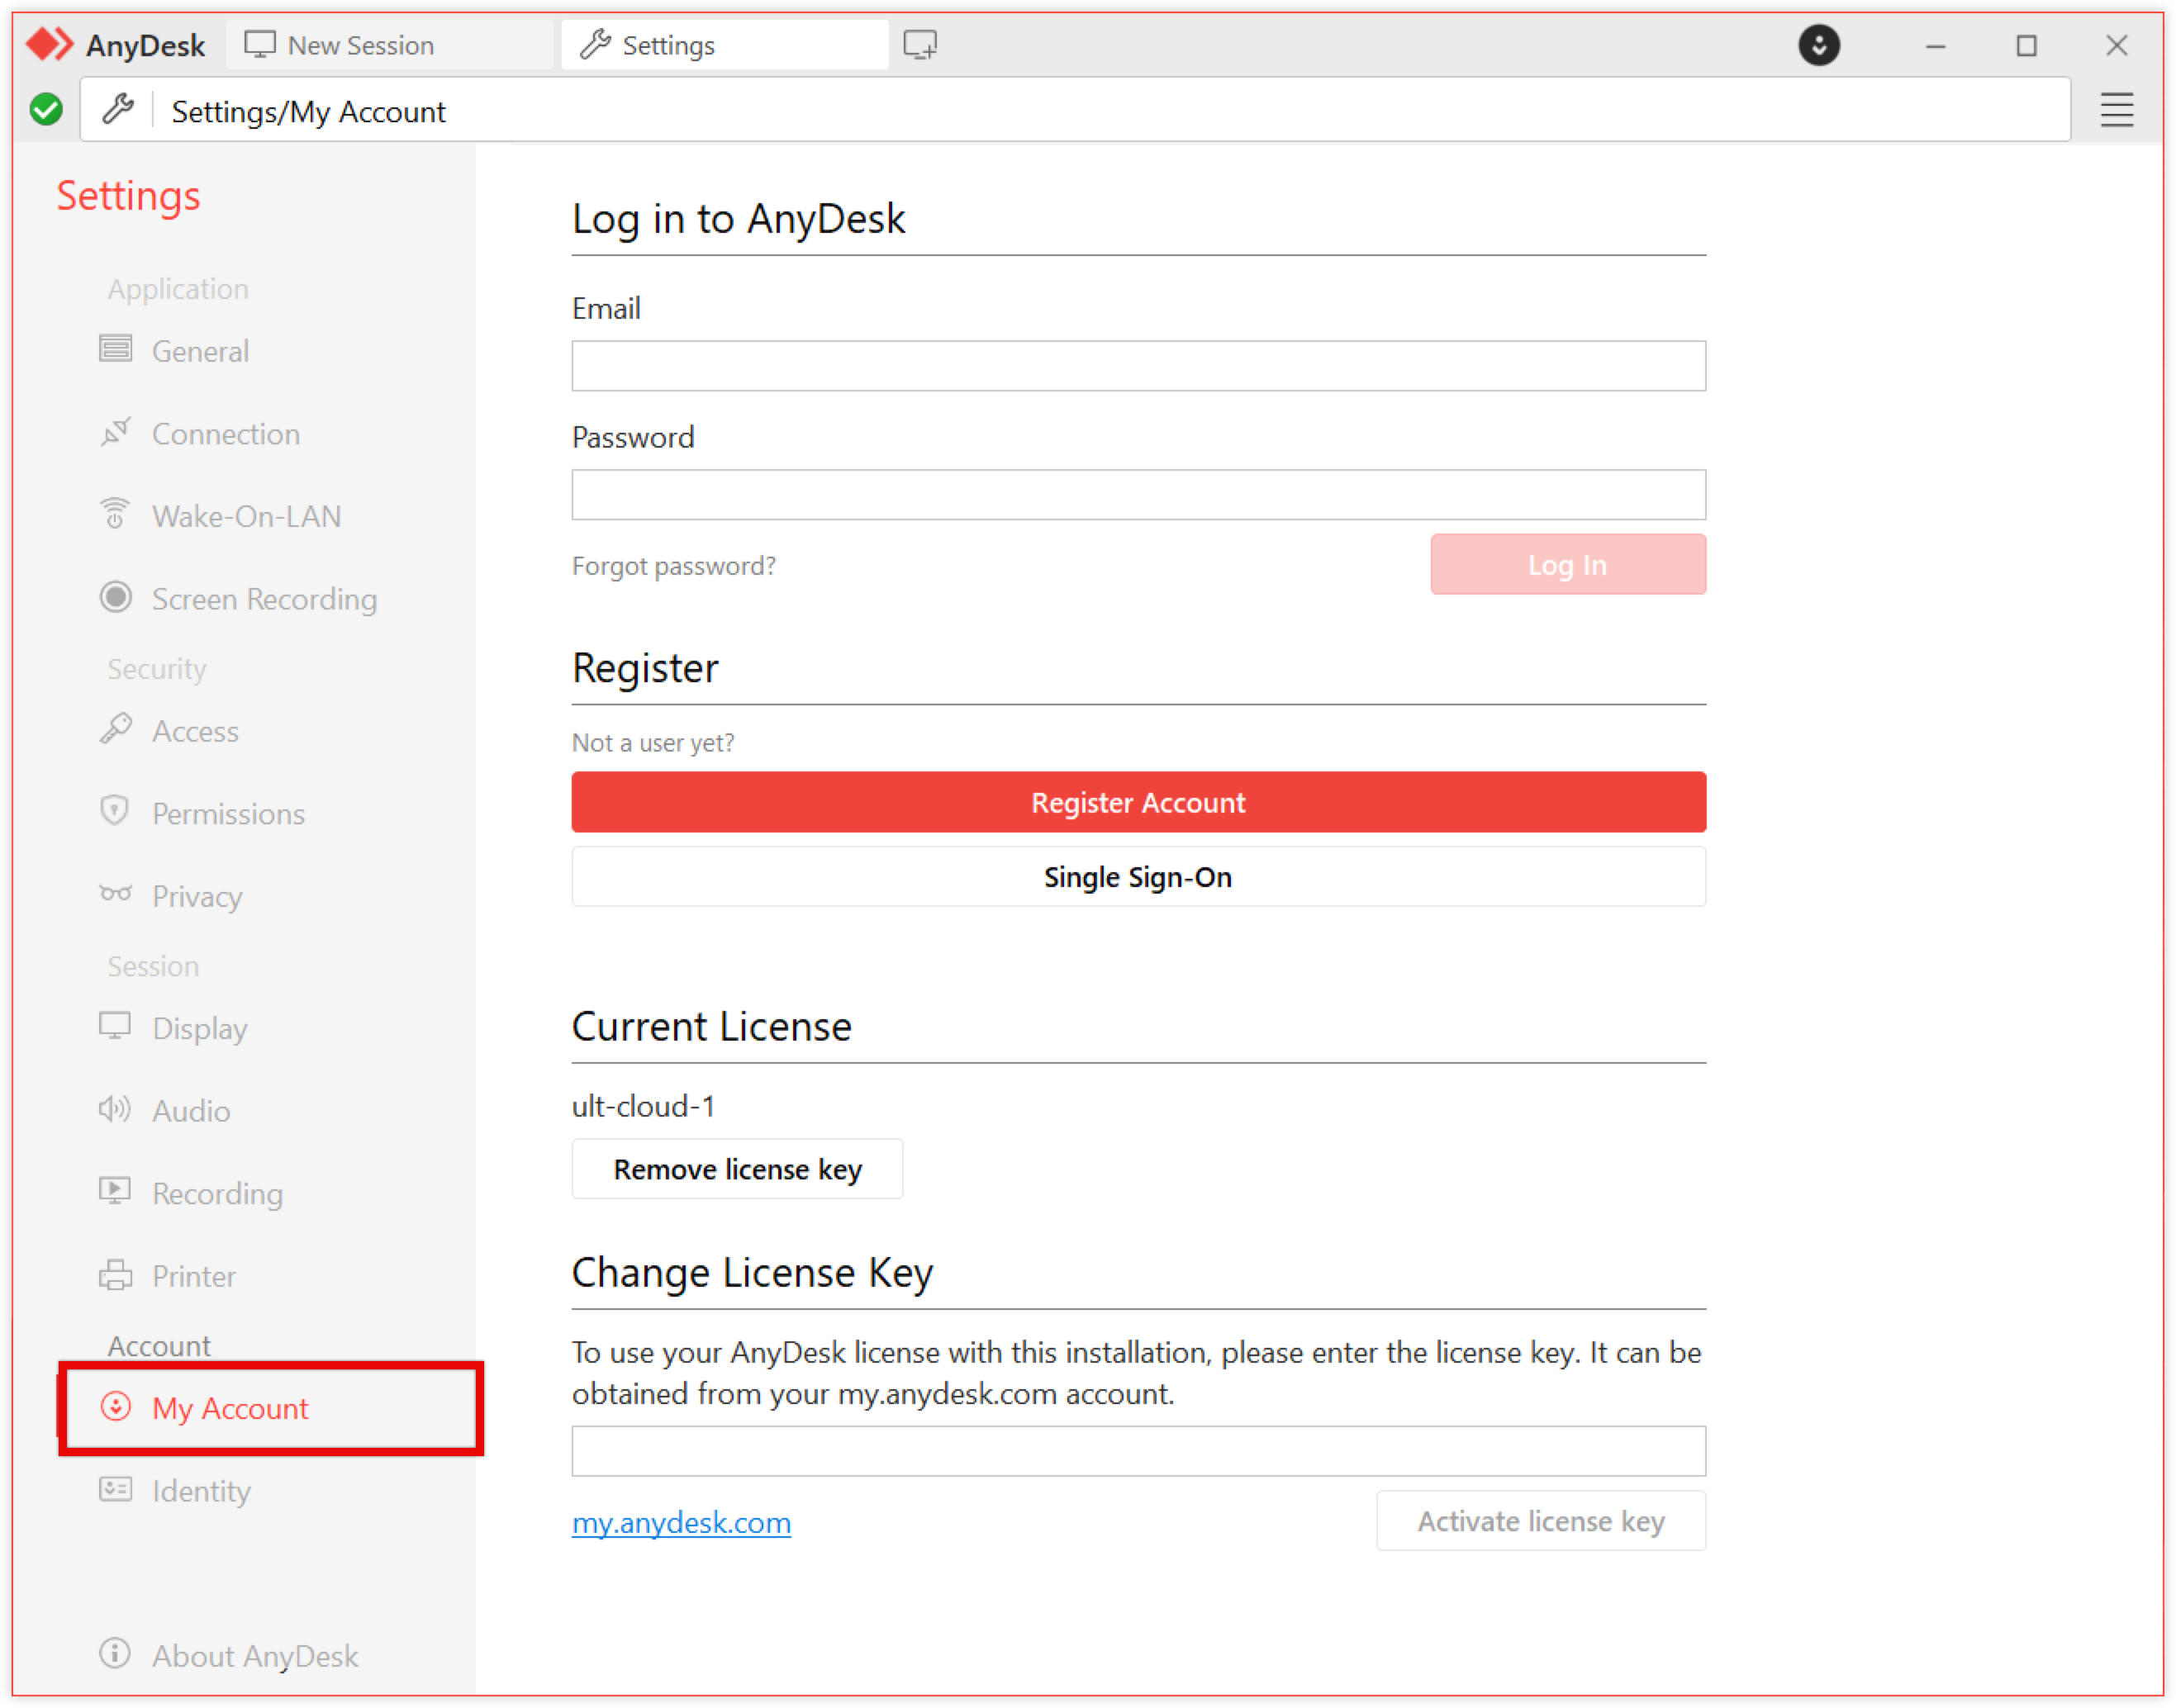
🦉 For more information on how to register the license, see this article.
Identity
Configure how your AnyDesk client is presented to others in the Address Book, Accept Window, and session list.
.png)
Alias - your AnyDesk client address used to establish connections. You can learn how to manage AnyDesk Alias here.
Desk Preview - control what preview image is shown to others when your AnyDesk client is listed in their Address Book or Recent Sessions:
Hide - replace the preview with a generic placeholder image.
Account’s desktop wallpaper - show your desktop background.
Screenshot - show a live image of your desktop.
About AnyDesk
In About AnyDesk, you can see the version of your AnyDesk client, as well as what license is currently registered to the AnyDesk client.
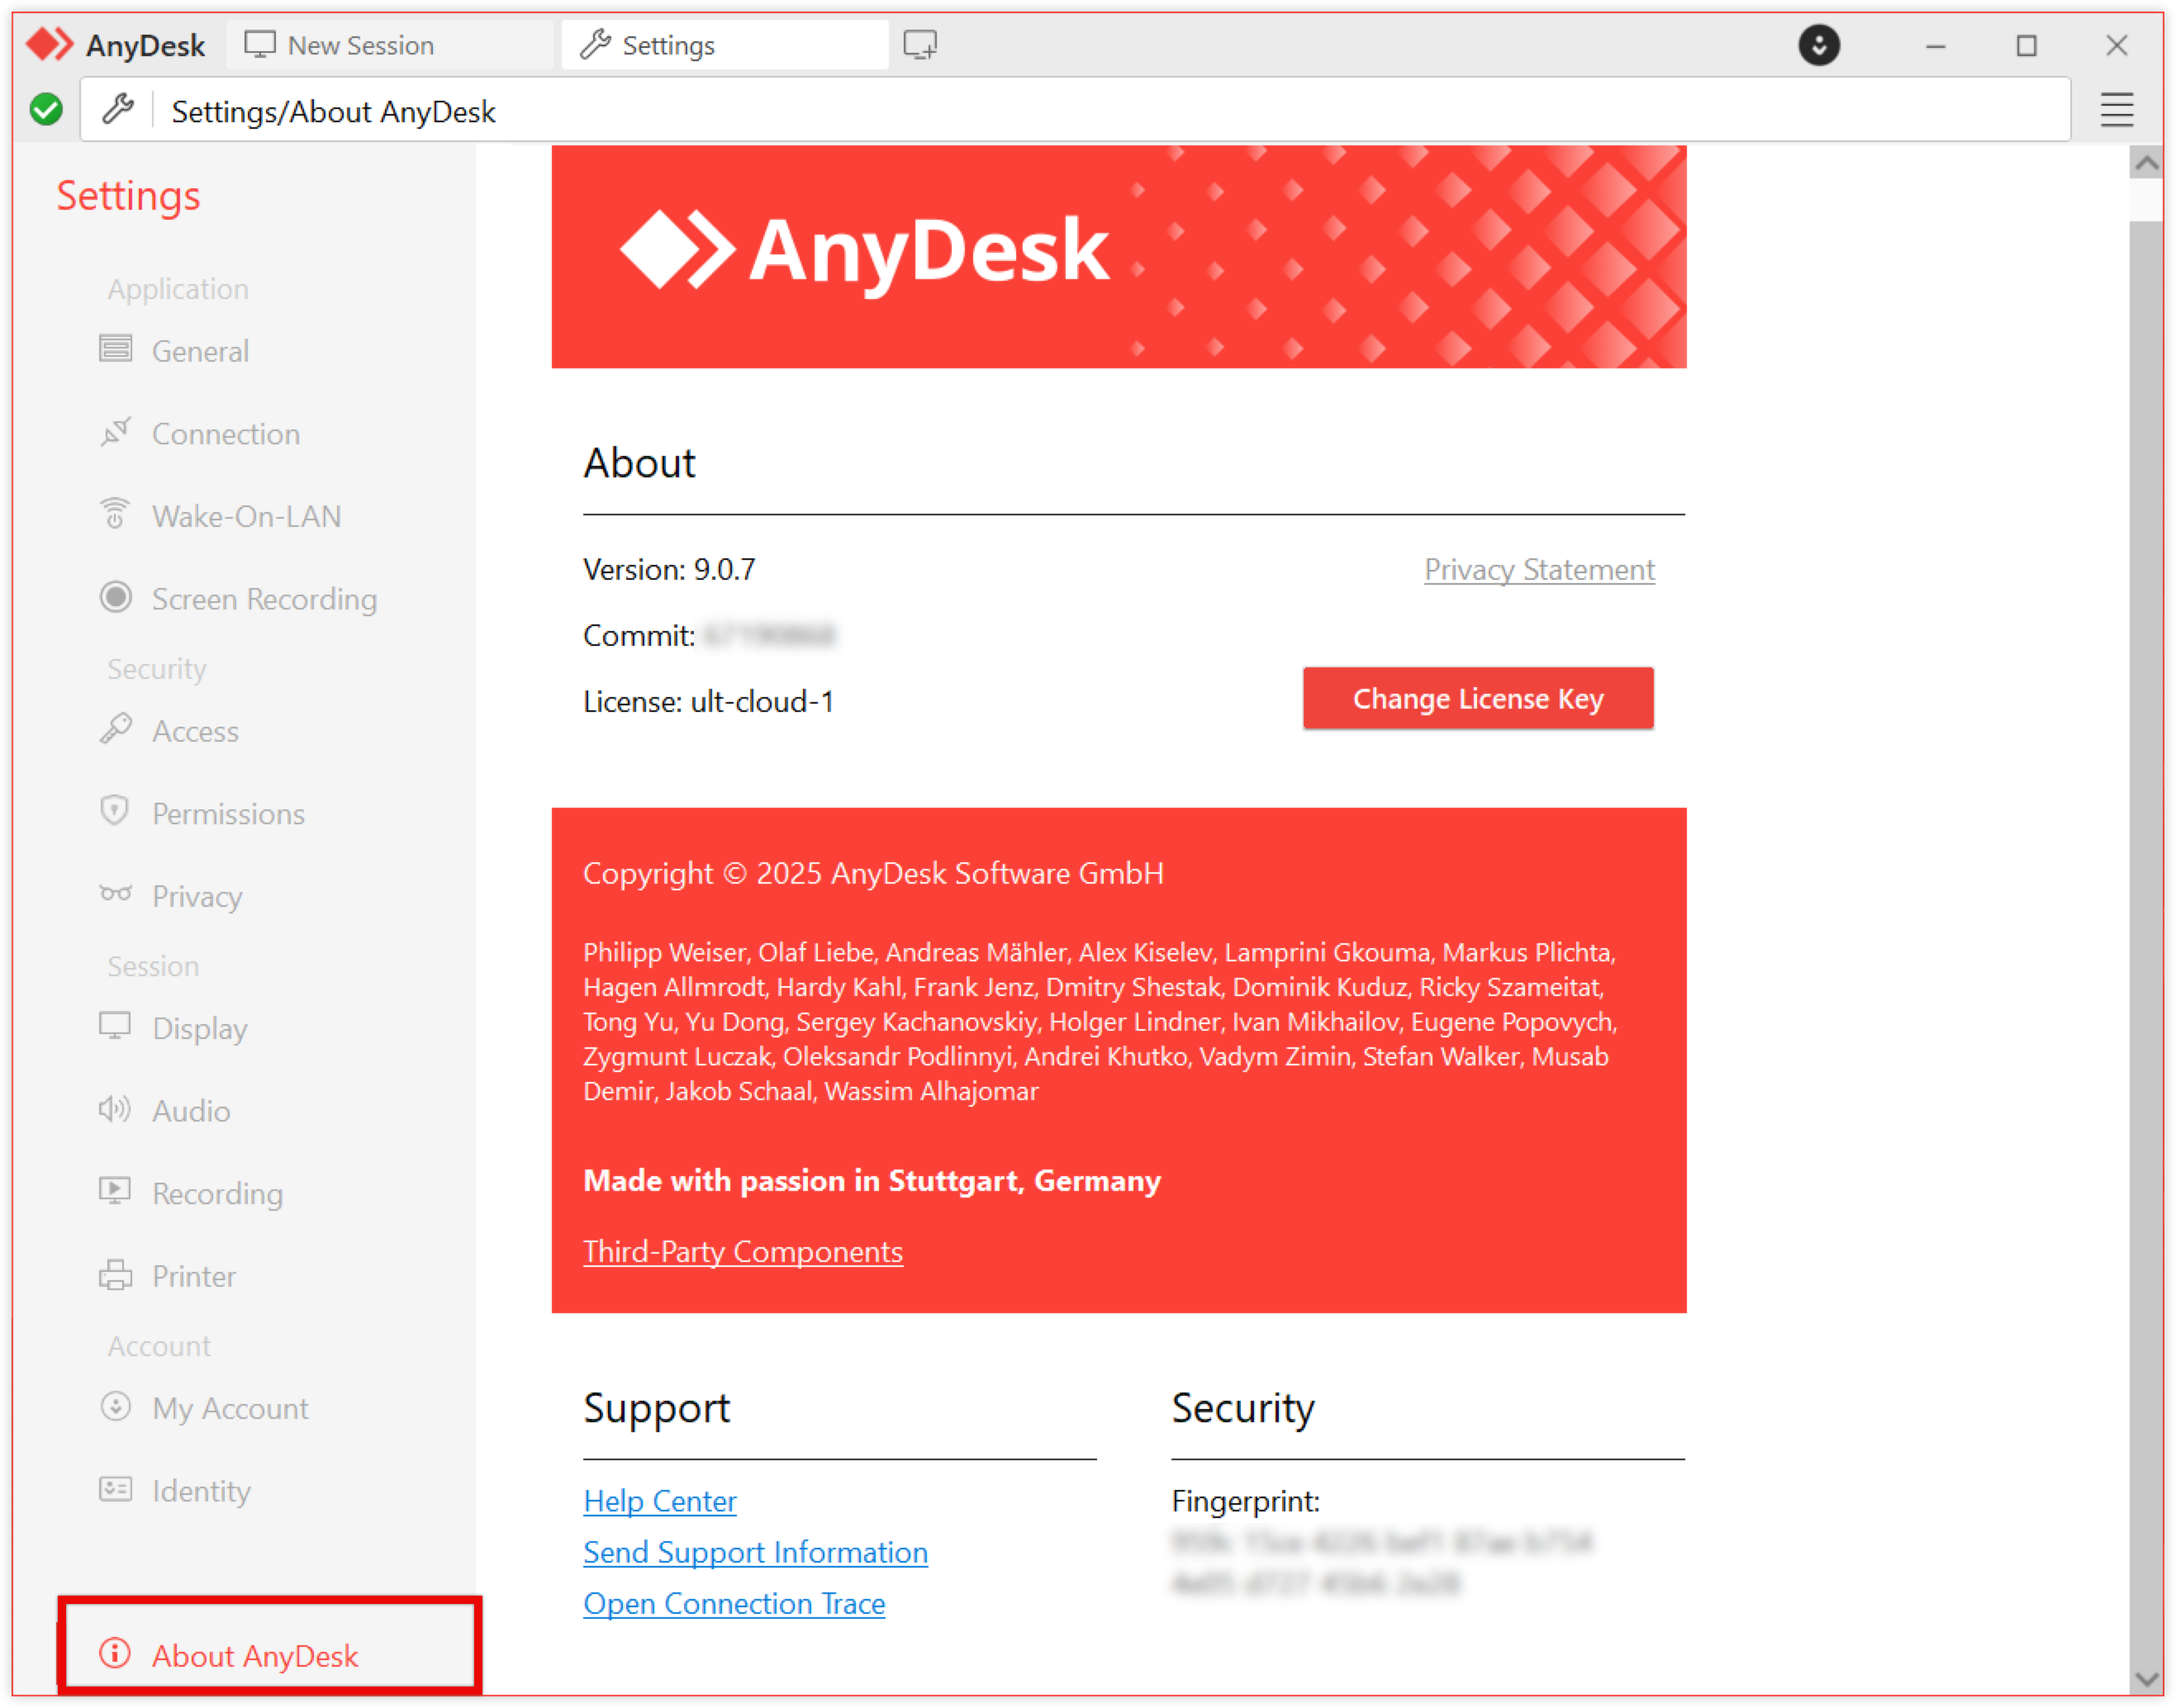
Help Center - opens our Help Center using the default browser.
Send Support Information - sends our Support team an email with your Trace Files. Please do not forget to also provide a description of the issue.
Open Connection Trace - view a list of all clients that have made a connection request to this AnyDesk client.