License: Ultimate-Cloud
Permission Sets define what users can view and manage within the my.anydesk II management console. You can use permission sets to control access to specific features and pages based on user roles.
🦉 For instructions on assigning permission sets to role, see this article.
Create a permission set
Once you create a permission set, it cannot be edited. After you create a permission set, you must assign it to a role or group.
To create a permission set:
In my.anydesk II, go to User Management > Permission Sets and click Create Permission Set.
On the opened page, provide the following details:
About - general information about the permission set.
Name - enter the name for the permission set.
Description - provide a short description of the permission set.
Roles - from the drop-down list, select the roles to which you want to assign this permission set.
💡 You can also assign the permission set to roles later in the User Management > Roles section.Access Control - for each section of the management console, select the level of access - No Access, View, View & Edit.
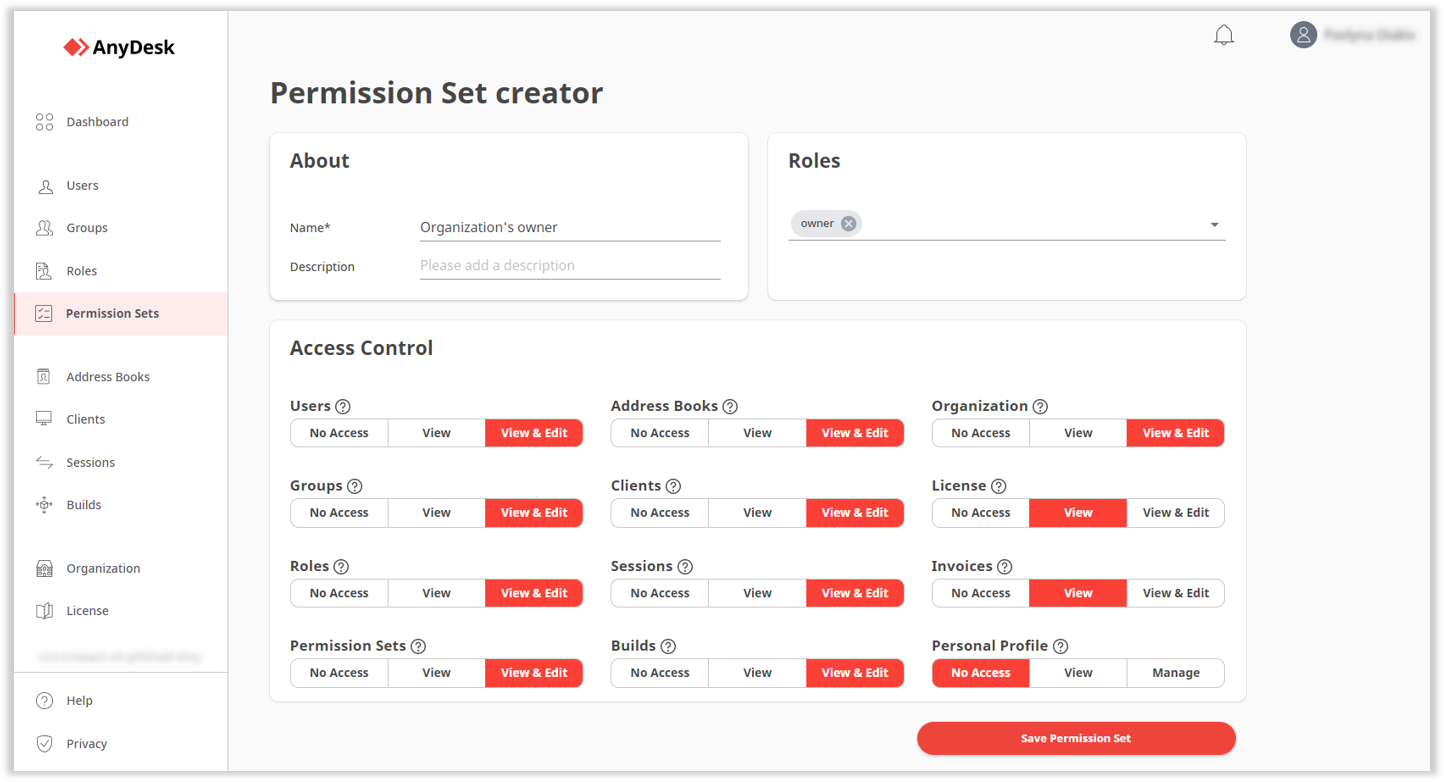
Click Save Permission Set.
Assign permission set to a new role
To assign a permission set to a role:
In my.anydesk II account, go to User Management > Roles.
Open the role, find the Permission Sets section, and click Edit.
Click Assign Permission Set, and then select one or more permission sets from the list.
Click Submit.
Users with that role now have access levels as defined by the assigned permission sets.