License: Standard, Advanced, or Ultimate-Cloud
This article explains how to add AnyDesk clients to your license, modify client settings in real time, and remove clients when no longer needed.
Once installed, a client can be managed directly from my.anydesk II, with changes applied instantly, no reinstallation required. Real-time configuration requires Central Management to be activated.
Add a client to your license
There are two ways of how you can license your AnyDesk client:
Activate the license key in the client
Create a custom client linked to the license and install it on your device
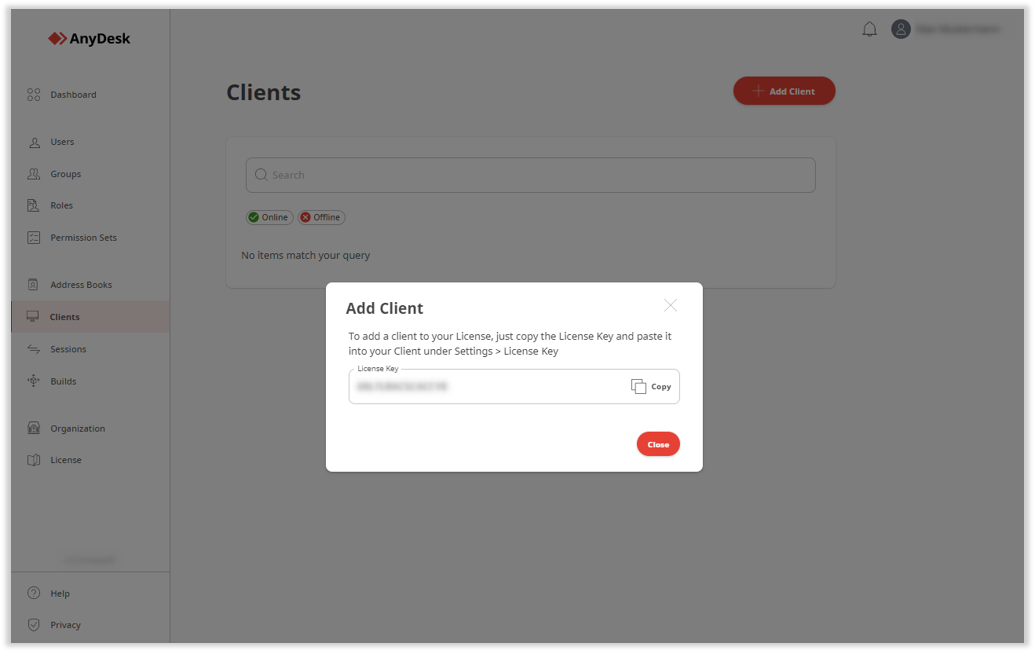
To add a client to your license:
Sign in to my.anydesk II, open the Clients tab, and click Add Client.
In the pop-up window, copy the License Key value.
Open your AnyDesk client and in the upper-right corner of the client, click
.png) > Change License Key....
> Change License Key....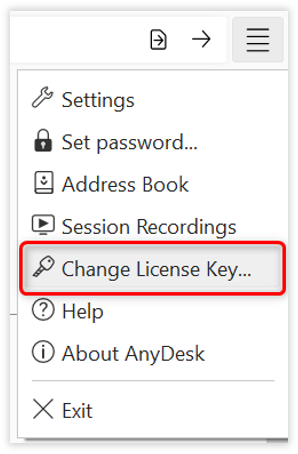
In the Change License Key section, paste the copied license key and click Activate license key.
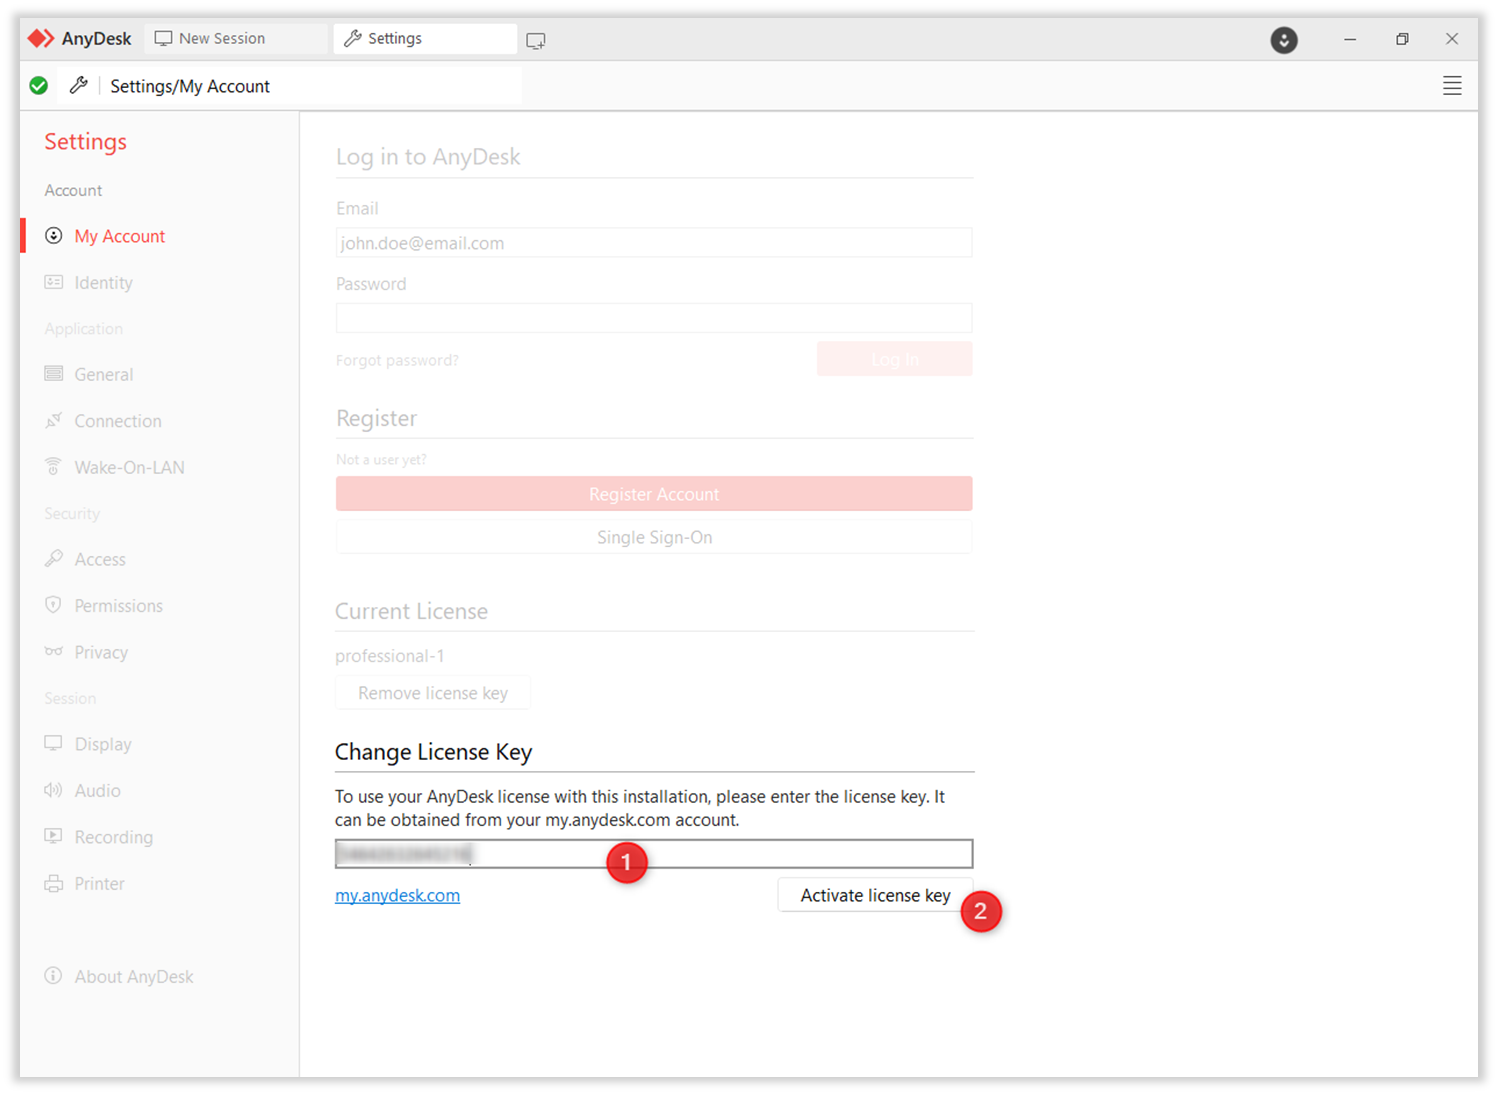
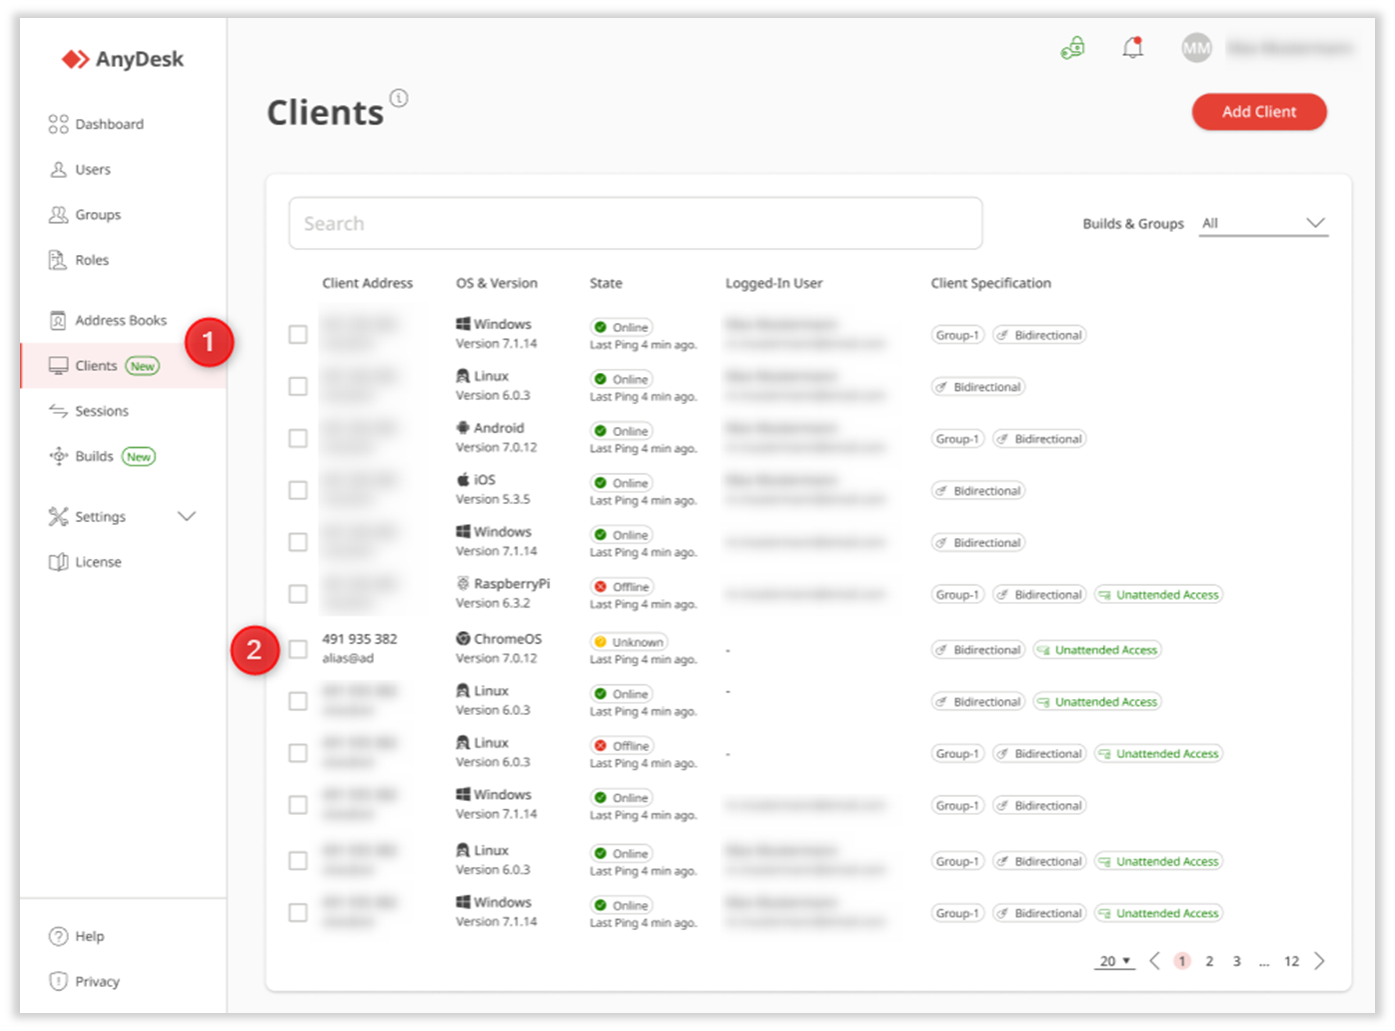
After that, the AnyDesk client will be linked to your license and you will be able to see it in the Clients tab.
Edit client’s settings
With Central Management activated, you can adjust settings on individual clients without reinstallation, such as
adjust client type (Incoming only, Outgoing only, or Bidirectional)
update security settings
manage access to certain features in the client
edit session permission profiles
All changes will be automatically applied to the specific client instantly.
Create client configuration
To apply client configuration:
Sign in to my.anydesk II and in the Activate Central Management section, click Provide Private Key.
💡 To learn how to get your Private Key, see What is a Private Key?
Paste the key and click Continue.

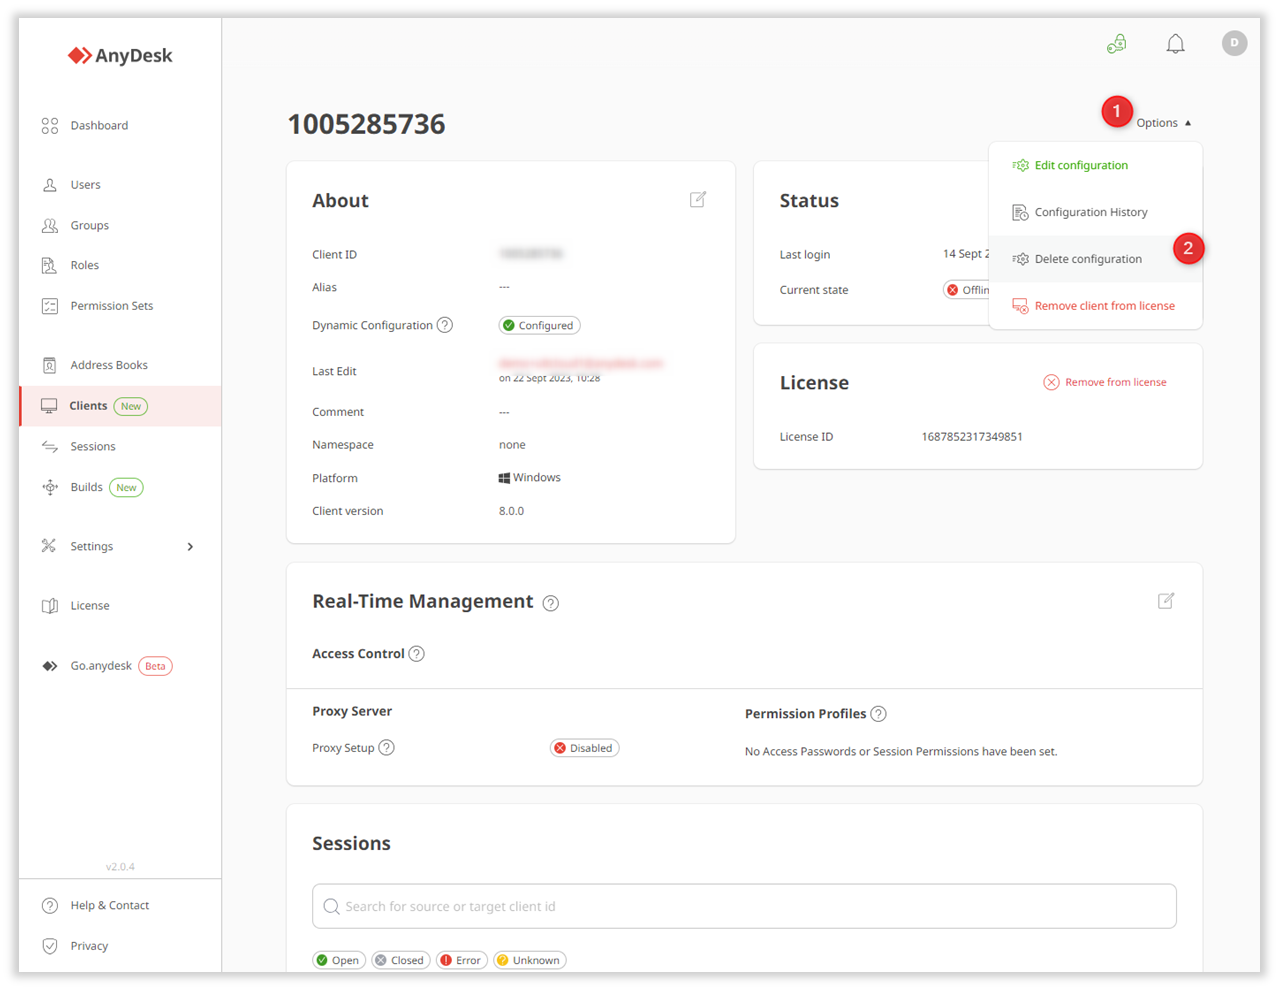
Go to Clients and select the client you want to edit.
On the opened page, click Options > Create configuration.

On the opened page, make changes to the following sections:
Client Type - adjust client type (Incoming only, Outgoing only, or Bidirectional).
Security - update security settings.
Advanced - override default AnyDesk settings by using key-value pairs.
Features - manage access to certain features in the client.
Session permission profiles - edit session permission profiles.
Click Save Config.
Any modifications made to the client will be automatically applied to it.
To check if the changes were successfully applied, in the About section, the Dynamic Configuration field will change from Unconfigured to Configured.

You can also review the list of changes made to the client by navigating to Options > Configuration History.
Central management client status
Status | Description |
Not available | The client was installed with a static build or standard client. It cannot be centrally managed, which is why this status appears. |
Unconfigured | The client was installed using a dynamic build. Whenever the client is online, it will automatically receive any changes made in the custom client configurator. |
Configured | The client uses a dynamic build and has custom settings applied through my.anydesk II. Once individual settings are changed, the status updates to Configured. |
Delete client configuration
You can also revert settings back to the default client version.
To delete client configurations:
Go to Clients and select the client you want to edit.
On the opened page, click Options > Delete configuration.
In the confirmation window, click Delete configuration.
All custom edits are removed, and client returns to default settings.
Remove client from your license
You can remove a client from your license by following instructions in this article. Once removed, the AnyDesk client (and the device) will be unlinked from the license and assigned to the free version of AnyDesk.