License: Standard, Advanced, Ultimate-Cloud
Relevant for: Admin, IT agents
This article provides an overview of how to modify or delete your custom client builds in my.anydesk II.
Overview
Once you've created a custom client, you can distribute it across multiple devices. A custom build may have several AnyDesk clients linked to it.
If you need to adjust client settings, such as security configurations or feature access, you can apply changes through my.anydesk II.
🦉 To modify individual clients in real time, see this article.
Custom client (Build) types
Changes to build can be applied in two ways, depending on the build type you selected during creation. There are two types of builds:
Static - a custom build that requires reinstallation on all devices after each customization.
Dynamic - a custom build that supports real-time updates across all linked clients without reinstallation. To use the dynamic builds, you need to Activate Central Management first.
Edit a custom client
You can adjust settings of already created and installed custom builds in my.anydesk II.
Editing a static build
After making changes to the static build, it should be reinstalled again on all devices.
To update a static build:
Sign in to my.anydesk II, go to Builds and select the build you want to modify.
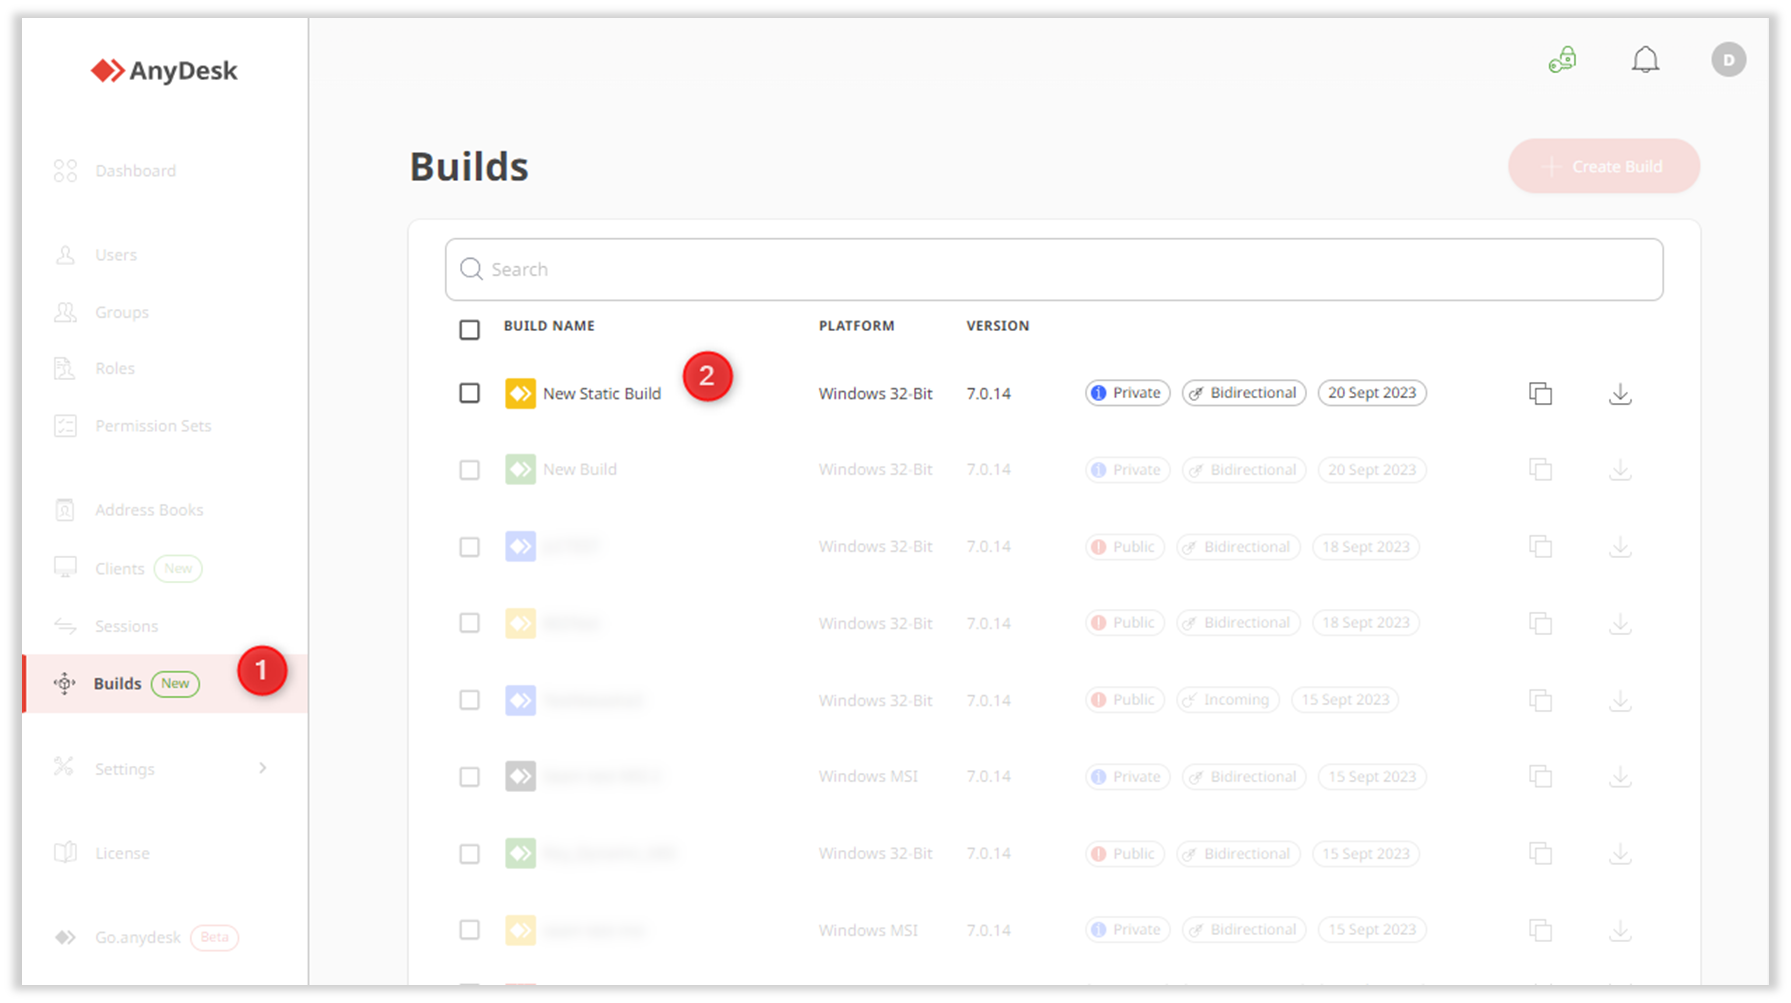
On the opened page, click Edit Build.
Adjust the settings of the build and click Save Build.
🚨 IMPORTANTA static build cannot be changed to a dynamic build after creation.
Once updated, share the download link for reinstallation on all devices.
Editing a dynamic build
A dynamic build eliminates the need for manual client reinstallation unlike the static build. It streamlines the management process and ensures consistent updates across all clients.
💡NOTE
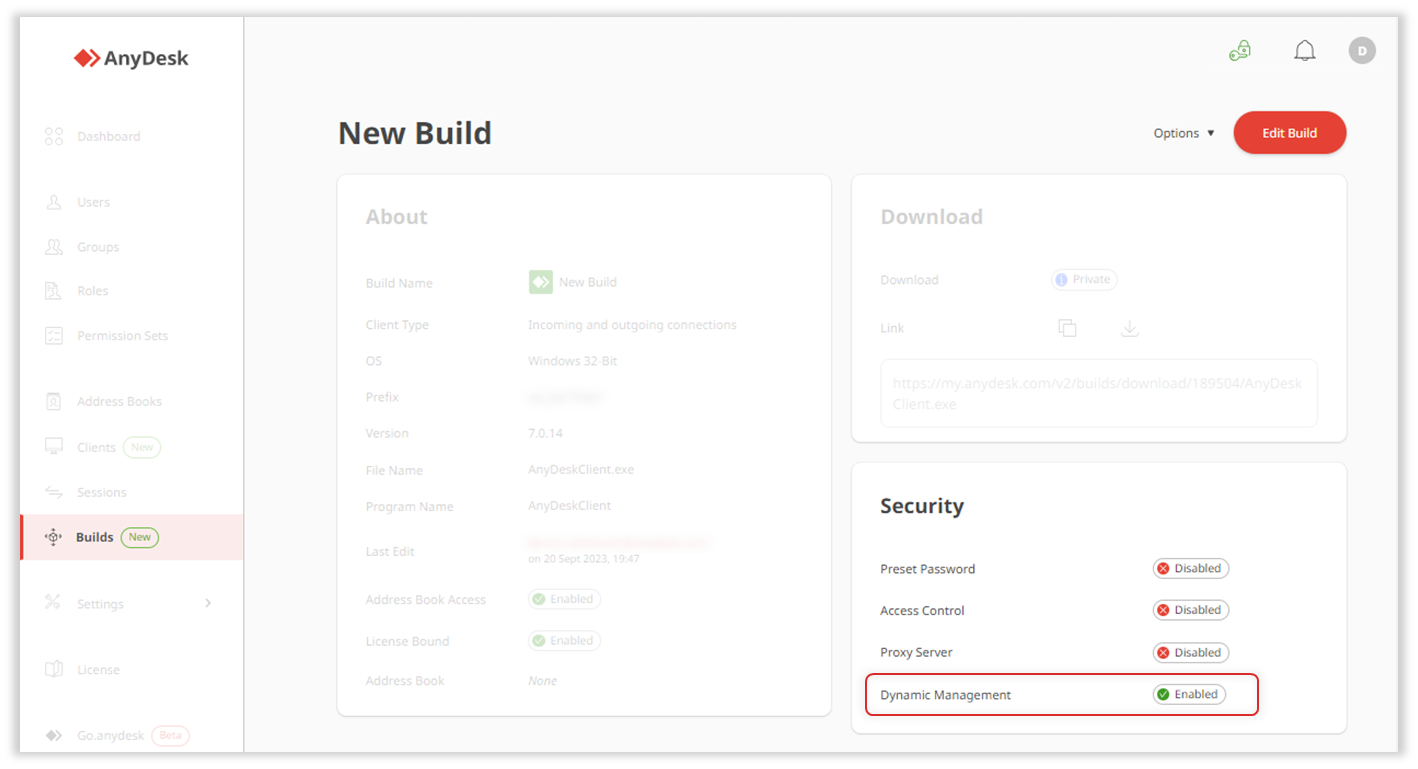
Ensure that Central Management is enabled under the Security section to confirm it is a dynamic build.
To update a dynamic build:
Sign in to my.anydesk II and in the Activate Central Management section, click Provide Private Key.
💡 To learn how to get your Private Key, see What is a Private Key?
Paste the key and click Continue.

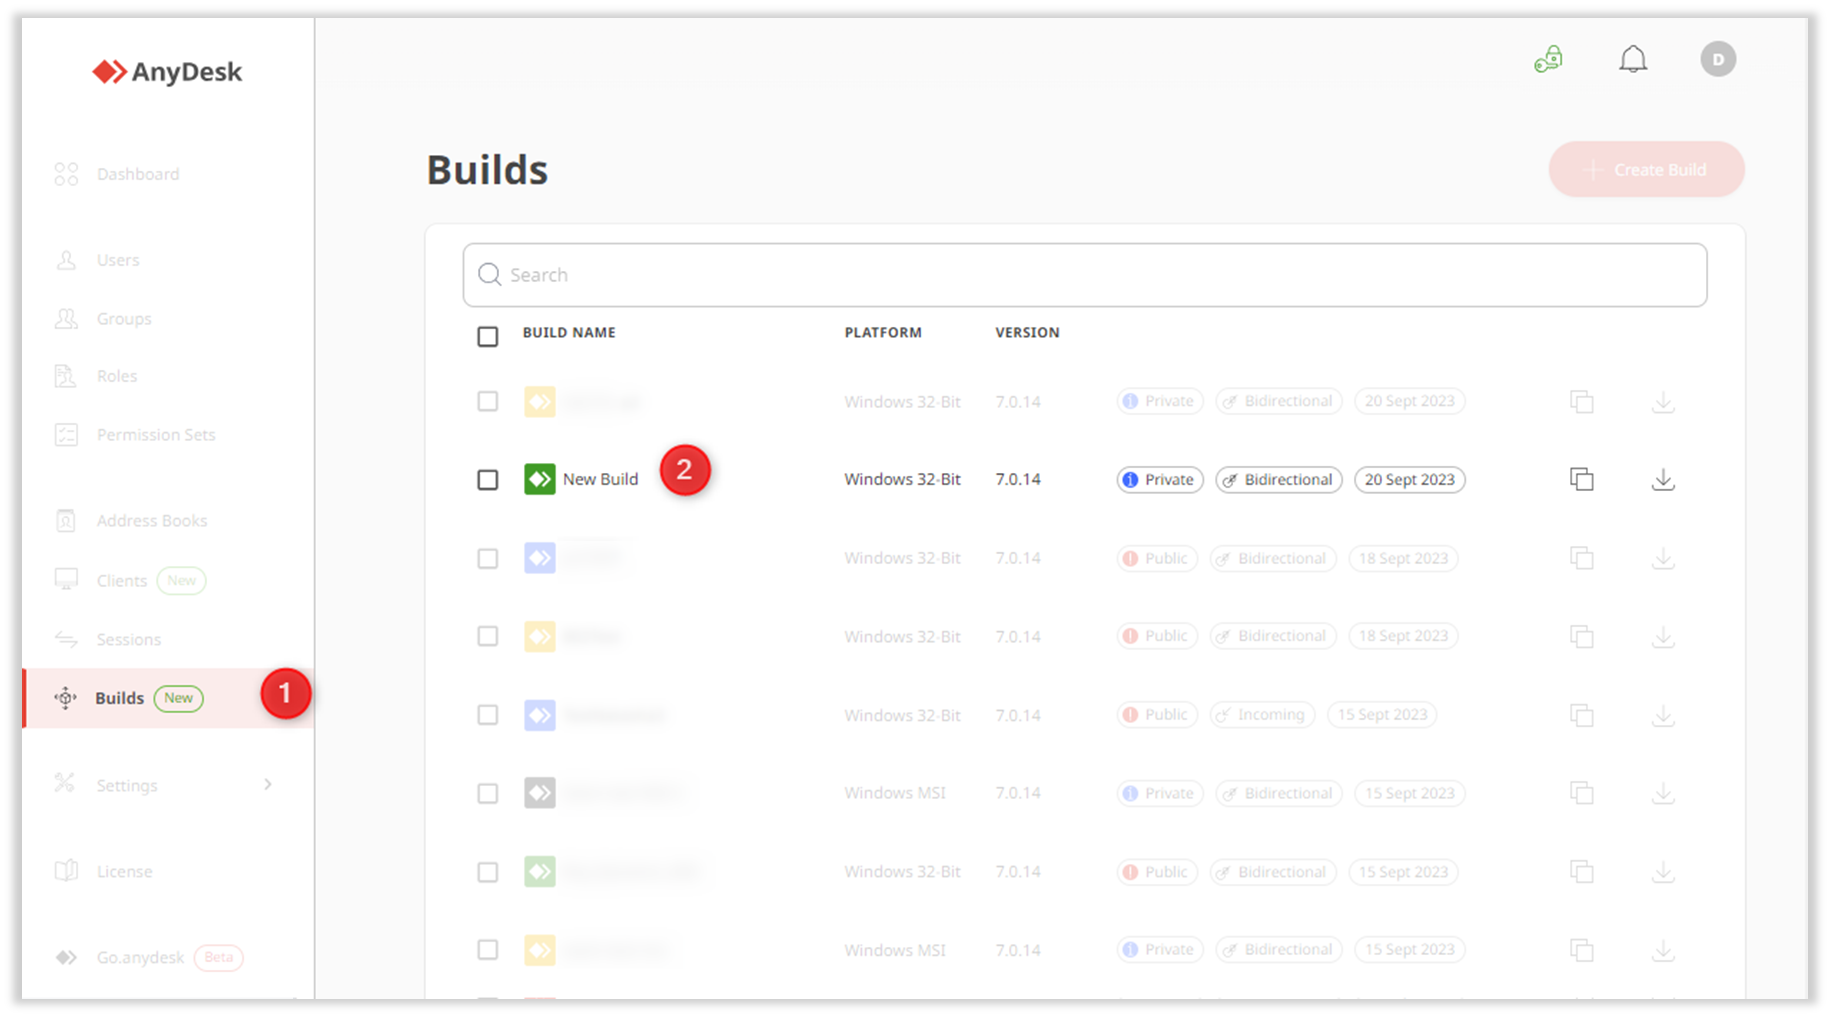
Go to Builds, select the build you want to edit, and then click Edit Build.
Apply the required changes and click Save Build.
Changes are applied automatically to all linked clients. You can also view:
Devices where the build is installed.
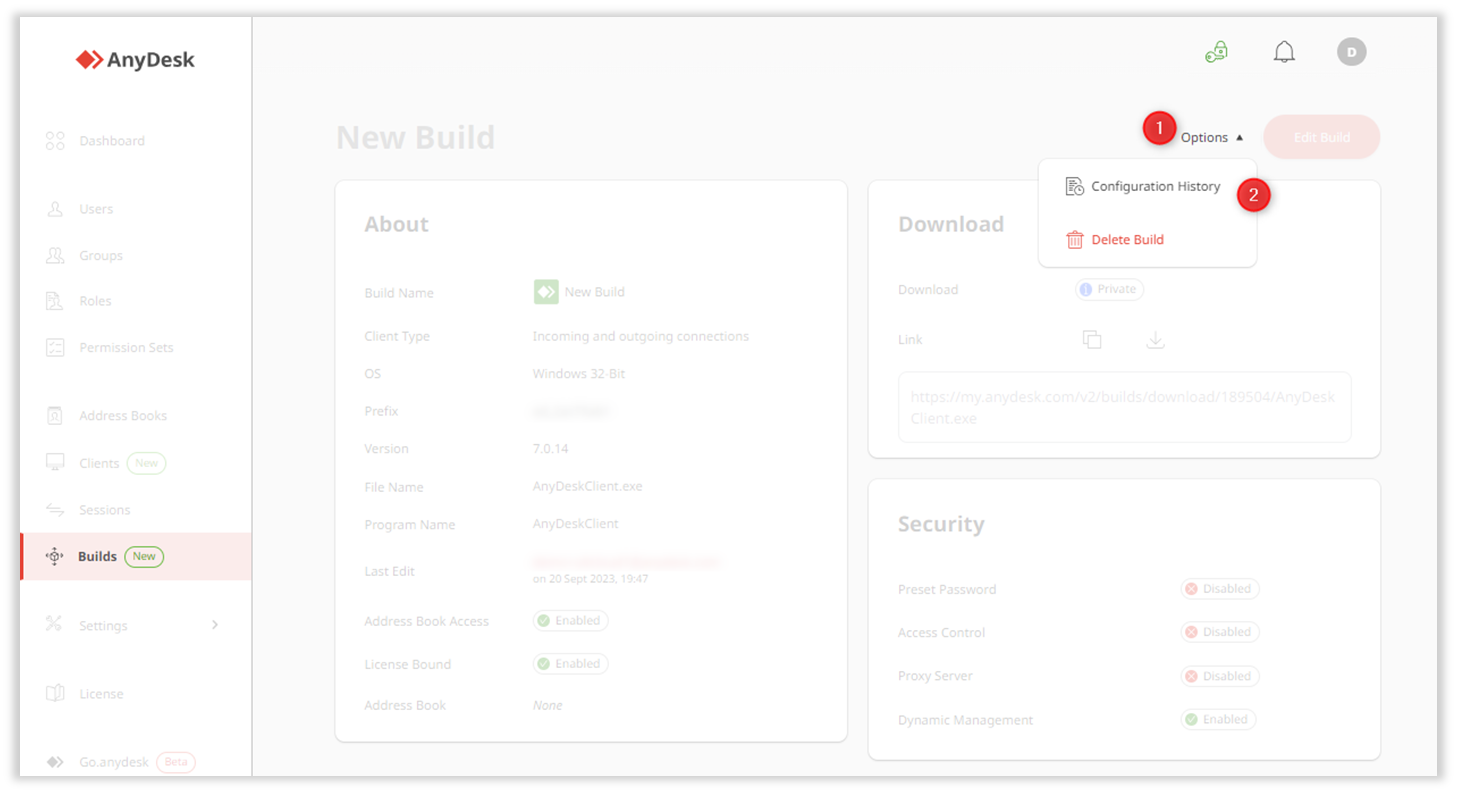
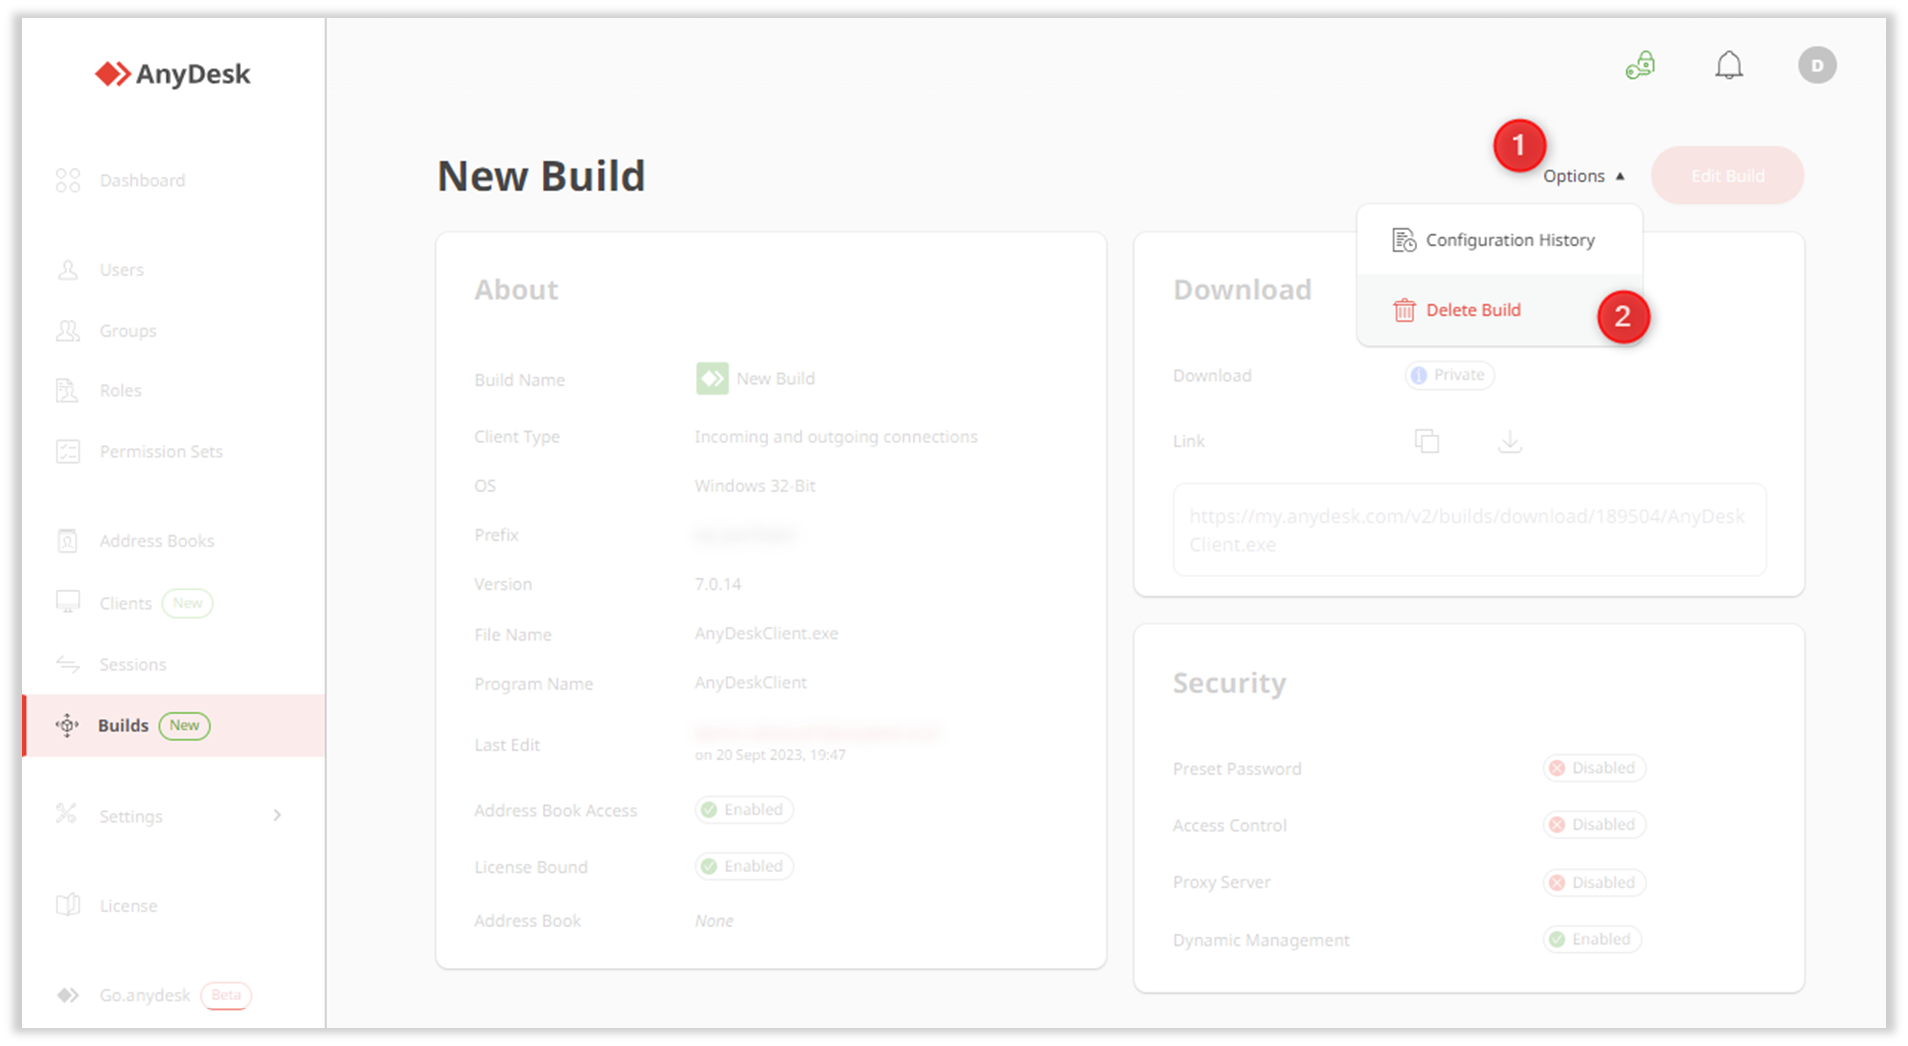
The build’s configuration history via Options > Configuration History.
Delete a custom client
If you created a build by accident or don't use the build anymore, you can permanently delete it.
There are two ways of how you can delete a build:
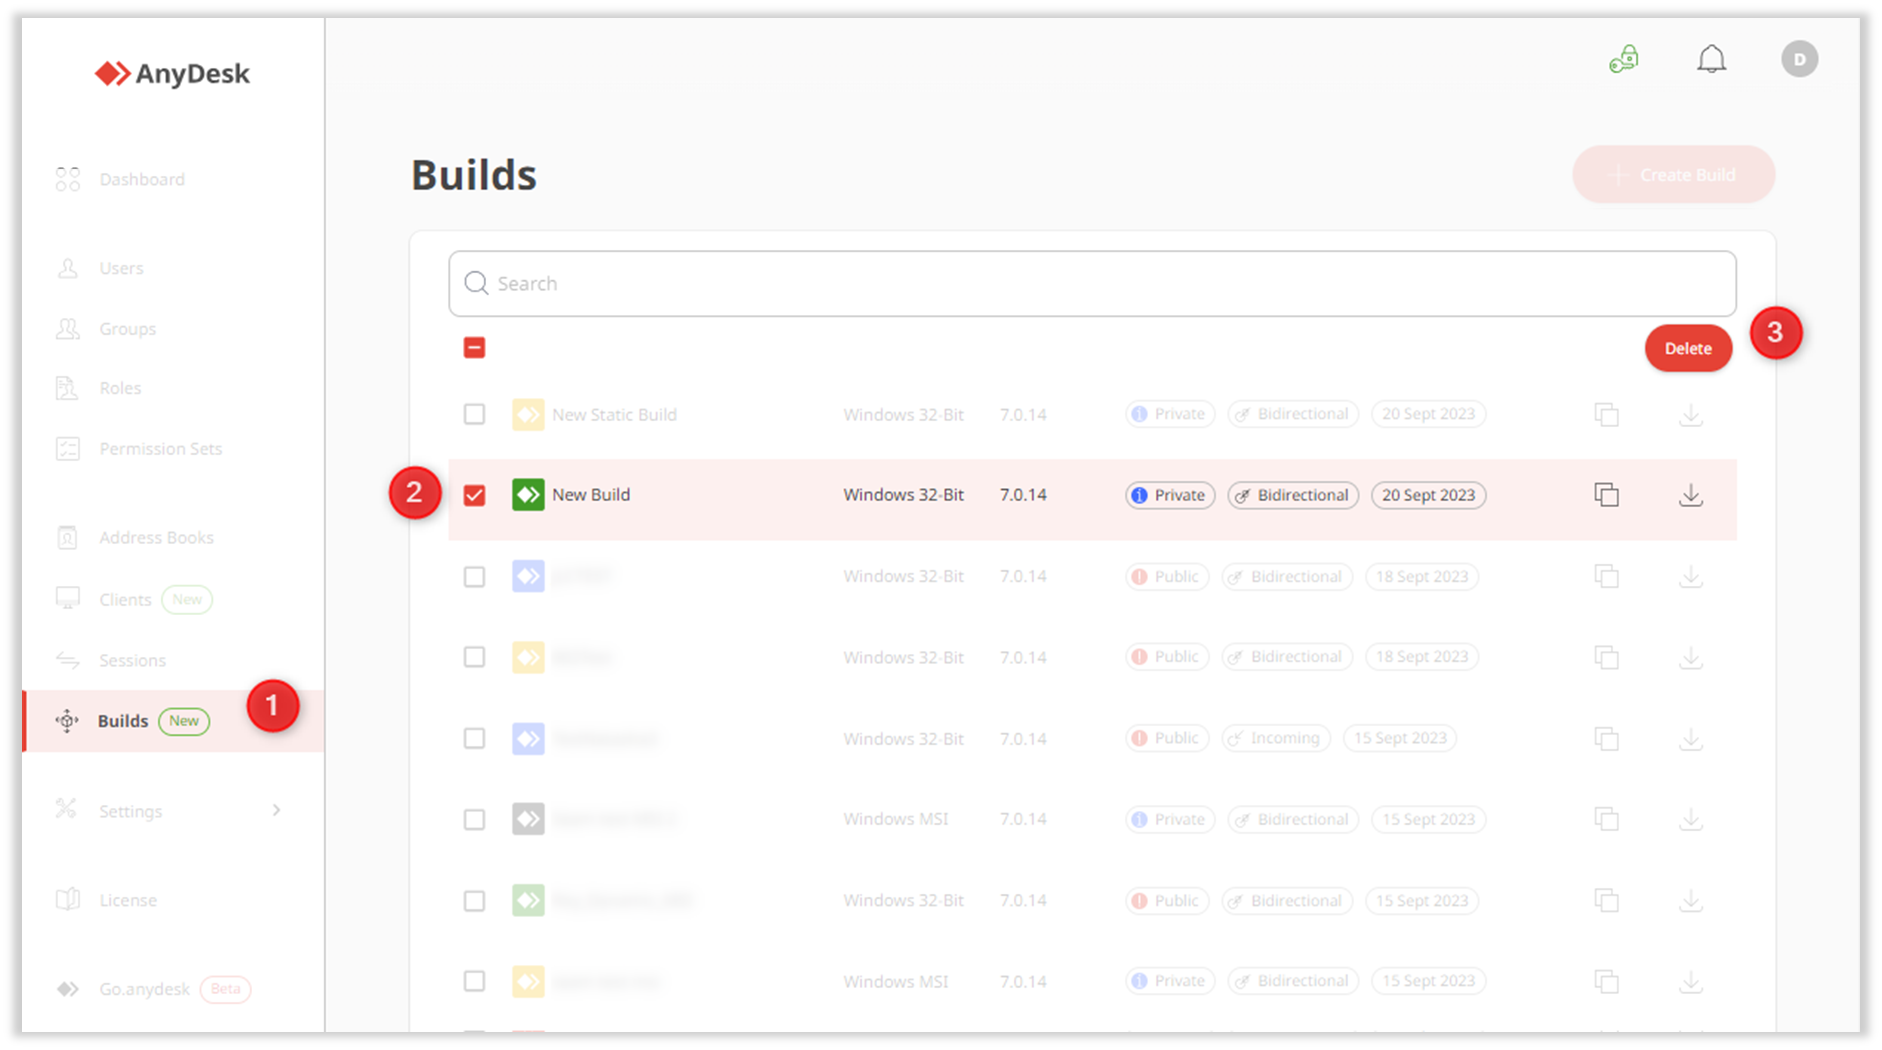
Go to Builds, select the checkbox for the build you wish to delete and click Delete.
Go to Builds, open the build, and click Options > Delete Build.
Once deleted, a custom build cannot be recovered.