别名为 AnyDesk ID提供了更具描述性和用户友好性的标签。别名对于快速识别设备、提高个人和企业环境中的可用性特别有用。

如果您需要更改现有别名,本文将介绍可用选项以及如何更新它,具体取决于您的 Namespace 和许可证类型。
要求
别名必须遵循以下格式: <name>@<namespace>。
允许的字符: a-z、0-9、连字符 (
-)、句点 (.)、下划线 (_)最大长度: 25 个字符
可以在公共或自定义命名空间中分配别名:
公共命名空间 @ad
格式:
john@ad仅适用于付费许可证用户
每个AnyDesk ID最多可以在公共命名空间中分配3个 别名 。
创建后,这些别名将 永久链接 到原始 ID, 无法删除或重新分配。
自定义命名空间是您想要的任何内容,例如 @yourcompanyname
格式:
john@yourcompanyname需要标准、高级或终极许可证
可以随时创建、更改或重新分配自定义命名空间中的别名,而不受限制。
设置或更改别名
如果 AnyDesk 客户端还没有别名,可以按照以下步骤分配它:
要在 AnyDesk 客户端中设置别名,请确保客户端已安装并注册了有效的 许可证密钥。设置完成后,您可以直接在应用程序中分配别名:
打开 AnyDesk。
在右上角,单击
.png) 并选择 设置。
并选择 设置。 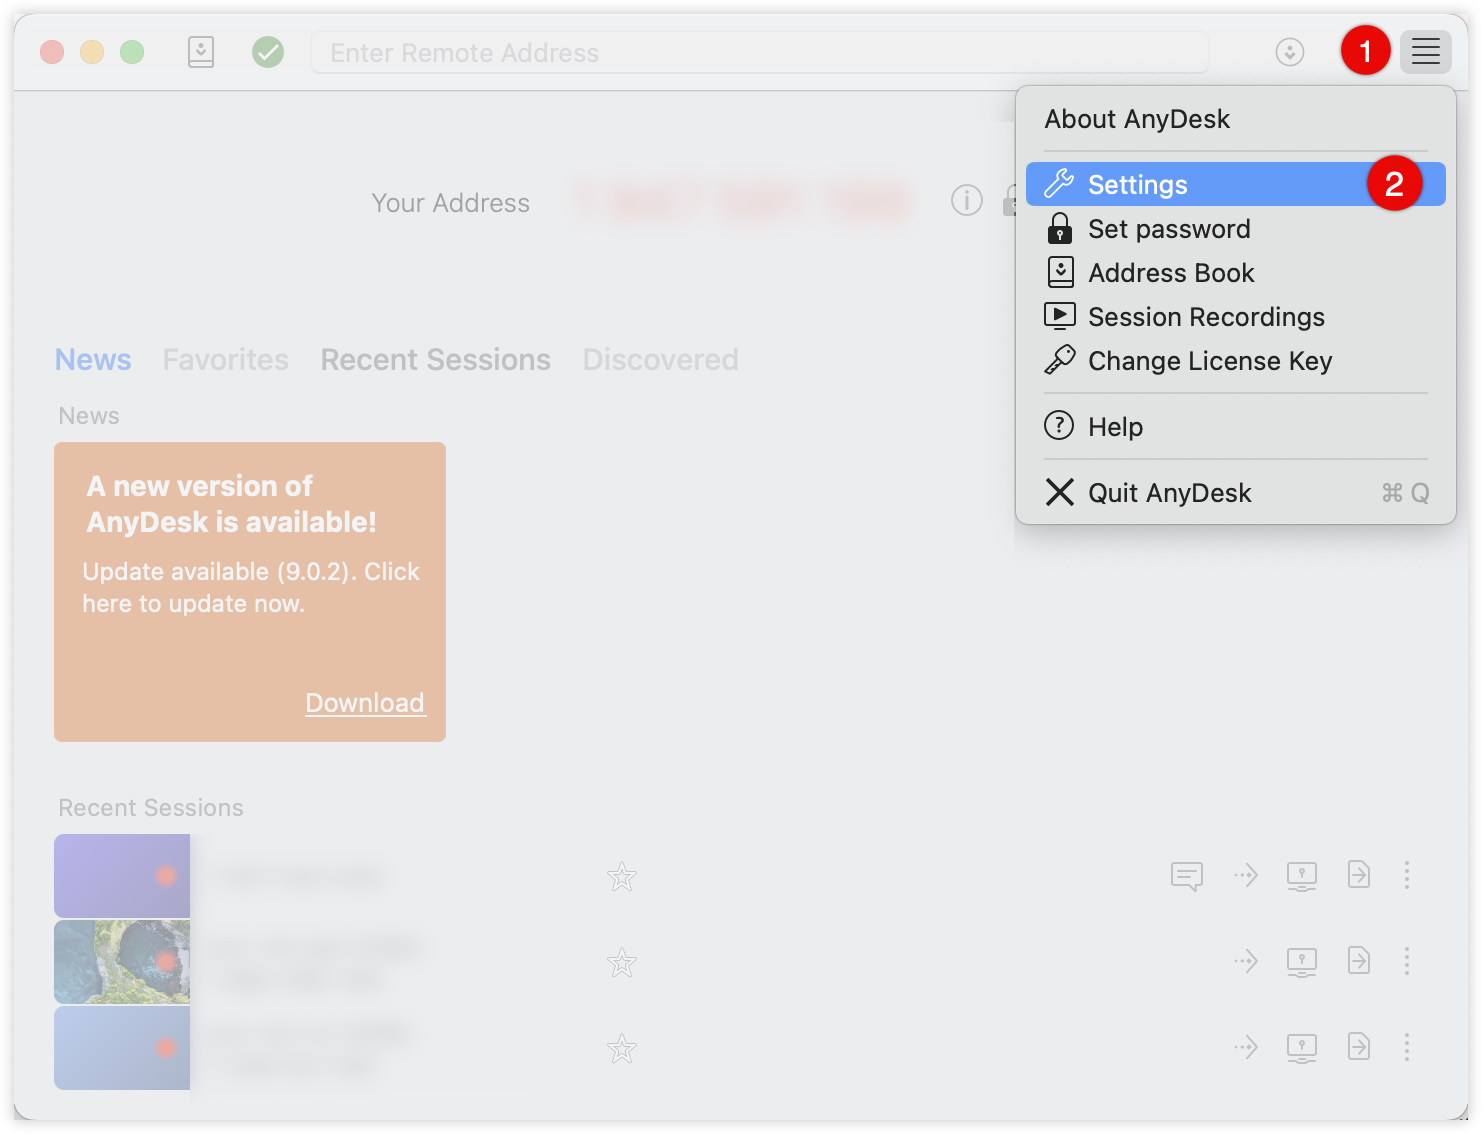
转到 “身份” ,然后在 “别名 ”部分中,单击“ 选择别名”。
输入您的新别名,然后单击 注册。
💡 注意
如果 “选择别名 ”按钮显示为灰色,则表示您使用的是免费版本,无法分配别名。
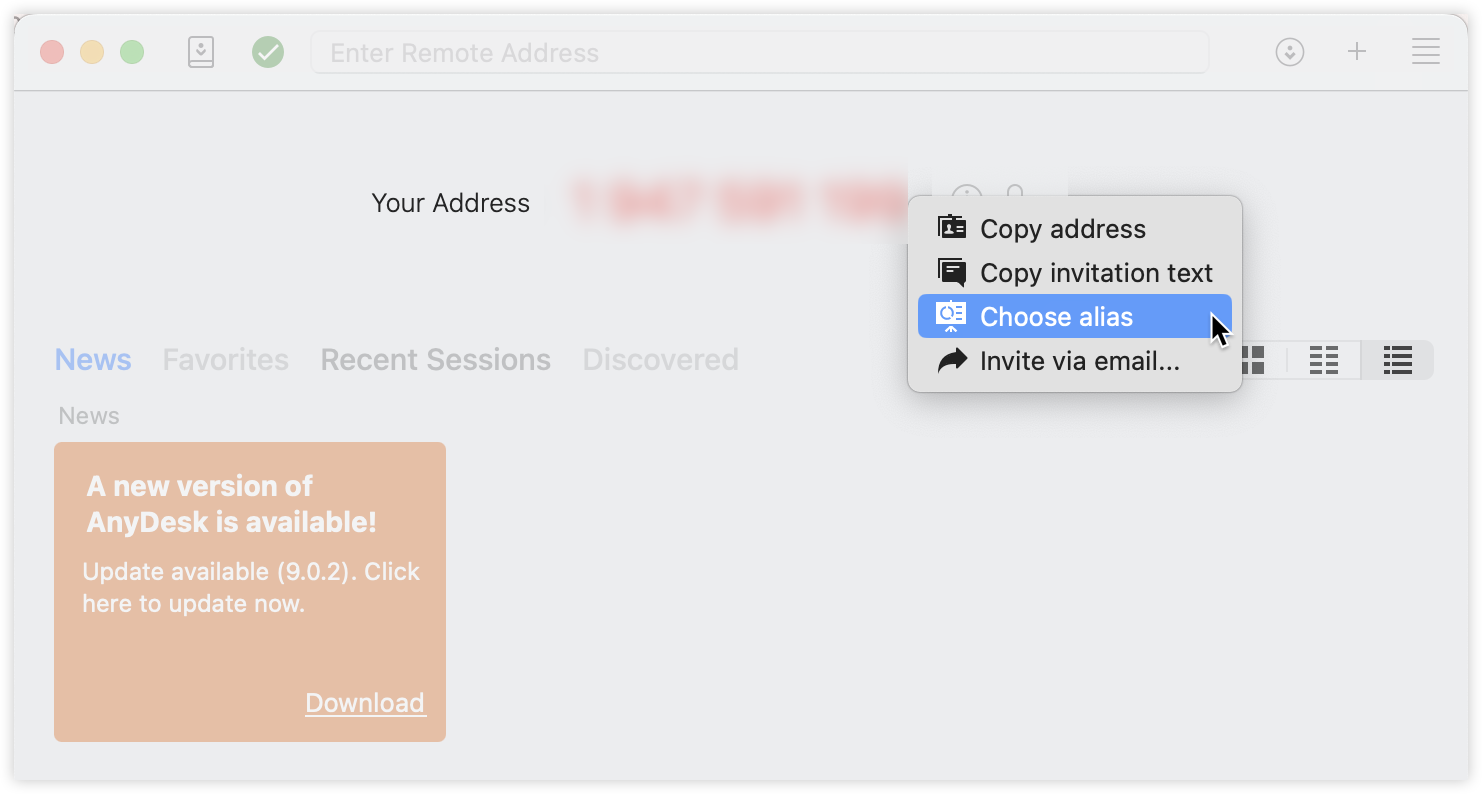
🦉 您也可以右键单击 AnyDesk ID 并从列表中选择别 名 。
您可以在 my.anydesk II中更改现有的别名。
您可以为链接到许可证的所有客户端设置和更改别名。为此:
登录 my.anydesk II 并导航到 “客户端” 选项卡。
.png)
选择所需的客户端并双击它以打开 客户端详细信息 页面。
在 “关于” 部分中,单击
.png) 。
。在 别名下,输入所需的别名,然后单击 保存更改。
.png)
自动注册别名
在开始之前,请确保目标设备没有现有的 AnyDesk 配置文件。
要自动注册别名:
登录 my.anydesk II 并转到 “构建 ”选项卡。
点击 创建构建(Create Build) 以打开 自定义客户端 生成器。
在打开的页面上,选择 “高级设置”。
向下滚动到“ 客户端设置 ”部分,对于“ 主机名”作为“别名”,选择 “公共 ”或 “自定义命名空间”。
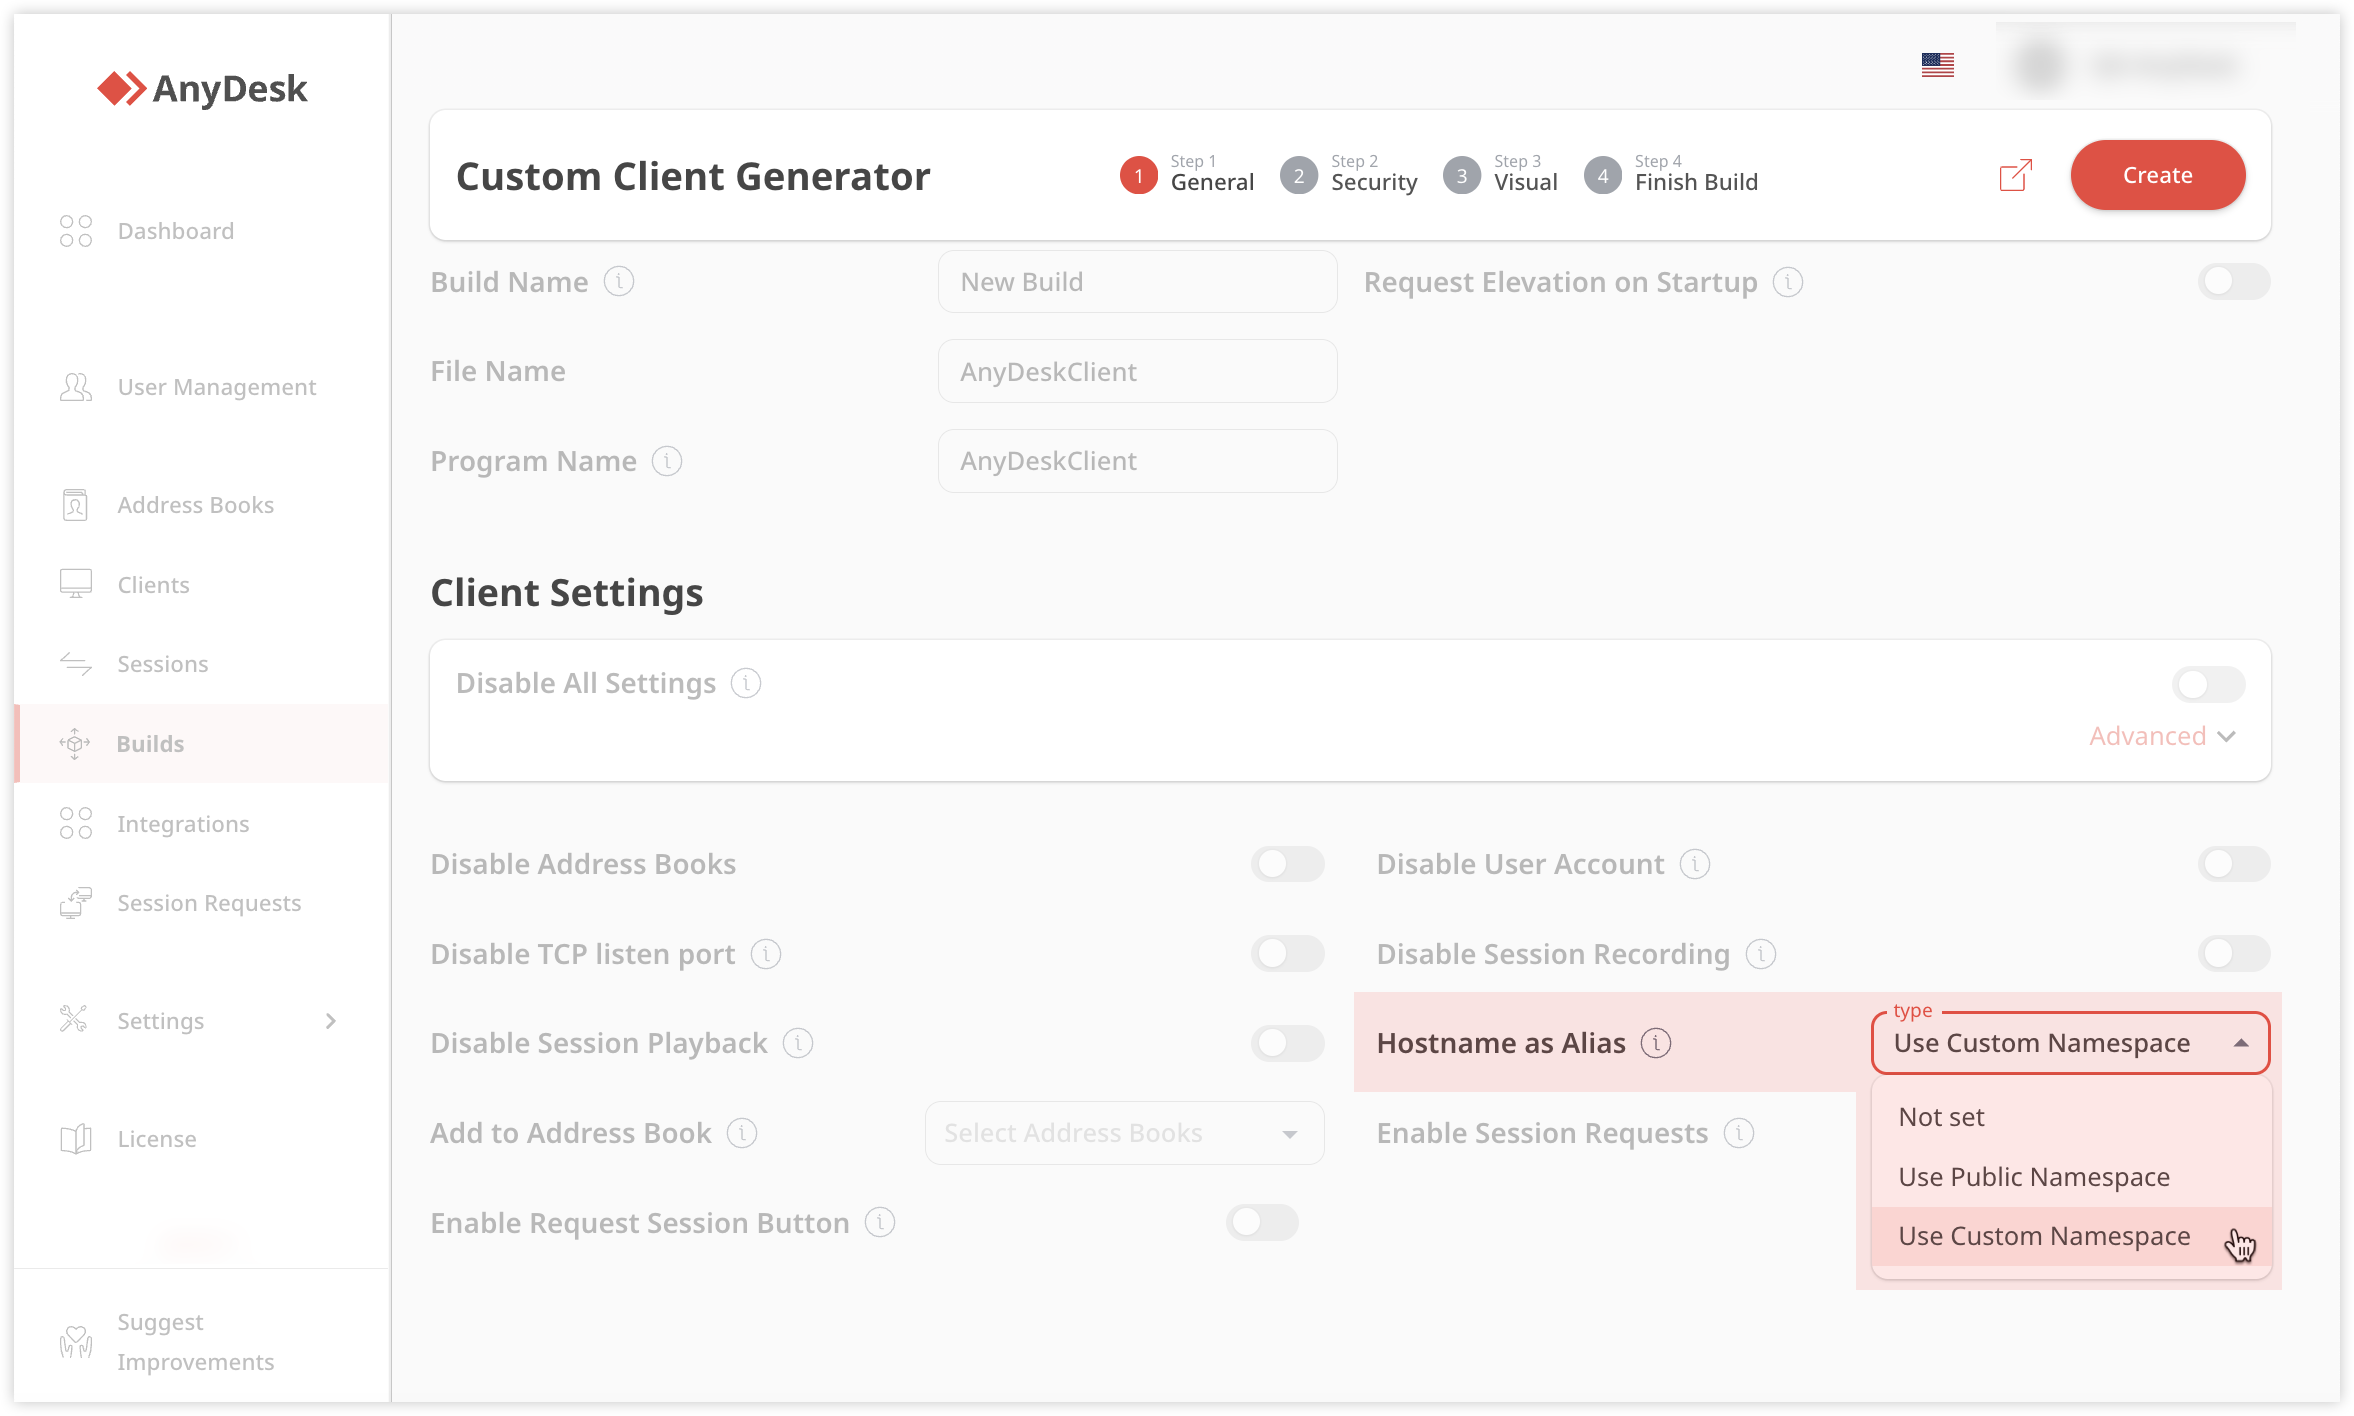
完成自定义客户端配置并将其安装在目标设备上。
laptop01@adlaptop01@yourcompany,)中使用设备名称自动注册。
备份别名
🦉 有关备份 AnyDesk ID 和别名的更多信息,请参阅 this article。
当迁移到新设备或从数据丢失中恢复时,您可以通过备份 AnyDesk 配置文件来保留您的 AnyDesk ID、别名和配置设置。别名存储在文件中 service.conf 。
要备份您的别名和 ID,请执行以下作:
将文件保存
service.conf在安全位置。
要进行完整备份(包括设置和 会话历史记录),请备份完整的配置目录:
安装的 AneDesk:
%programdata%\AnyDesk\
便携式 AnyDesk 应用程序:
%appdata%\AnyDesk\
🚨 重要如果丢失且未备份,则
service.conf无法恢复别名和 AnyDesk ID。