License: Standard, Advanced, Ultimate-Cloud
Relevant for: Admin, IT agent, or users with permissions to create custom clients.
In the my.anydesk II management console, you can customize your own AnyDesk client and share it with others. Builds are custom clients, or custom AnyDesk applications.
🦉 To learn how to create a custom client (build), see this article.
Overview
A Build is a personalized client configuration with your preset settings, which can be installed on one or multiple devices. This ensures that each device within your organization will have an AnyDesk client configured to your needs.
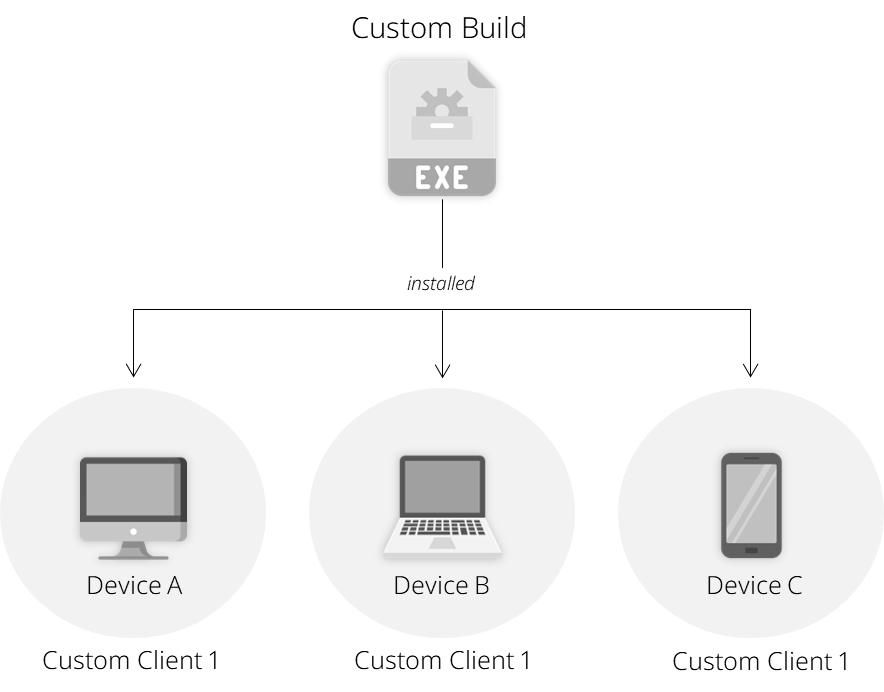
You can view all builds that you created, or others in your license that have the permission to do so, in the Builds tab.
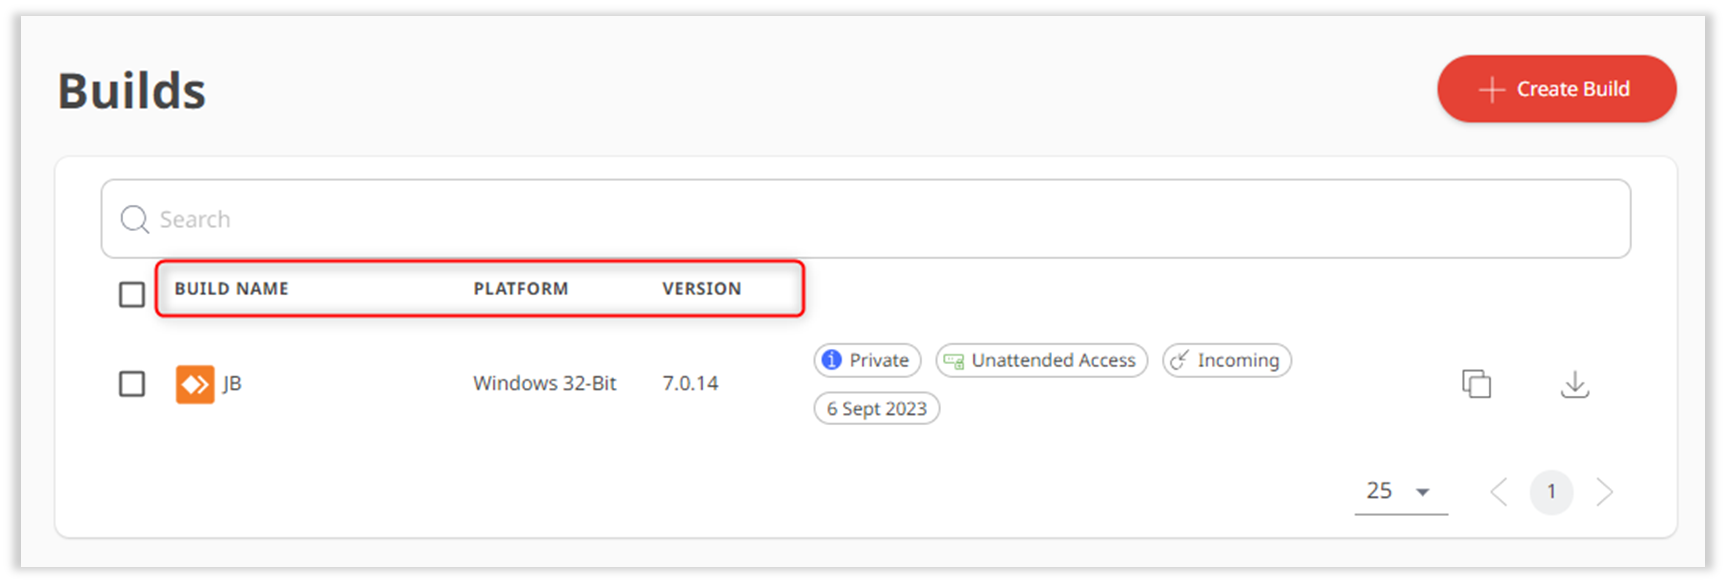
On the Builds page, view the following information for each custom build:
Build name - the name of the created build.
Platform - the operating system for which the build was created.
Build details
You can view the details of each build by going to the Builds tab and then clicking the specific build from the list. Here, you can see the following information on each build:
About - displays the type of the client (incoming or outgoing, or bidirectional), for which operating system the build was created, the version of AnyDesk client, the name of the build, and more.
Security - shows which the security settings are activated for the build, such as Access Control List, Unattended Access, Proxy Server, or Dynamic Management.
Download - includes the settings for downloading the build. You can easily share your custom configuration by copying (
 ) the URL and sharing it with others. If the Download type is Private, users have to will need to log in with a linked account to download. If it's set to Public, anyone with the link can download the custom client. To download the custom client to your device, click
 . You can also customize the Download button's design.
 Clients Linked To This Build - shows a list of devices where the build has been installed.
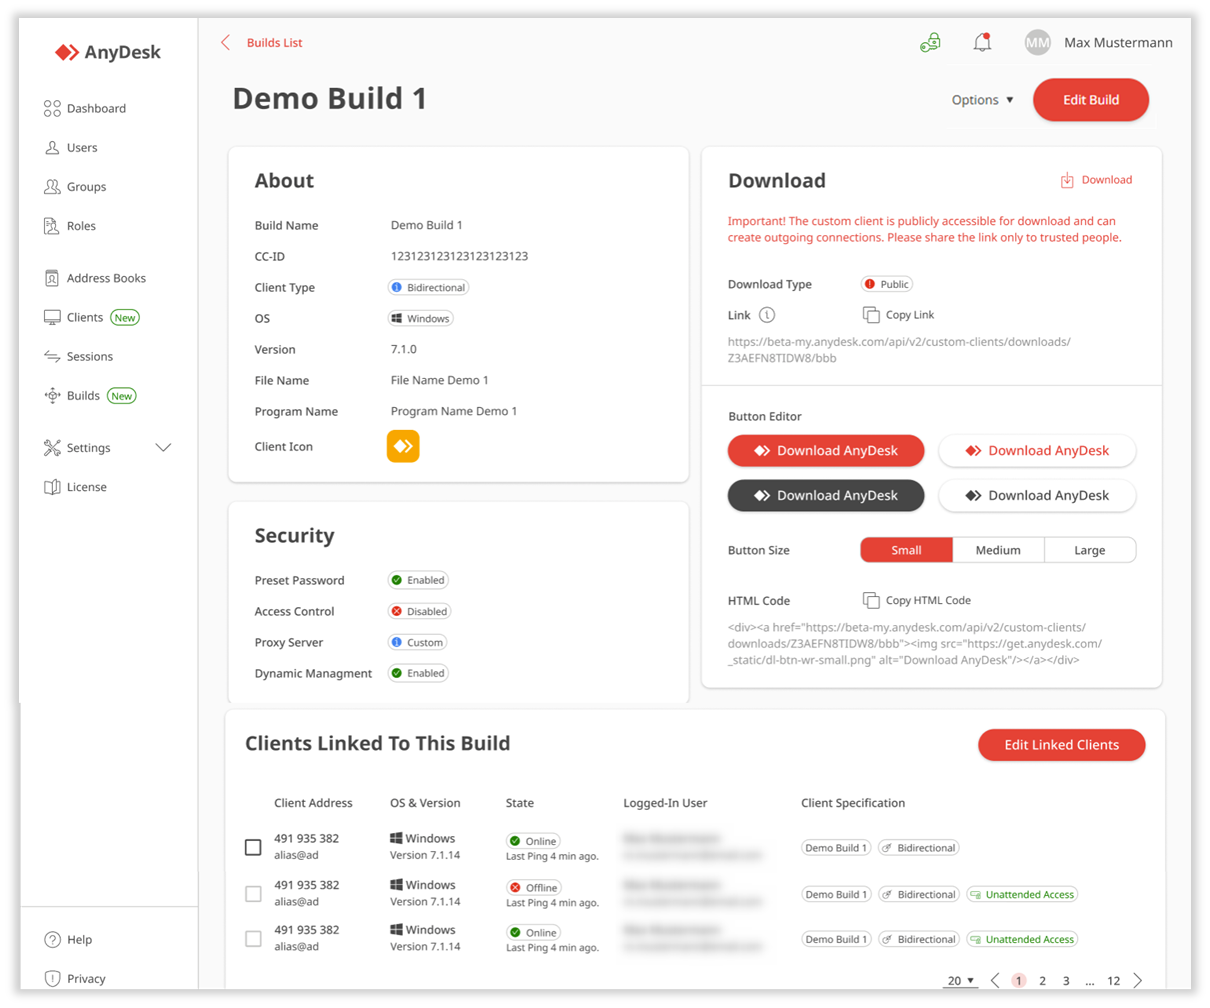
Custom client (build) details page