License: Ultimate-Cloud
Relevant for: Admin and support agents
Session Queue is part of the Session Requests feature in AnyDesk 9.0.1 for Windows and AnyDesk 9.1.0 for macOS. It helps support teams stay organized when managing multiple session requests by grouping them into separate categories. Support admins/managers can subscribe support agents to these groups and handle requests more efficiently.
This feature ensures that support requests are organized and handled by the right agents.
🦉 For more details about session requests, see this article.
How session queues work?
The Session Queues feature in AnyDesk provides a structured way to manage support requests by organizing them into queues. Each queue has a dedicated page where you can view all the requests assigned to it.
To create a new queue:
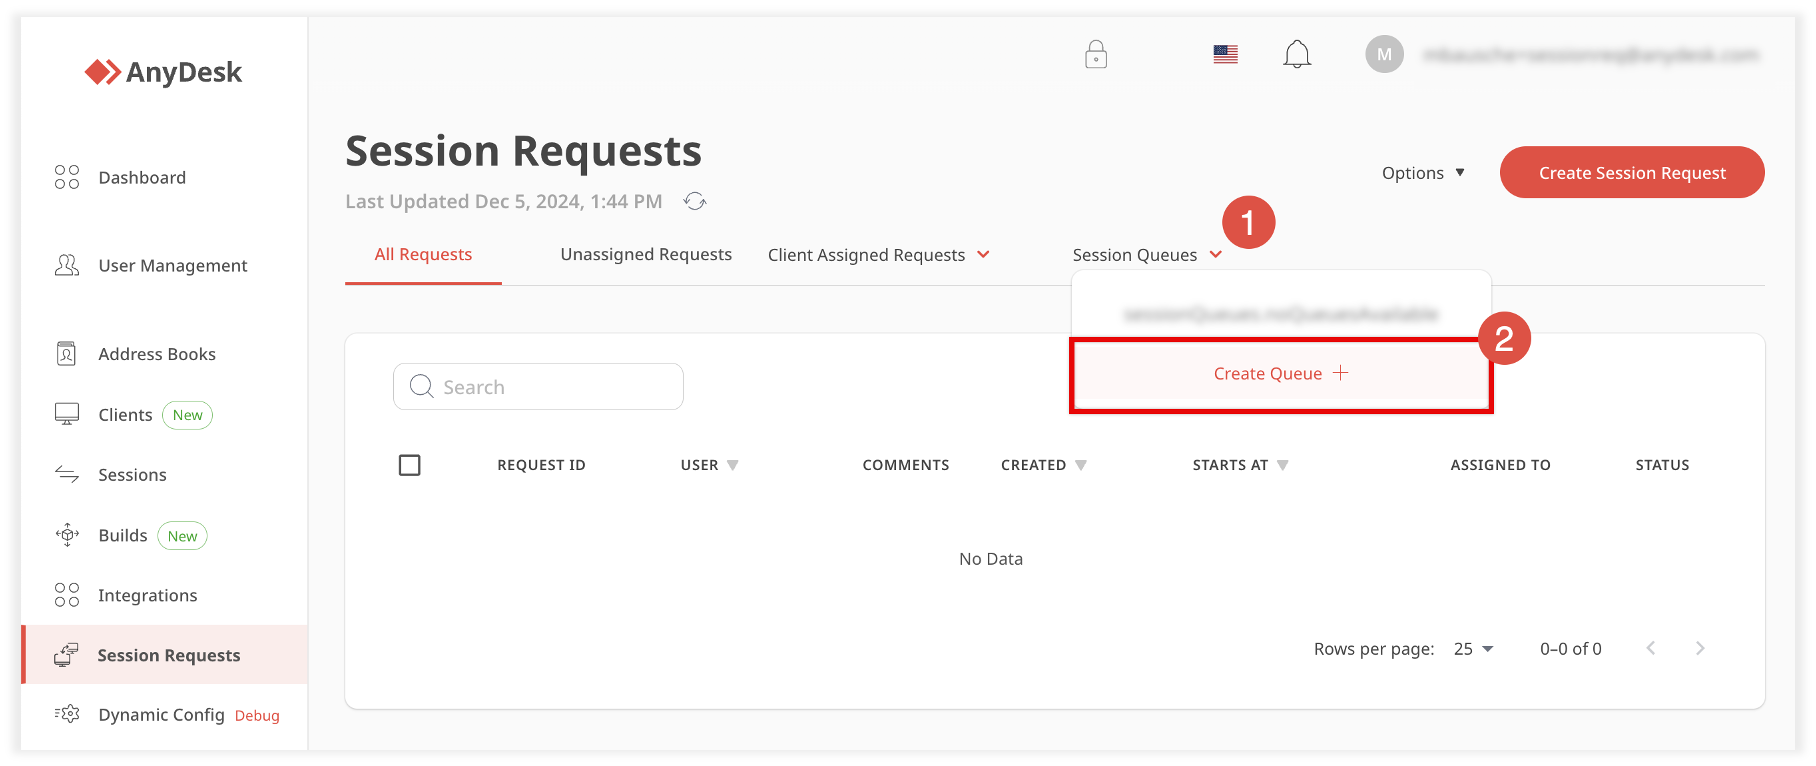
In my.anydesk II, go to Session Requests > Session Queues and click Create Queue in the drop-down menu.

Once a queue is created, you can use the Support Clients button to view and subscribe AnyDesk clients to that queue.
Only support agents with their subscribed Client IDs can view and manage the requests assigned to that queue in their AnyDesk client.
Who can manage session queues?
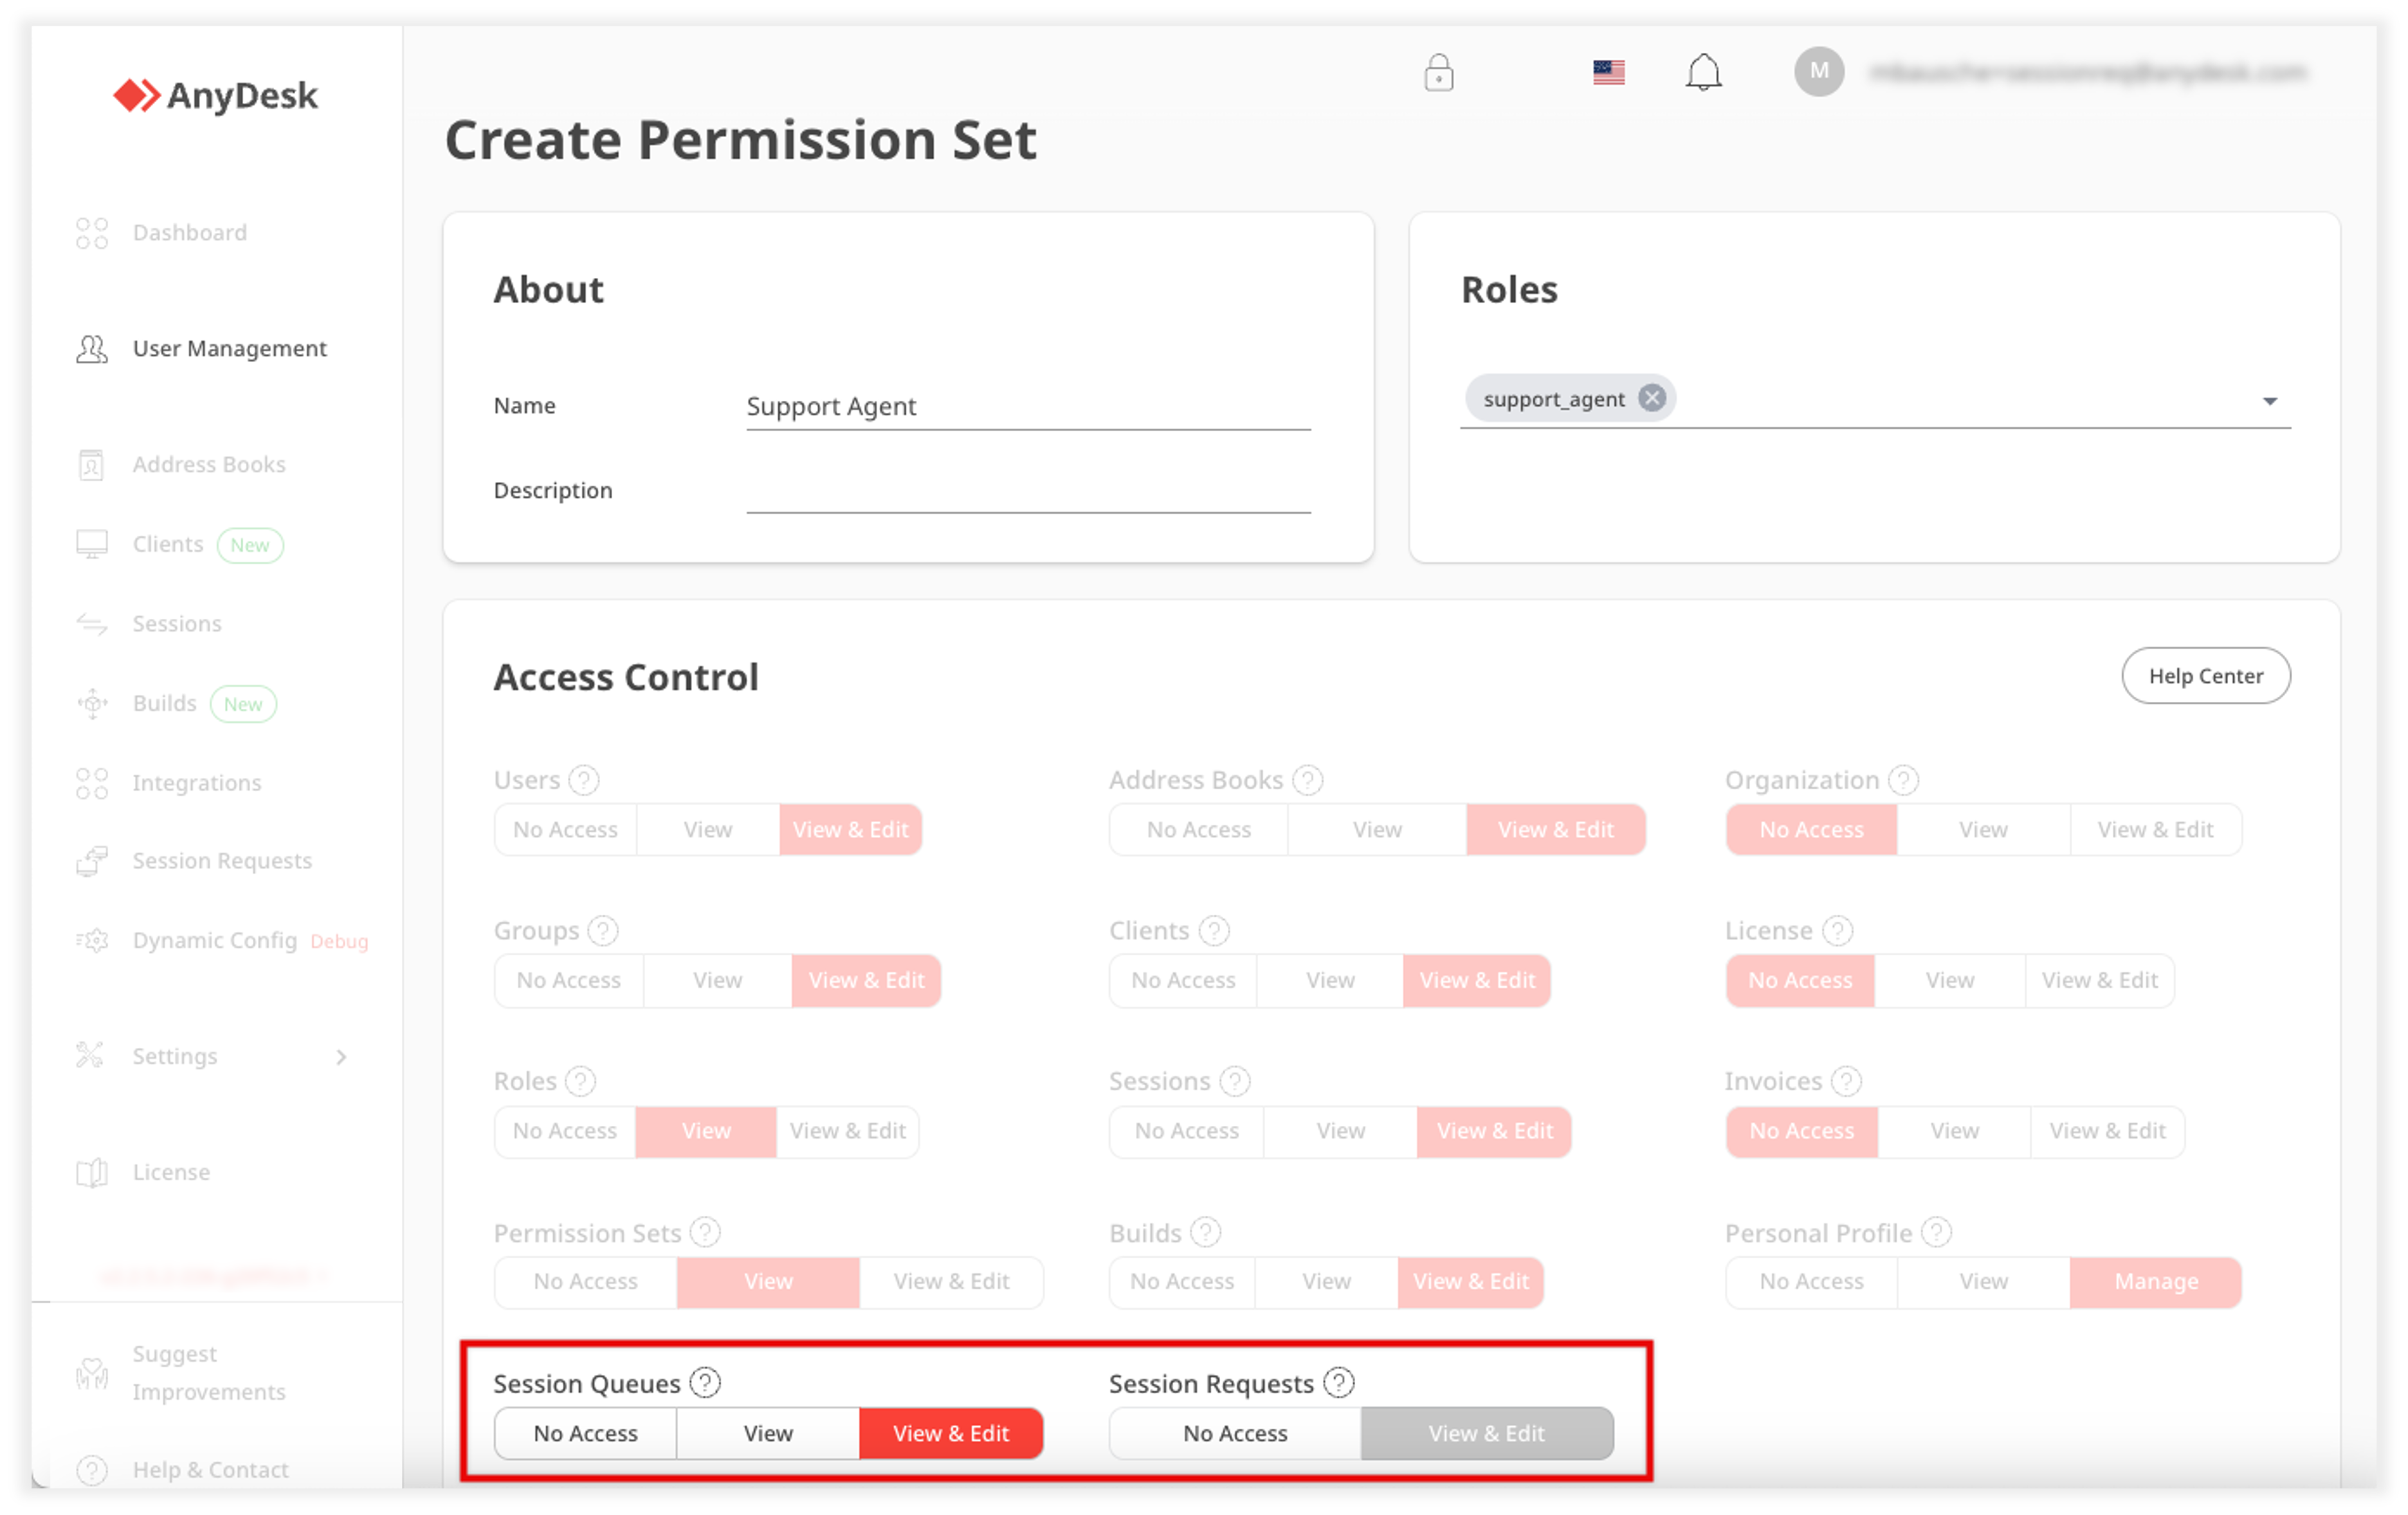
In my.anydesk II, only users with the View & Edit permissions for Session Queues can create, edit, or delete queues.

Permissions for Session Queues
Support admin can create permission sets and assign them to a role in my.anydesk II. To do that:
In my.anydesk II, go to User Management.
Open the Permission Sets tab and click Create Permission Set.
On the opened page, enter a name for the permission set, description, and assign it to an existing role.
Configure the permissions you want the user to have in my.anydesk II.