License: Ultimate-Cloud
Relevant for: Admin and support agents
Session Requests allows support agents to create new session requests, close or reopen them, schedule session requests for a specific time, and more.
This feature is for Support teams and organizations that need efficient and secure remote support solutions.
🦉 For more details on how to create session requests and connect to the Remote User, see this article.
Requirements
To create and manage Session Requests and Session Queues, you must have the appropriate role and permissions. Only the license owner can grant support agents the permissions in my.anydesk II.
Support agent must have the View & Edit permission for Session Requests enabled in my.anydesk II.
Support agent must be signed in to their account in the AnyDesk client with the correct permissions enabled.
Creating a session request
Support agents can create session requests in the AnyDesk client and in my.anydesk II if they have the required permissions. Follow these steps:
In the AnyDesk client, sign in to your account and then navigate to Session Requests.
In the dialog that opens, fill in the following details:
Recipient name - enter the end user’s name.
Assign to - select who to assign this session request to: Myself, Client, or a specific Queue.
Recipient email - provide the end user’s email address.
Send invitation email - select the checkbox to send the session link and updates to the provided email.
Comments - add any notes relevant to this request.
Click Create Request.
If you selected the Send Invitation Email checkbox, an email with the session request link will be automatically sent to the remote user from noreply@anydesk.com. You can also copy the session link by clicking ![]() and share it with the user.
and share it with the user.
In the my.anydesk II management portal, navigate to Session Requests.
In the dialog that opens, fill in the following details:
User name - enter the end user’s name.
User email - provide the end user’s email address.
Send invitation email - select the checkbox to send the session link and updates to the provided email.
Language - select the language in which to send email to the end user.
Support Notes - add any notes relevant to this request.
Schedule - select the checkbox to set a time for the session request.
Assign to - select who to assign this session request to: Myself, Client, or a specific Queue.
Click Create.
Managing session requests
Follow these steps to manage your session requests in the AnyDesk client or my.anydesk II:
Open the Session Requests tab.
Locate the
 menu in the right corner of the session request row.
From the menu, select one of the following actions:
Copy Link - copy the session link to share with the remote user.
Send Email - send the session link to the remote user via email.
Close - close the session request, which disables the session link.
Reopen - reopen a closed session request to reactivate the link.
Extend - extend already expired session requests.
Open the Session Requests tab.
Select the session request you want to manage from the list.
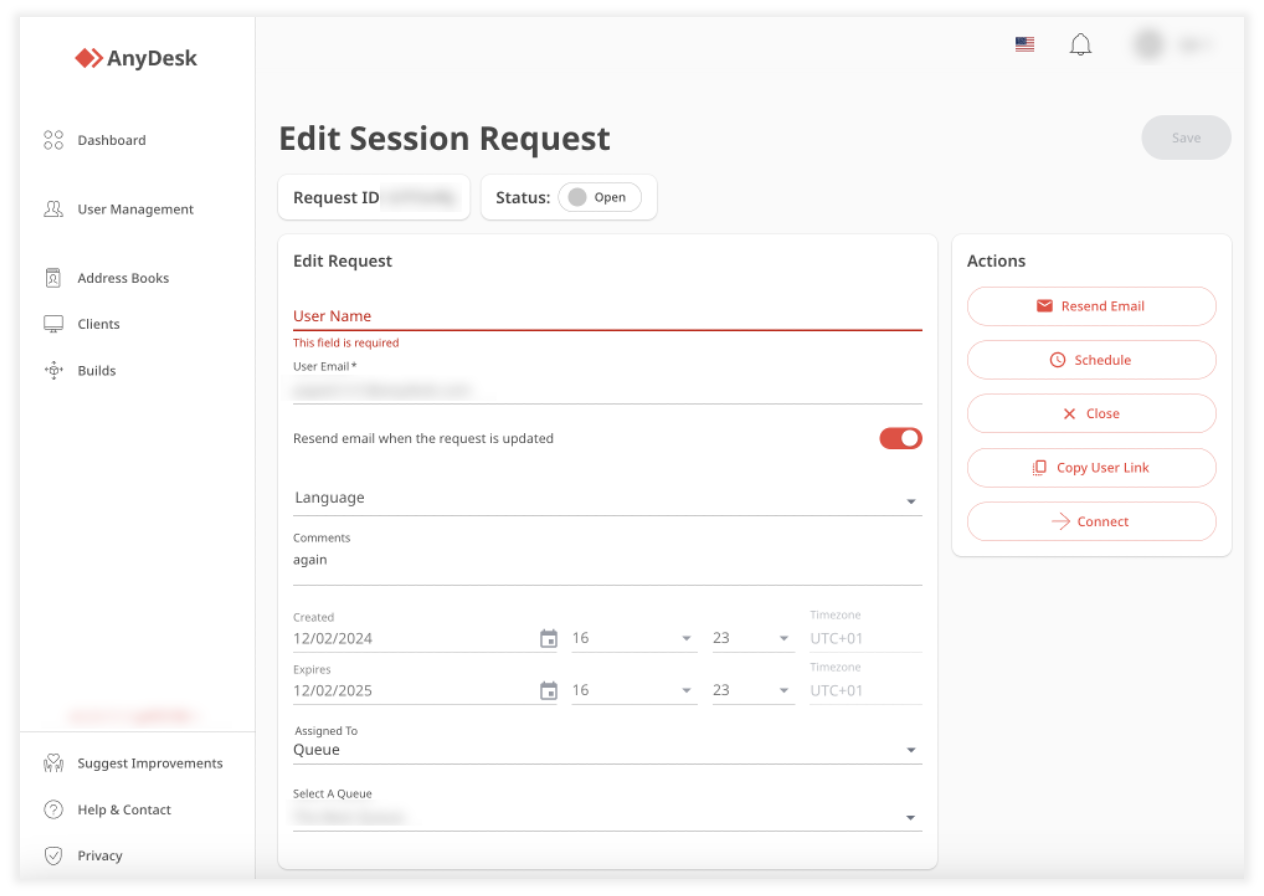
On the opened page, you can edit the session request details like User Name and User Email, add more comments, reassign the session request.
You can also do the following:Resend Email - send another email with the session link to the remote user's email.
Schedule - schedule a session for a specific time.
Reopen - reopen already closed session request to reactivate the link.
Close - close the session request after resolving the issue.
Copy User Link - copy the session link to share with the remote user.
Connect - start a session with the remote user.

Assigning session requests
You can assign a session request to yourself or another support agent. When creating a session request, you can assign it in my.anydesk II or the AnyDesk client:
During session request creation
Sessions can be assigned in my.anydesk II or directly within the AnyDesk client at the time of creation.After session request creation
If the session is already created, assignments can only be managed via my.anydesk II.
There are three assignment options:
Assign option | Description |
Unassigned | The session request is not assigned to anyone and is open for any agent to work on. |
Client | Assigned to a specific AnyDesk - yourself, meaning your client, or other support agent's client. which could be yourself (your client ID) or another support agent's client ID. |
Queue | Assigned to a Session Queue, where any support agent subscribed to the queue can take over and handle the request. |
🦉 For more details about session queues, see this article.
To assign a session request:
In my.anydesk II, open the Session Requests tab.
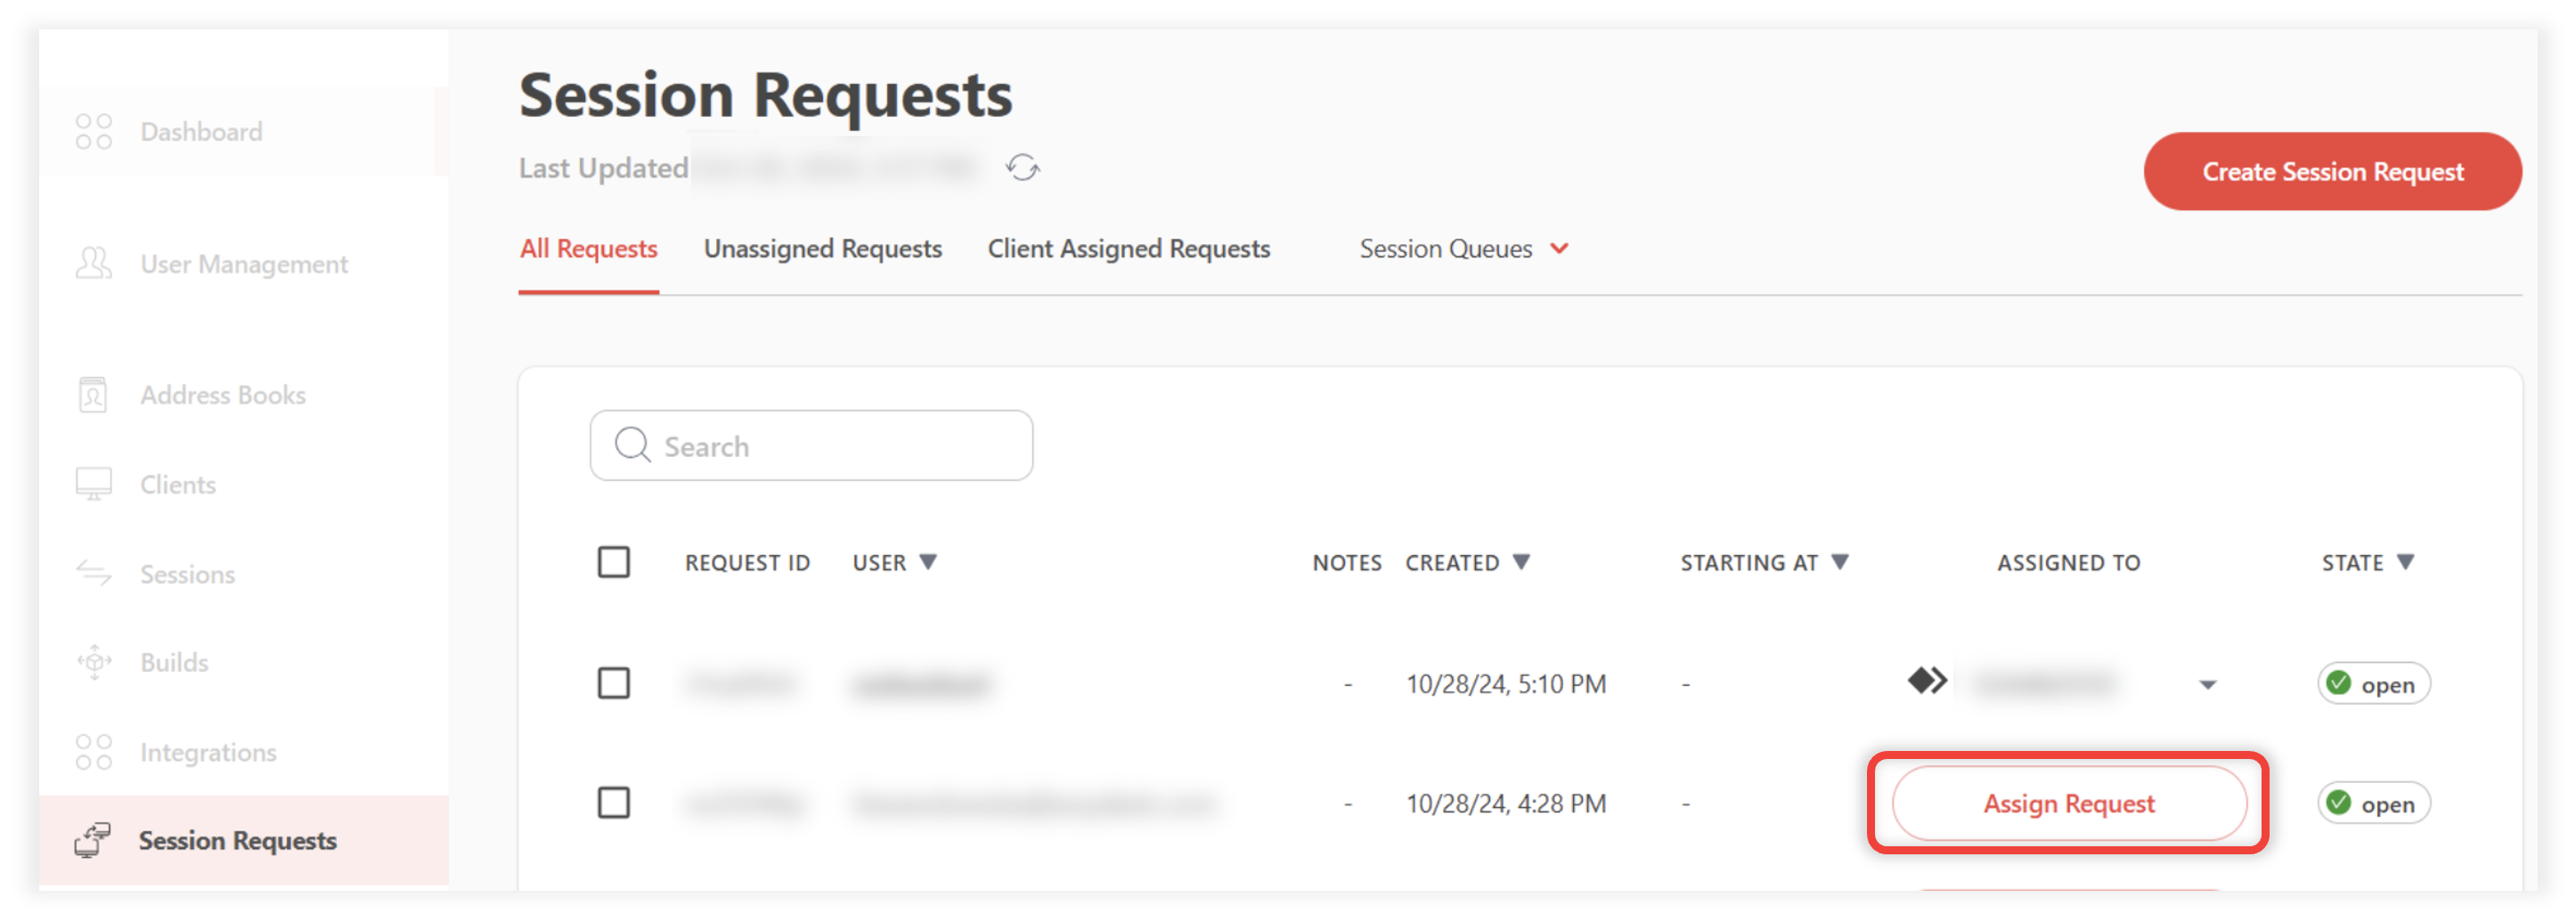
Select the session request you want to assign from the list and click Assign Request.

Select one of the following assignment options - Client or Queue.
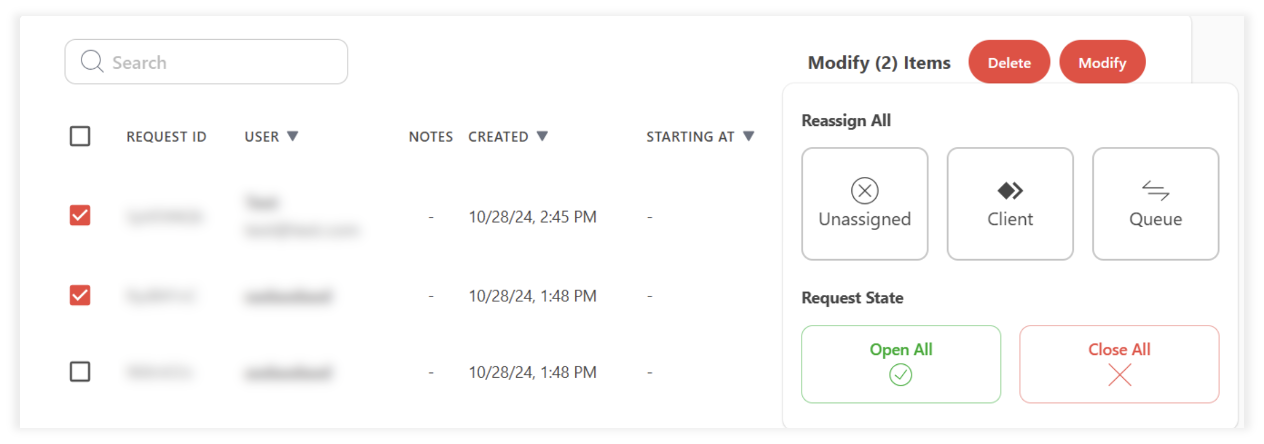
You can also select multiple session requests and modify assignments and status in a batch.
