License: Solo, Standard, Advanced, Ultimate-Cloud
A client is an AnyDesk application installed on your device. Within the my.anydesk II management console, you can view, filter, and manage clients that are linked to your license.
Overview
You can view all clients that are linked to your license in the Clients tab. An AnyDesk client is linked to the license by either registering a license key in the client or installing a custom client.
🦉 For more details oh how to manage clients in my.anydesk II, see this article.
Each client displays the following information:
Client address - the unique address of the client which is used to create a connection.
OS & Version - the operating system the client is installed on and the AnyDesk version number.
State - the client's status, either Online or Offline.
Namespace - displays the custom namespace, if added.

Clients details
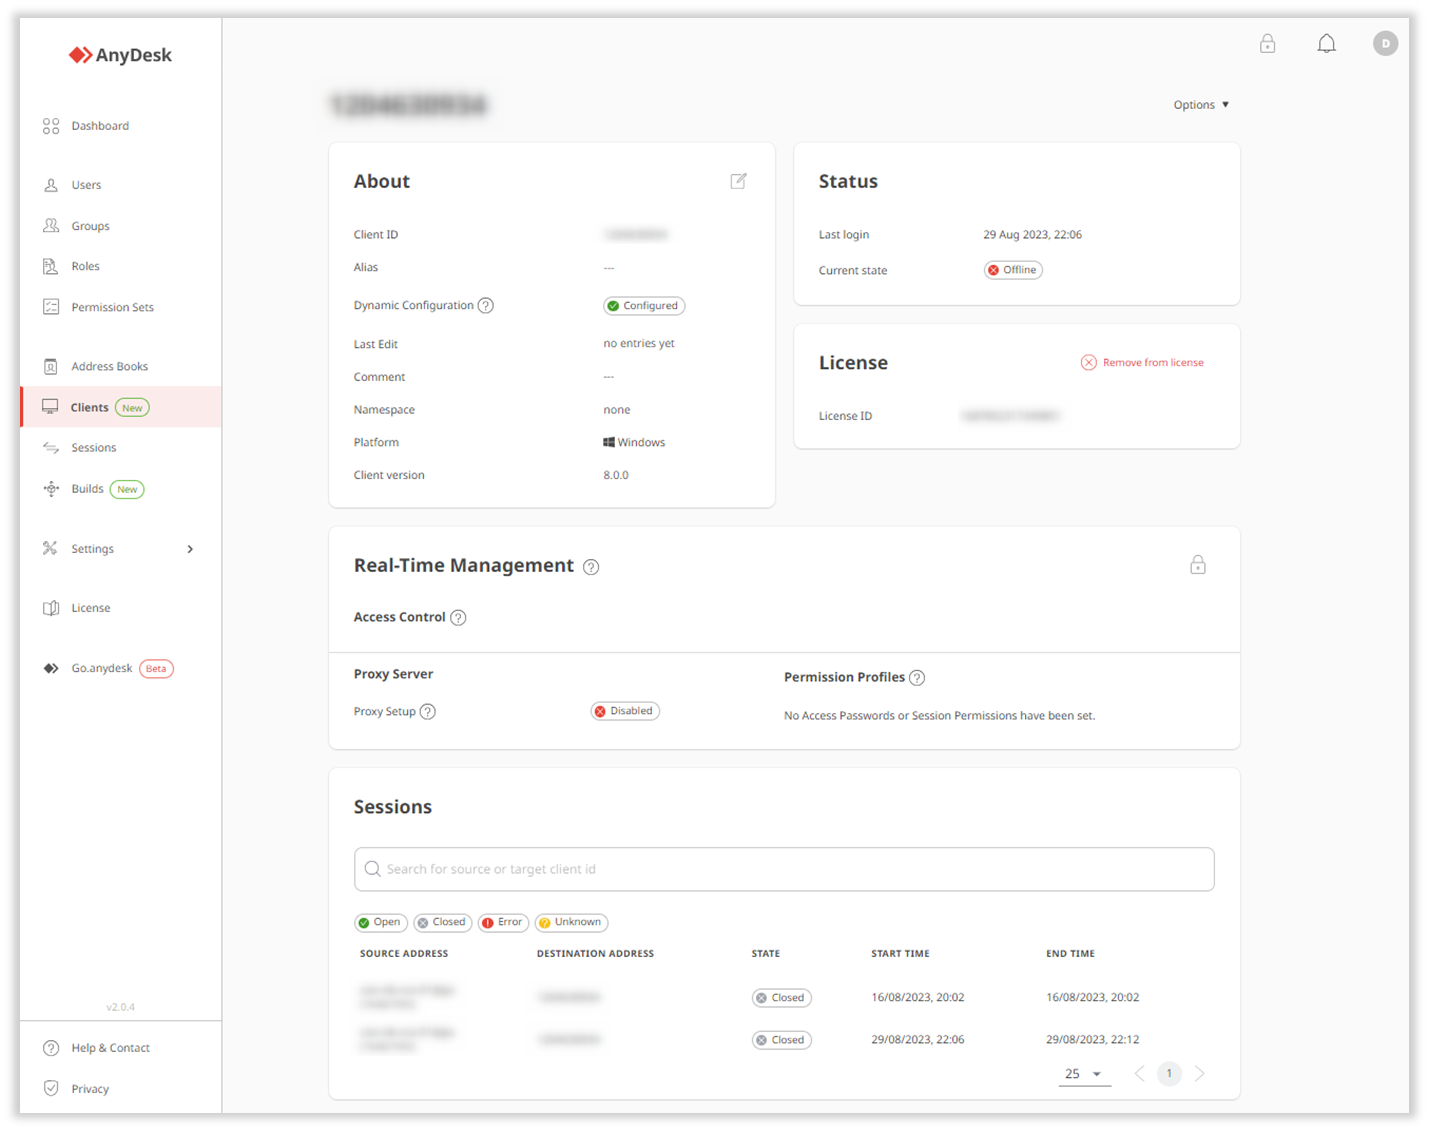
To view a client's details, go to the Clients tab and select a specific client from the list. The client details page includes the following:
About - shows client address (ID and Alias), whether Dynamic Configuration is enabled, the custom namespace (if any), the operating system, the AnyDesk version, and the client name.
Status - shows the date of last activity and current status - Online or Offline.
License - displays license ID.
Real-Time Management - lists settings that can be adjusted in real time for the selected client. To manage settings in real time, you must first activate Central Management.
💡 To apply real-time configuration changes across all clients from a custom build, see Manage custom clients.
Sessions - displays a list of recent sessions made using the client.