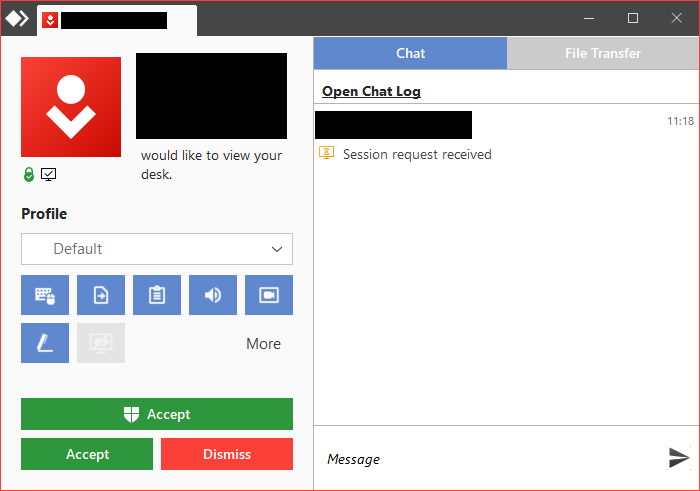
When a connection request is received, the accept window appears, displaying the available permissions. Select the desired permissions or a predefined Permission Profile, then click Accept to start the session.
Connector Information
In the upper left corner of the Accept Window, you can find information regarding the AnyDesk client that is trying to connect to you. Here, you can find information such as:
Account image of the connecting user. This can be configured in Privacy.
Name of the connecting user. This can be configured in Privacy.
AnyDesk-ID and Alias of the connecting user. See AnyDesk-ID and Alias.
Permissions
These permissions indicate which actions can be performed by users and what rights they have when connecting to your AnyDesk client.
They should be checked thoroughly and set up carefully to prevent accidents or misuse on any given device AnyDesk is used on.
There are currently four ways to configure the session permissions:
In the Accept Window by changing the Permission Profile. This can be changed during the session as well as before the connection request has been accepted.
In the Accept Window by modifying the permissions in the currently selected profile. Please note that any changes made here do not affect the Profile in Settings but rather only for the session.
The default permissions found in each Profile can be changed in Settings > Security > Permission Profiles.
Via custom client configurations. Please note that if the "Overwrite settings" field was used, the permissions cannot be configured from within the AnyDesk client.
Connection Handling
There are five types of buttons available in the Accept Window to help manage the AnyDesk session:
Clicking this button will accept the incoming session request and the user will be able to connect to your device with the permissions configured in Permissions.

This button is only available if the AnyDesk client being connected to is not installed and is in portable mode. Clicking this button will accept the incoming session request. Afterward, a UAC prompt will appear asking you to to enter the administrative credentials of that device.
Valid credentials will result in the session being elevated which will allow the connecting user to see and interact with UAC prompts on the device being controlled. For more information, please see Administrative Privileges and Elevation (UAC). On the other hand, invalid credentials or clicking "No" in the UAC prompt will result in a standard unelevated session instead.
Clicking this button will reject the connection request.

This button is only available after a connection request has been accepted. This
button allows you to retain full control of your device and disconnect the session at any time.
This button is only available if the Switch Sides action was used in the session. It will allow you to revert the Switch Sides action.

File Transfer
Clicking this tab will show a history of all transfer and delete actions that occurred while in the File Manager view during the session. See File Manager and File Transfer for more information.